How to Decorate Cookies with Royal Icing

Learn how to decorate cookies with royal icing to make stunning designs with just 2 colors that are perfect for beginner cookie decorators. These simple tricks will have you whipping out trays of gorgeous cut-out cookies in no time.
If you want to learn how to decorate cookies with royal icing but have been anxious to get started, these beginner tips will help walk you through the entire process in no time.
Give yourself enough time to prep everything so when you're ready to decorate, you get to skip right to the fun part!
But, the real trick to making perfectly decorated royal icing cookies is to keep your first tries extra-simple and use just two colors of icing until you are more comfortable with the process.
Even with just two colors, you'll be amazed at just how pretty your final cookie platter can be when you use these simple design tricks.
Start with the Best Royal Icing Recipe
Even beginner bakers will find this royal icing recipe easy to mix up. You'll find all the tips and tricks you need for tinting the icing and making the flooding and piping consistencies in the recipe right here:

Supplies You Need
Once your royal icing is prepared, now you're ready to do the cookie decorating. There are just a few simple supplies that will make your job so much easier:
- Piping Bags: Piping bags hold the piping icing that creates the borders of your cookies and adds decorative flair to the top of a finished cookie. You can buy a budget box filled with them here.
- Piping Tips and Couplers: This set of tips and couplers will work on a piping bag.
- Icing Bottles: The smaller and larger bottles that come in this icing bottle set are super handy. Sometimes you'll need a lot of a flooding color, sometimes only a little.
- Toothpicks or a Cookie Pick: Disposable toothpicks come in really handy for popping air bubbles and nudging flooding icing into place. You could also use this reusable cookie pick.
- Large Baking Trays: I stocked up on budget-friendly cookie sheets for cookie decorating. I can line up to a dozen decorated cookies on a pan for drying and carry them from spot to spot in the house as I need to make space in my kitchen.
Optional Extras:
- Cookie Turntable: This adorable flower-shaped cookie turntable makes cookie decorating extra fun. It would also make a cute gift for the cookie decorator in your life. (Maybe you??)
- Piping Bag Ties: Not essential but super handy to have, I love this re-usable set of bag ties here.
- Assorted Sprinkles: Just because you're using royal icing doesn't mean you can't use fun sprinkles to finish your cookie! From sparkling sugars to cinnamon red dots, as long as you attach them while the icing is wet, you can use them for festive decorations.
Make-Ahead Icing Tips
I always make my royal icing at least one day before I plan to decorate cookies. Store it in an airtight container with plastic wrap covering the actual surface of the icing before placing the lid over the top and it will keep for several days.
Sometimes I go the next step and actually prep the piping and flooding icings the day before, sometimes I do it just before decorating. It just depends on how many colors I plan to use.
Either way, having everything prepped and ready the day before can make decorating day go much smoother and lots more fun, especially if you're baking with kids. Be sure to read up on my full timetable for baking sugar cookies with kids here.
How to Use Piping and Flooding Icings
Piping icing in a piping bag is used to create the border around your cookies or separate the sections of color designs on the top of the cookie.
It can also be used to add flourishes on top of the fully iced and completely dried cookie.
Flooding icing is wetter and smoother and is used to fill in the open spaces created by the piped borders.
It can also be used to create gorgeous "Wet on Wet" designs that I'll demonstrate below.
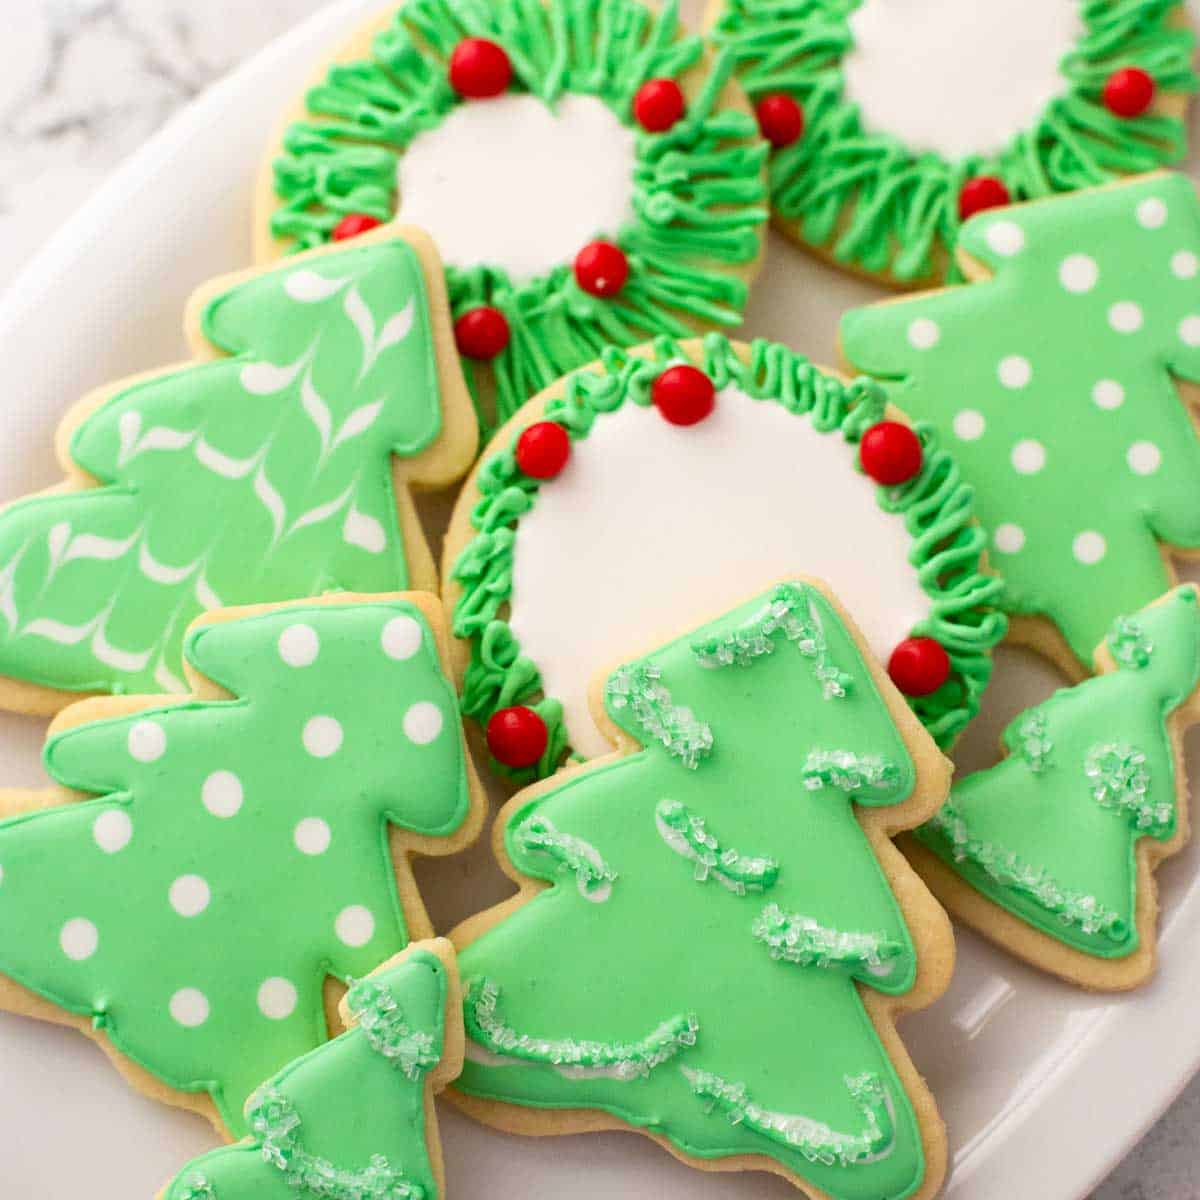
4 Simple Designs for Beginners
As you're learning to use royal icing, it is best to choose designs that are simple but stunning. These easy techniques are perfect for beginners to use for learning how to use the piping and flooding icings.
When you're finished, your cookie tray will be simply breathtaking. Never underestimate the power of simplicity in design!
All the designs below use just two colors of icing -- white + one tinted color of your choosing.
Change the shape of the cookie and the color of the tinted icing and you could have a wide range of designs available at your fingers using these same simple design tricks!
You'll find a list of fun ideas after the demonstrations to get you started.
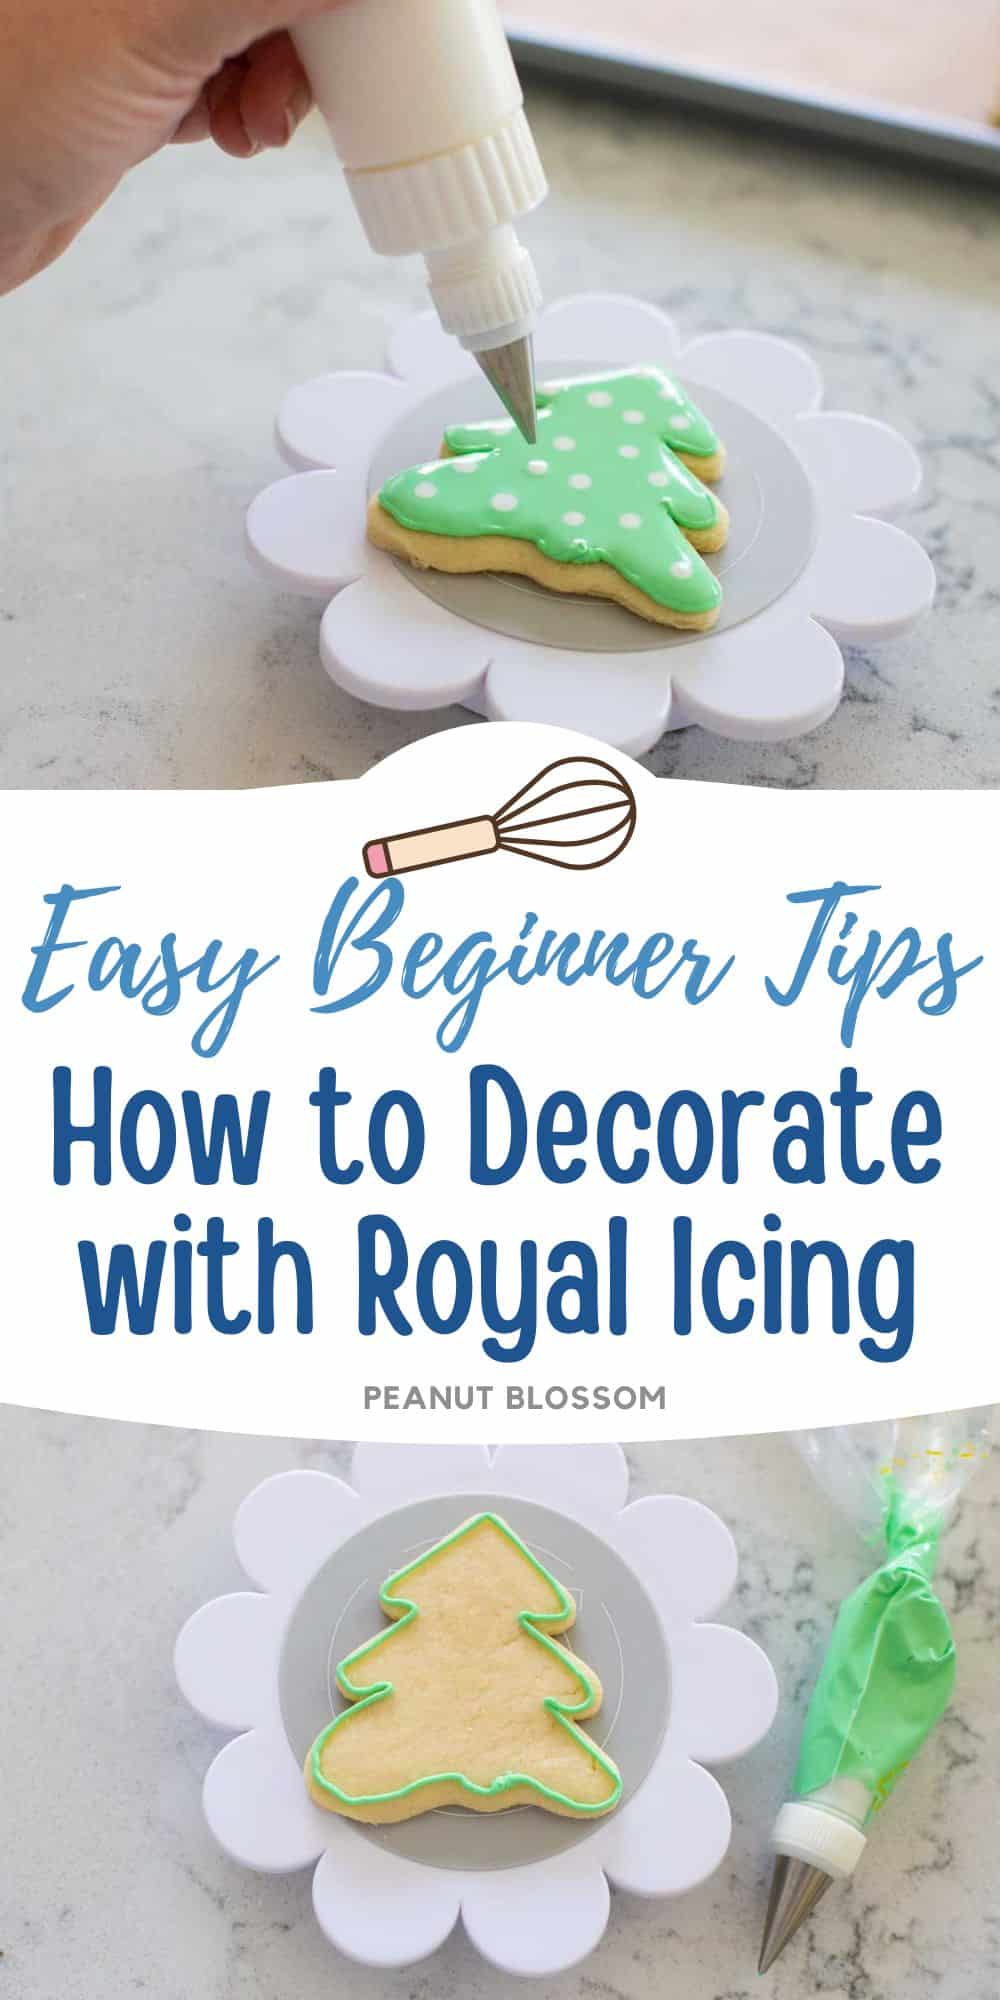
1. "Wet on Wet" 2-Color Polka Dots
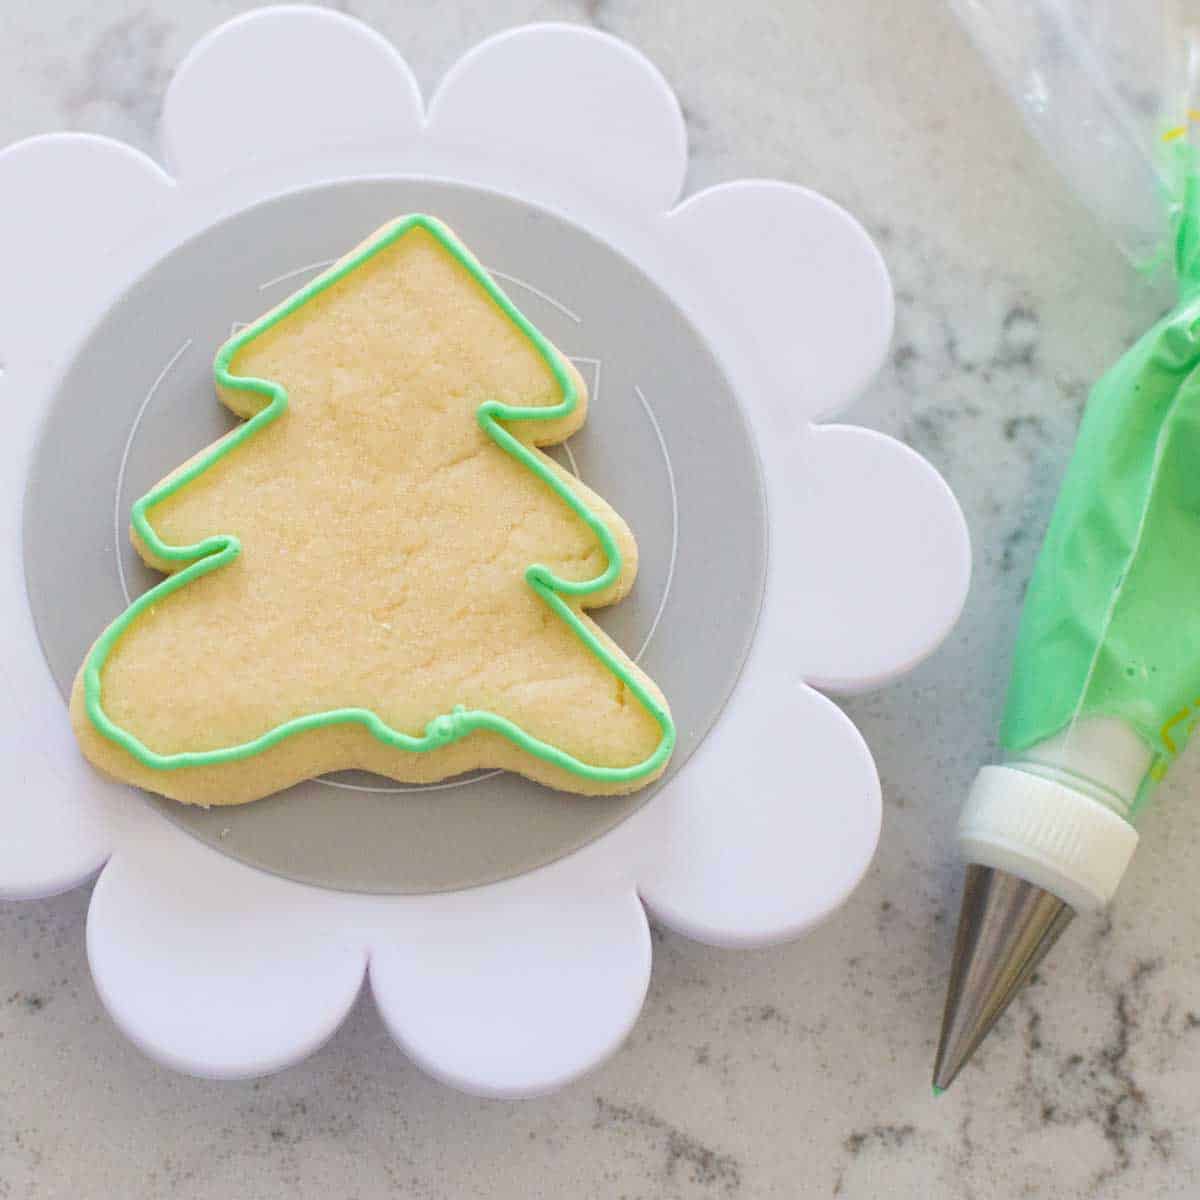
First, use your piping icing in the piping bag to draw a border all around the edge of your cookie.
Start at the bottom of the cookie and draw the border from point to point around your shape until you meet the point where you started.
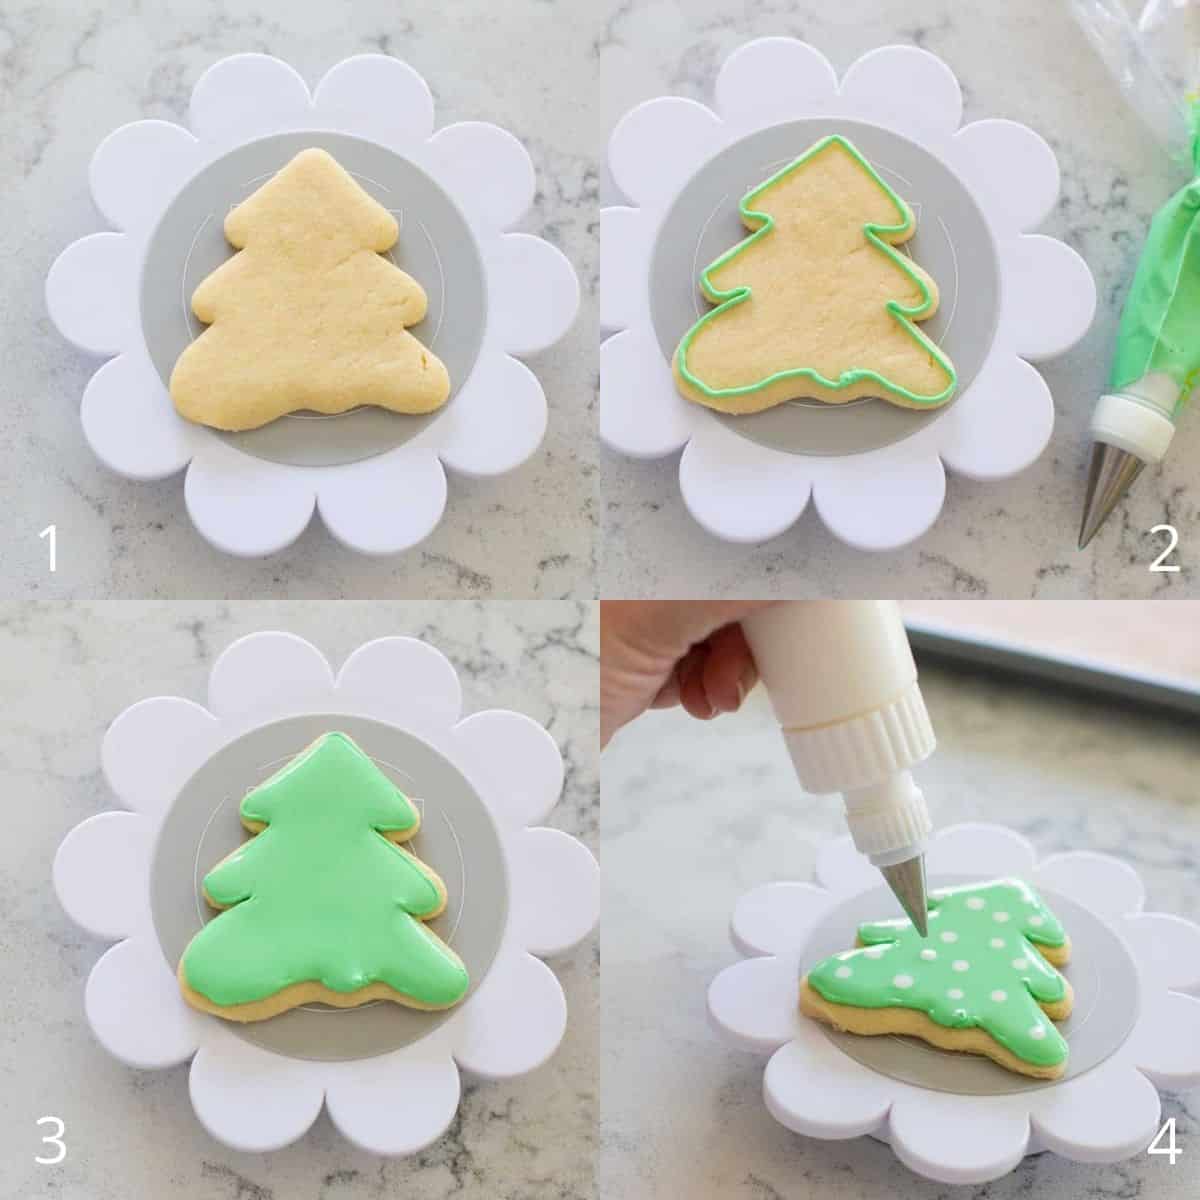
Then choose the flooding icing that matches the color of your piped border and fill in the entire space you've created. You can use the tip of the bottle or a toothpick to smooth the flooding icing into all the nooks and crannies as needed.
BEFORE THE ICING DRIES: Now quickly grab the second color of flooding icing and drop small dollops of color into the wet icing. It will "melt" into the icing creating a flat, smooth polka dot appearance.
This technique is called "wet on wet" because the work is done while the entire cookie is still wet and the icing dries altogether.
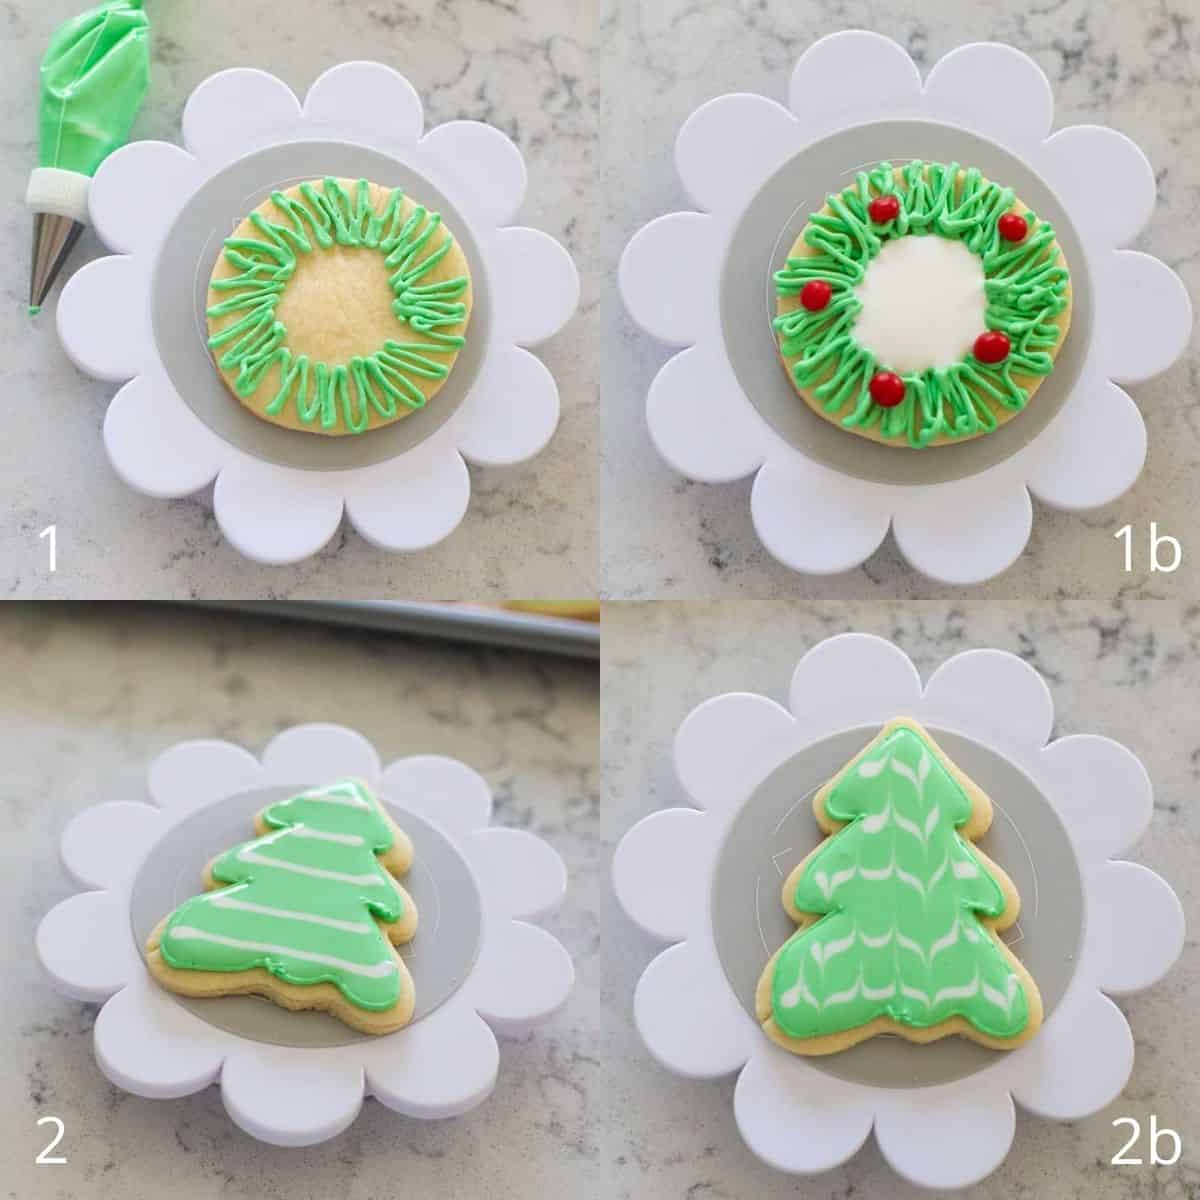
2. Decorative Piping Borders
To create simple Christmas wreaths, I used the piping icing in a zig-zag pattern all around a simple circle shaped cookie. While it was still wet, I tucked in red cinnamon dots to form the holly berries.
I filled in the center with white flooding icing.
You could use this same technique to create flowers of all kinds.
Want to Save This for Later?
3. Patterned Wet on Wet
Similar to the wet on wet polka dots, you can use that same technique to create stripes, zig-zags, and plaids just by using your cookie pick or toothpick.
Follow the same steps as the polka dots, but rather than squeezing the dots, draw longer lines with your second color. While it is still wet, drag your toothpick back and forth to pull the color into finer points.
I used this same technique to create the fun spider web cookies seen here.
4. Piped Patterns on Top
Finally, you can also add texture and depth to your sugar cookies by decorating them with a final layer of piped icing, with or without sprinkles, on top.
Wait till the flooding layer has dried for at least an hour, then pipe on little accents to the surface of the cookie and immediately sprinkle on the sprinkles if using. Shake off the excess sprinkles for a gorgeous sparkling cookie like the festive "snow frosted" trees here:
Design Variations for Other Holidays
You don't need a large collection of cookie cutter shapes to make adorable sugar cookies. Simply swap the icing colors and use the designs above for the following cookie trays:
Valentine's Day:
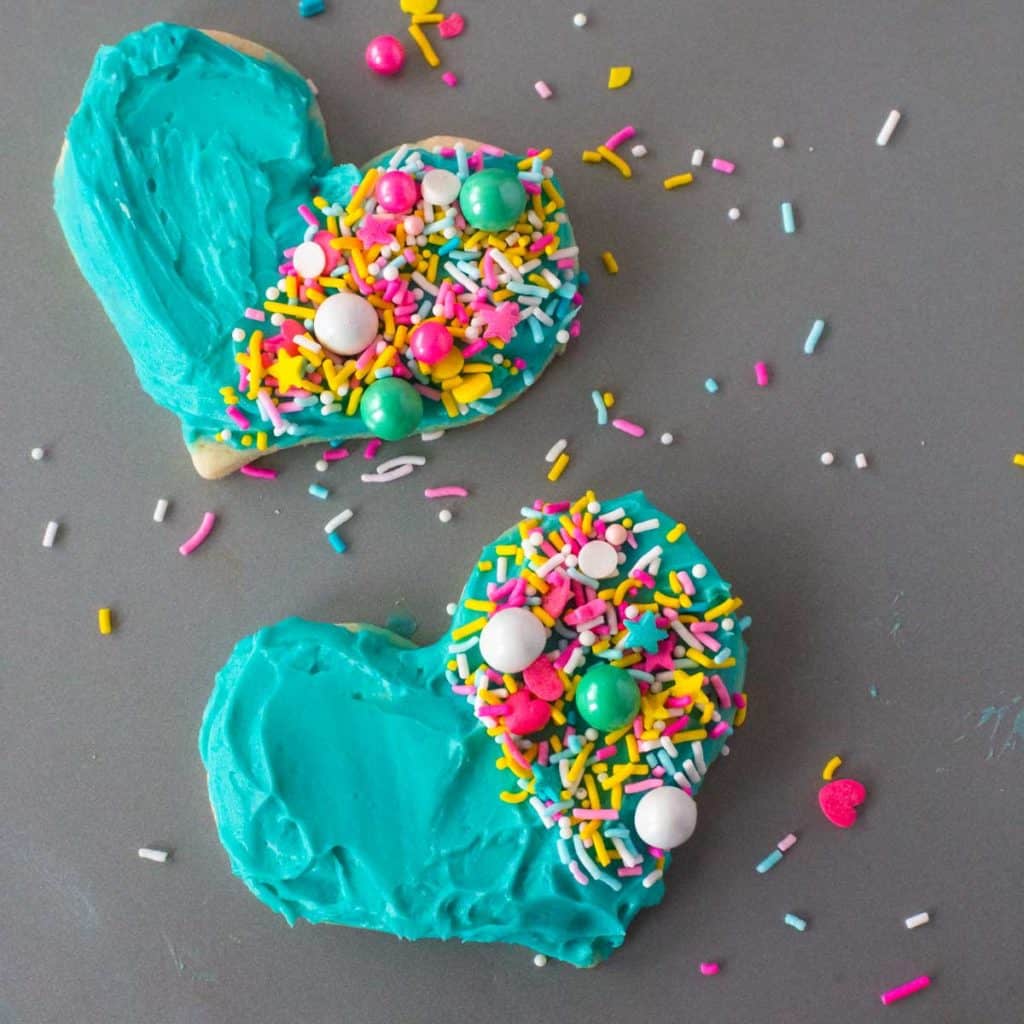
Use a heart shaped cookie with the techniques above and a festive color palette:
- Red and White
- Pink and White
- Lavender and White

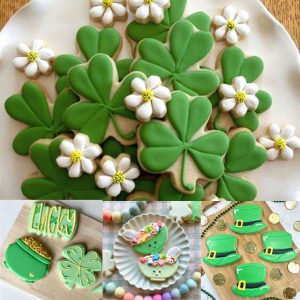
St. Patrick's Day:
Use a clover shaped cookie with the techniques above and a green and white color palette.
Easter:
Use an egg shaped oval cookie with the techniques above and a festive color palette.
- Yellow and White
- Pink and White
- Aqua and White
- Lavender and White
For other fun ideas, be sure to check out these fun Easter sugar cookies design ideas.

First Communion:
You definitely don't need many colors to create stunning cookies for First Communion party favors. Focus on the shapes of the cross, simple flowers, or all-white dresses with delicate details:

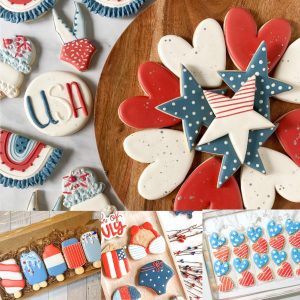
4th of July:
Use a heart shaped cookie with the techniques above and a festive red and white or blue and white color palette.
Add sprinkles to add the third color for the full red, white, and blue experience.
Looking for more easy 4th of July sugar cookies ideas?
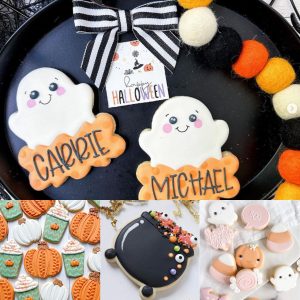
Halloween:
Use a pumpkin shaped cookie with the techniques above and a festive color palette.
- Yellow and White
- Orange and White
- Purple and White
Or check out one of these easy Halloween sugar cookie design ideas:
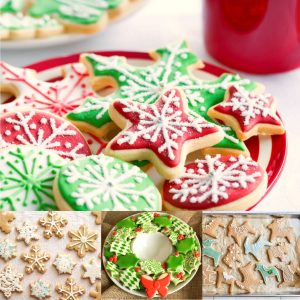
Christmas:
Christmas is one of the easier holidays to create sugar cookies for since you can use lots of simple shapes.
- Green and White: Trees, wreaths, holly leaves
- Red and White: Stockings, Santa hats, Gift boxes, Peppermint circles
- Pale Blue and White: Snowflakes, hearts, shimmering stars
Want to see plenty of examples? Don't miss my 2-color Christmas cookie designs inspiration list.
How to Handle Air Bubbles
While you're working with the flooding icing, you may run into issues with air bubbles forming.
While the icing is still wet, just use your toothpick or cookie pick to gently prick the air bubble. It will pop and smooth out as the flooding icing settles back into place.
Alternatively, you can gently thump your cookie flat on the surface, but I personally prefer the toothpick method so I avoid messing up my wet piped borders with my fingers.
How to Avoid the Icing Bleeding
The simple designs I demonstrated above won't require much waiting time for the cookies to dry in between your decorating steps.
However, if you have a more complicated design in mind, you may want to be strategic in how you lay the colors onto the cookie to avoid the icing bleeding together.
I add the darker color of icing first and let it dry before adding the lighter color. Generally, if you let the piped border dry completely and let the darker flooded section dry before adding the lighter color, you should be able to avoid the colors bleeding together.
How Long to Let the Cookies Dry
This may be the most difficult part of making cookies with royal icing -- waiting for them to dry completely before eating!
In our experience, the cookies taste their very best the next day once the icing has completely set. We don't prefer the flavor of wet royal icing.
The cookies will dry completely within a few hours, at the least I would recommend waiting for 4 hours before eating.
FAQ
Royal icing will form a crispy smooth surface but dries to a light texture when bitten. It isn't "hard" but should hold up to a gentle stacking of cookies on a cookie tray.
Cookies iced with royal icing do not need to be refrigerated and can be kept in an airtight container at room temperature for several days. However, you may wish to freeze your decorated cookies if you plan to enjoy them later.
Yes, you can absolutely freeze cookies decorated with royal icing. Be sure to lay them in an airtight container in a single layer, line them with a piece of waxed paper before adding another single layer, seal and freeze. This will protect your cookie designs during storage.
Basic Tips for Sugar Cookies
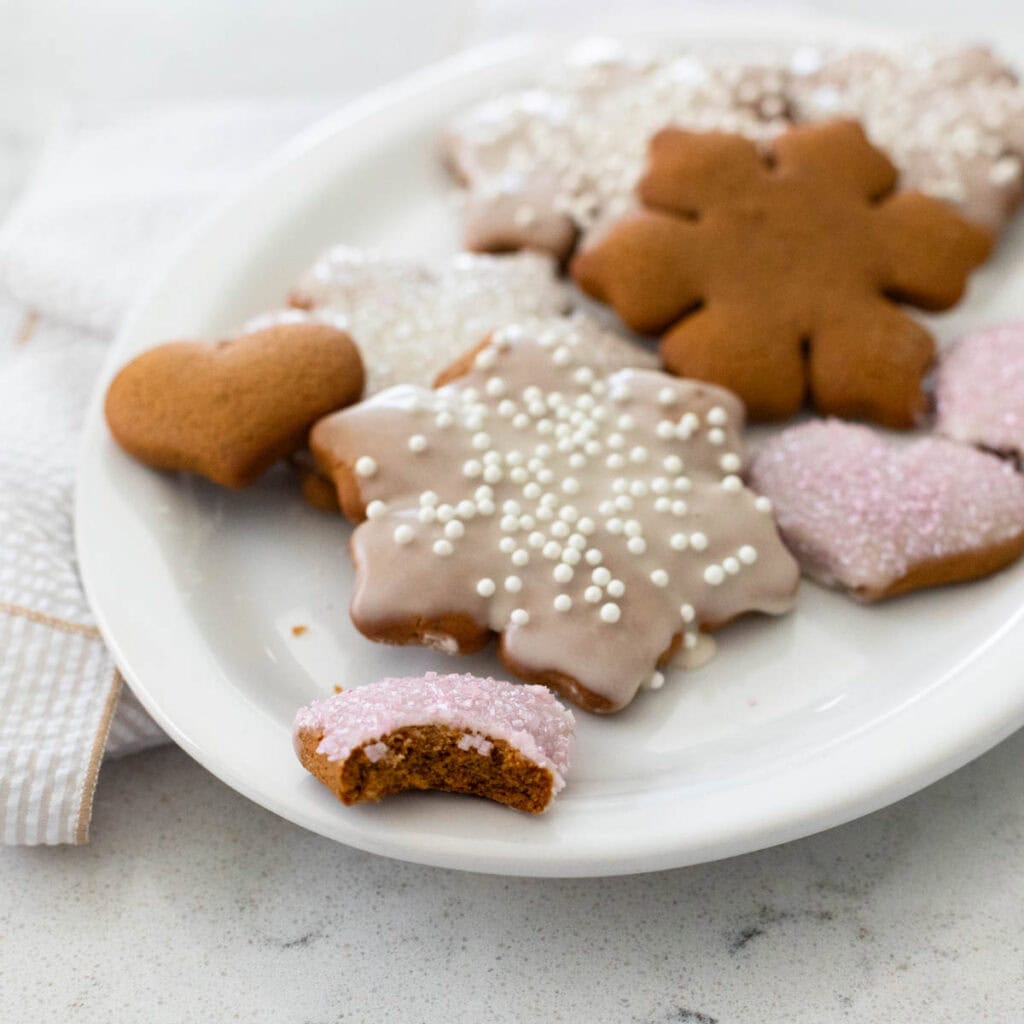
Decorating cookies with royal icing all starts with the best sugar cookies recipe but it works for my gingerbread cookies, too!

Comments
No Comments