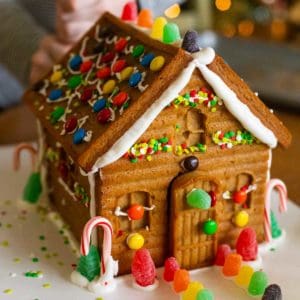
How to Make a Homemade Gingerbread House

Baking a homemade gingerbread house with kids can be a treasured Christmas tradition for your whole family if you follow these easy tips. Get all the supplies, learn about the baking timeline, and plan a stress-free Christmas baking session you'll love.

I still remember when my friend Carey asked me if I had baked a homemade gingerbread house yet.
I thought she was completely crazy. I couldn't imagine anything that sounded more difficult.
She nudged and she encouraged, as she does, and she finally convinced me I could do it.
I'm so sad I didn't listen to her earlier. This Christmas baking tradition was SO FUN to share with my girls last year for the first time. We learned so much about how to keep it easy and I just had to share every last tip with you.
I hope you'll set aside the time to bake a homemade gingerbread house with your family this year. I pinky swear that you can do it, too!!
Why This Recipe is the Best
If you're going to go to the effort of baking a gingerbread house from scratch, you want to be sure that your time will be well spent.
This gingerbread house recipe is the best because:
- Thick and Sturdy: The walls and roof of the house have enough dough to bake up thick and sturdy which is perfect for decorating with plenty of candy.
- Delicious and Safe: You may find you want to bake this as a unique Christmas dessert!
- Kid-Friendly: My instructions for baking and assembling the house are perfect for a fun, stress-free baking day with your kids.
- Clarified for American Bakers: The ingredients and quantities have been tweaked for the average American kitchen which measures in cups and teaspoons.
Can You Eat This Gingerbread House?
As long as you use my recipe for royal icing to use as the "glue" that holds the gingerbread house together and for attaching any decorative candies, this recipe is 100% edible.
In fact, after we displayed our gingerbread village for a few days, the girls and I had a great time breaking the houses apart and eating by large chunks for a few days.
You could also fill your gingerbread house with individually wrapped candies before placing the roof on top. This turns your gingerbread house into a Christmas piñata of sorts!
Supplies You Need
To make this baking project a stress-free and happy experience with your kids, I strongly encourage you to splurge on just a few crucial tools that will make the whole process go a lot easier for everyone involved:
- Silicone Gingerbread House Mold: This recipe was developed to work specifically with this gingerbread house mold. There are actually three pieces to the set, but you'll only be using the two molds that have the roof and sides of the house.
- Baking Boards: You need a surface on which to build your cookie house. I bought this stack of cake boards that ended up being the perfect size for the house plus a small yard filled with decorations. There are more boards than you need in the set, but you can save them for more baking projects later in the year.
- Piping Bags with Tips & Couplers: You don't need a huge set of piping tips, this basic set includes everything you need. If you already have piping bags and couplers, just be sure you have a large round tip like this. We used a smaller round tip for decorating the roof and sides of the house.
NOTE ON BAKING WITH KIDS: I made sure to have enough icing bags so each girl could work with their own. This helps avoid fighting over who gets to use the piping bag at any given moment or how hard somebody is squeezing the icing, etc. etc.
Special Ingredient & A Substitution
There's one unique, secret ingredient that makes these gingerbread house so gorgeous -- Golden Syrup.
If you've never heard of it, Lyle's Golden Syrup is made in the UK and can be found distributed in the United States at specialty retailers like World Market or upscale grocery stores like Fresh Market. You can also order the 11oz size on Amazon here.
Golden syrup is a cane sugar syrup for baking that has a gorgeous golden amber color. The consistency is very slightly thinner than corn syrup.
We use golden syrup in this easy treacle tart recipe, so it is definitely worth hunting down but if you can't find it or don't have time to wait for a delivery, you can substitute molasses.
NOTE: If you do substitute with molasses, be aware that the color of your gingerbread house is going to be significantly darker than what is pictured in my photos due to the color of the molasses. This will not affect the edibility but may alter the final flavor.
SHOPPING TIP: Buy one 11 oz bottle of golden syrup for each house you plan to bake. I made enough so that each kid could decorate their own house.
How Long Will It Last?
If you want to be able to eat your homemade gingerbread as a treat, I would recommend baking the house no earlier than 1 - 2 days before you plan to serve it.
We ate our house over the course of several days but the texture got significantly more stale around day 4.
If you don't plan to eat your house, it will stay beautiful for weeks and there's no reason to wait. It makes a fantastic home decoration.
Your Gingerbread House Timeline
The gingerbread recipe is very easy but between baking and cooling and decorating, it is a LOT to accomplish in a single day. Especially if you are baking with kids.
I strongly encourage you to break down the steps and enjoy the process for a couple days:
Day 1: Bake the Gingerbread Pieces and Prepare the Icing
Day 2: Decorate and Assemble the Houses
Want to Save This for Later?
Bake the Gingerbread
The first step is to make the gingerbread dough and bake the pieces in the mold.
I baked one house and when I saw how amazing the pieces turned out, the girls and I dropped everything and ran to the grocery store for another jar of Lyle's Golden Syrup so we could bake enough for a second house that same day.
I used just one set of baking molds, baked the first house and then placed the pieces on a cooling rack while I used the mold a second time to bake the second house.
This year, I bought enough golden syrup that we can bake three houses because I want to get in on the action, too! I plan to set up the entire gingerbread village in our dining room for the season.
How to Make the Gingerbread Dough
The gingerbread dough is very easy to mix together.
Basically, everything gets added to a mixing bowl and is beaten together until a dough forms.
The real trick is how to divide the dough and fill the molds.
How to Fill the Silicone Molds
While I strongly encourage you to watch the whole video, there are two main sections you'll want bookmarked for your baking day:
- Minute 2:08 she shows how to take the gingerbread house dough and fill the silicone molds with the right ratio.
- Minute 4:58 she shows how to assemble the walls and roof with icing
Prepare the Icing
While the gingerbread pieces are baking and cooling, use this time to prepare the royal icing.
I love this recipe because you can make it ahead of time, store it in an airtight container, and clean up your mess. When you're ready to decorate, the messy work has already been done!
You will likely want to double batch the recipe so you have plenty to work with for building and decorating your gingerbread house.
Decorate the Pieces & Assemble
The beauty of baking the day before is that your kids don't have to try to be patient about the cookies completely cooling before they try to decorate. Everything will be ready as soon as you are.
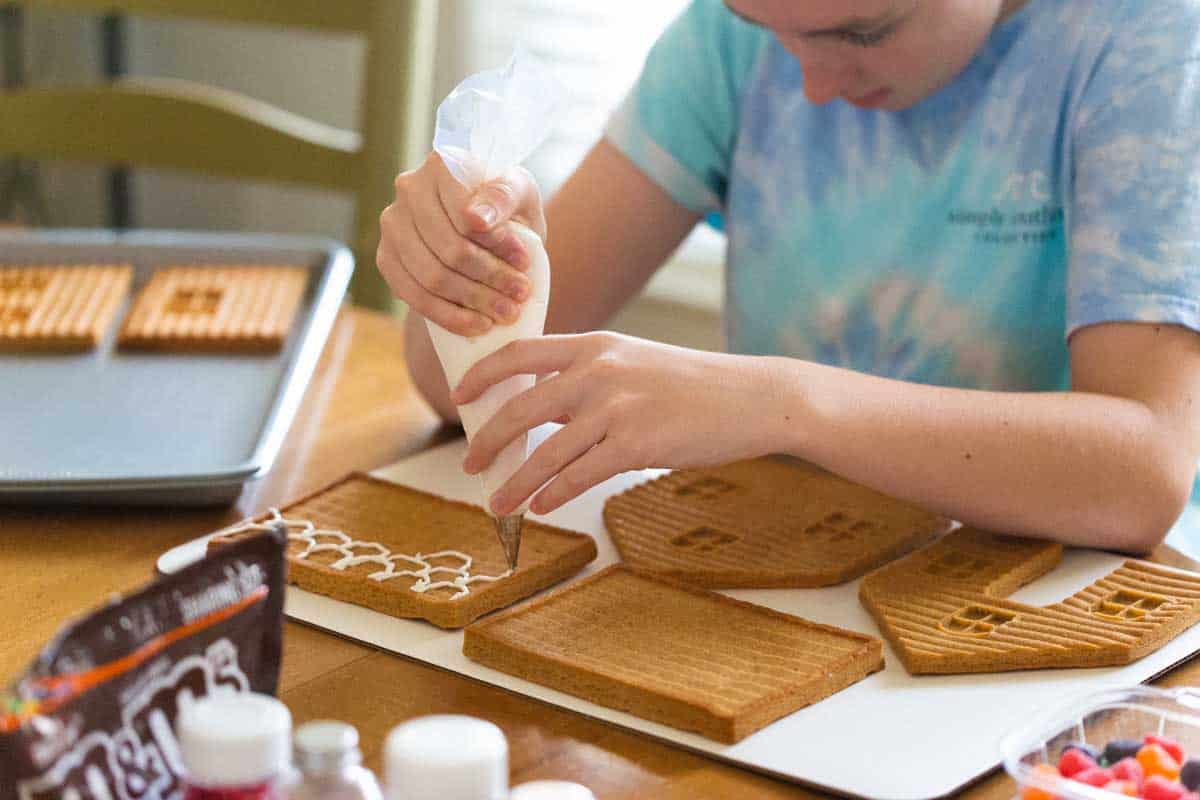
The very best tip I got from my friend Carey was to let the kids decorate the roof and walls of the house while they are still flat BEFORE assembling the house.
This may seem backwards, but it is so much easier for kids to pipe icing in pretty patterns on something that is flat than something they have to worry about tipping over.
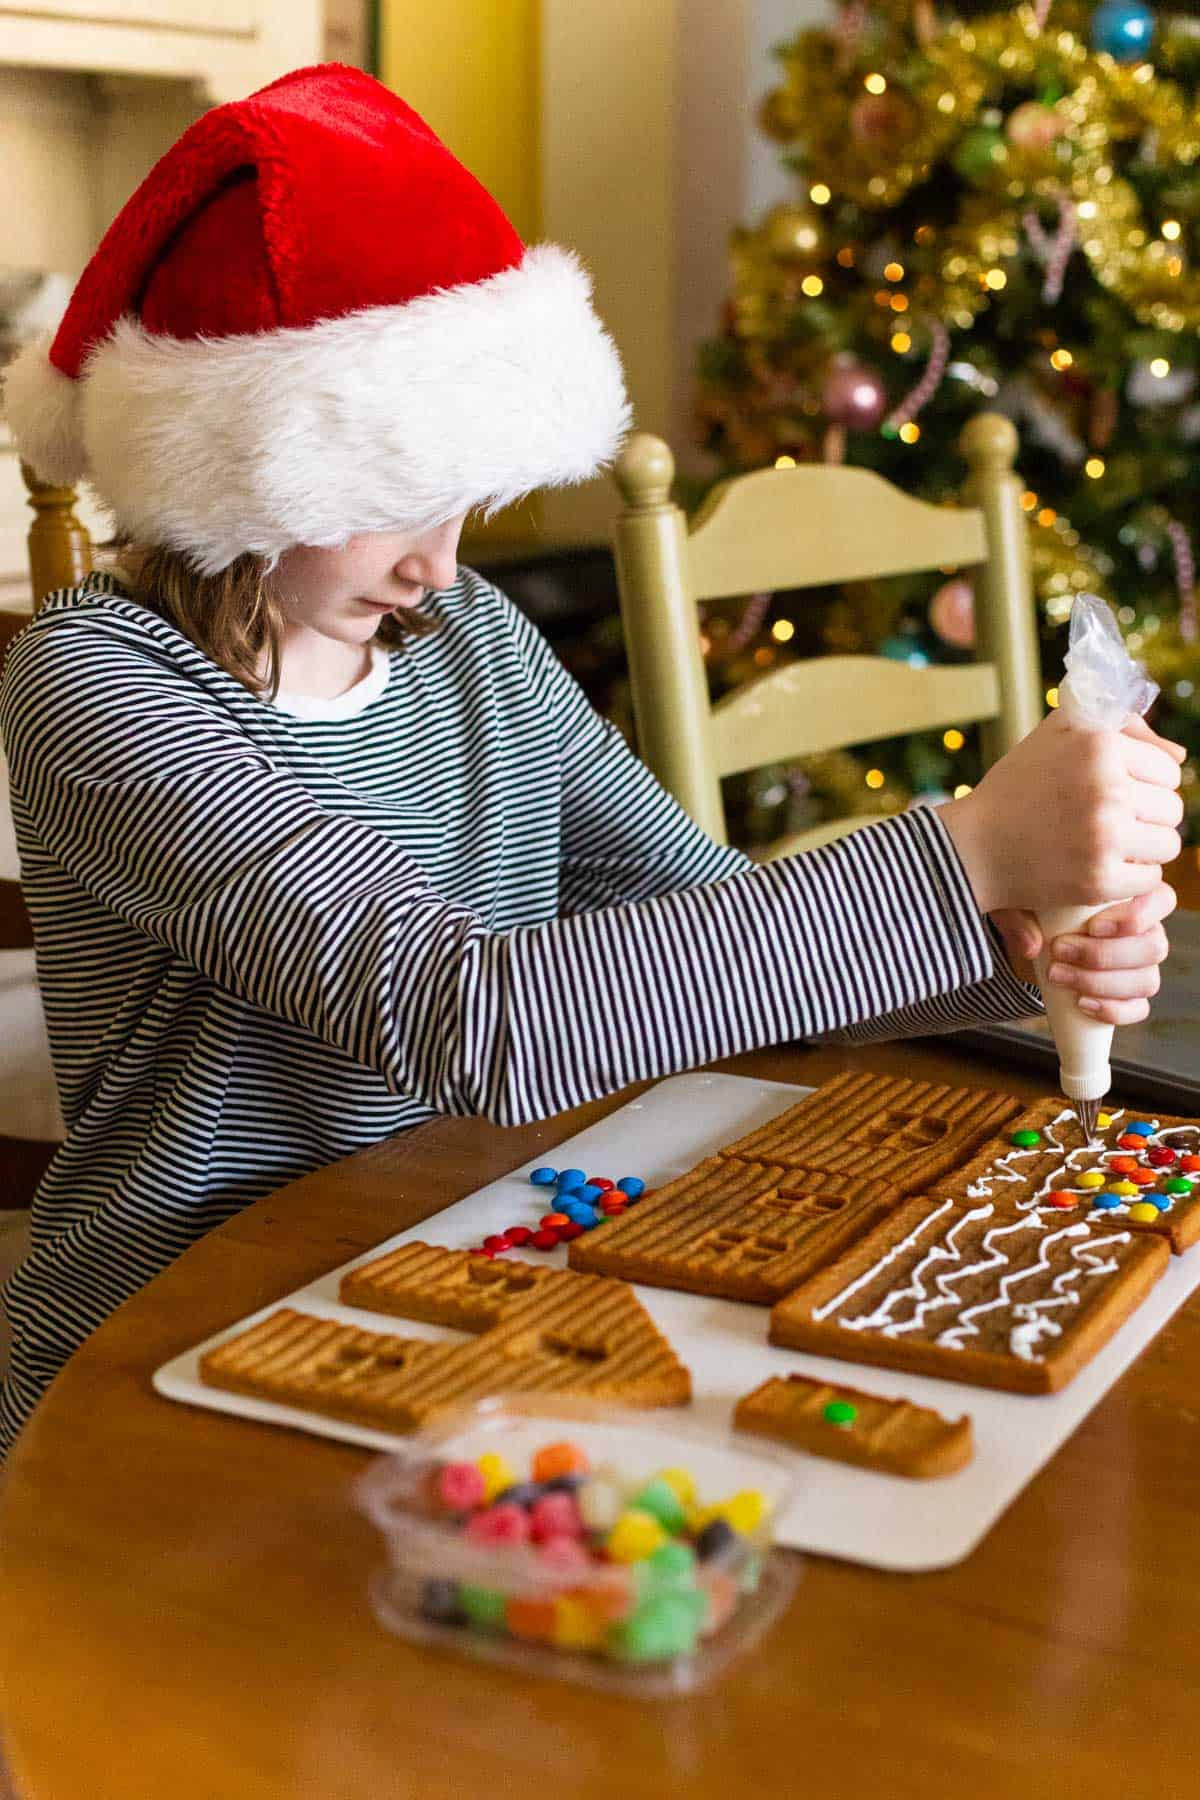
I set up all the pieces on a baking board to keep the table neat and gave each girl a piping bag. We shared the candy decorations.
Decorating everything flat also allowed the kids to pipe icing on the gingerbread, sprinkle some sprinkles over it before it dried, and shake off the excess a lot more easily.
The Best Candy For Decorating
This is where your family's creativity gets to really shine. The recipes up until now have been fairly specific, but how you decorate your gingerbread house is totally up to you.

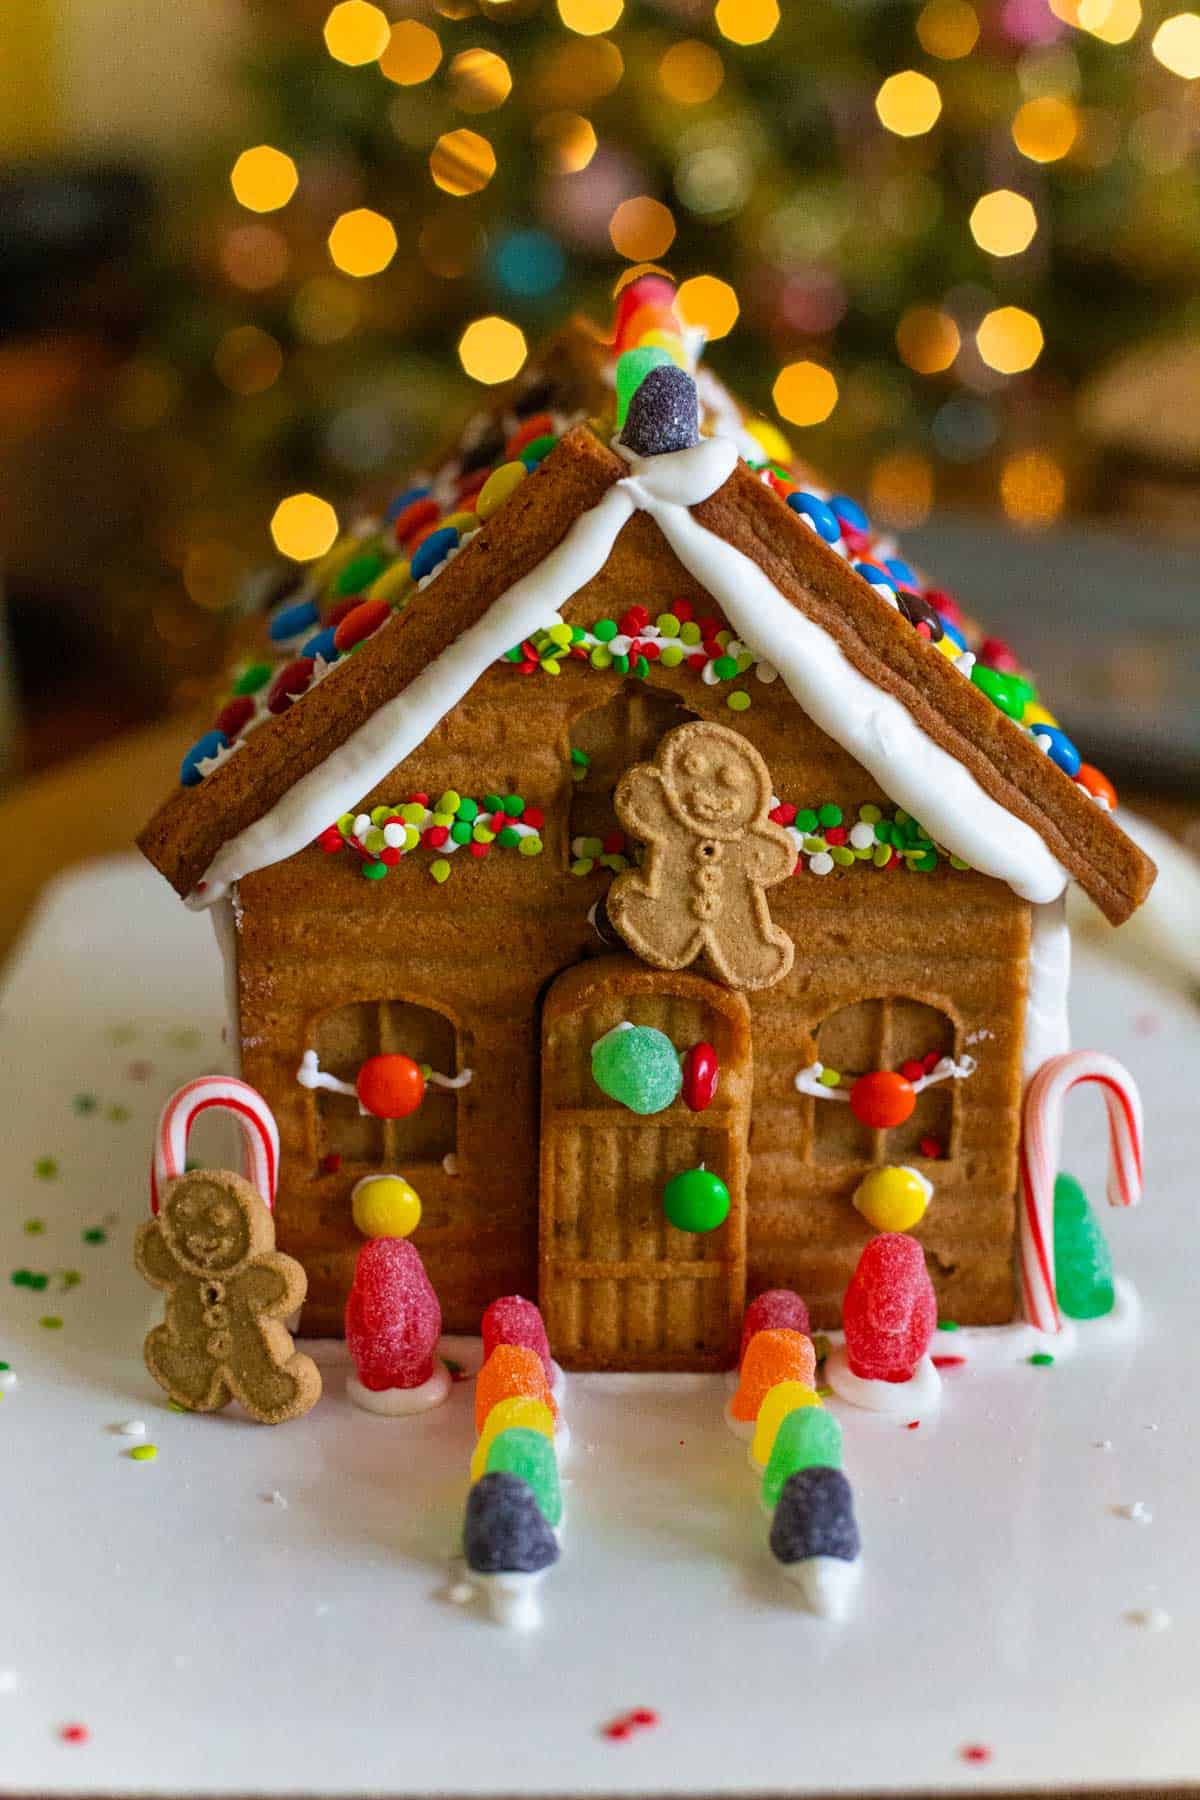
We relied heavily on these classic Christmas candies:
- Colorful M&Ms
- Rainbow gum drops
- Mini candy canes
- Red and green sprinkles
You could also use pretzels, graham cracker crumbs, bits of chocolate, peppermint or butterscotch candies, and so much more.
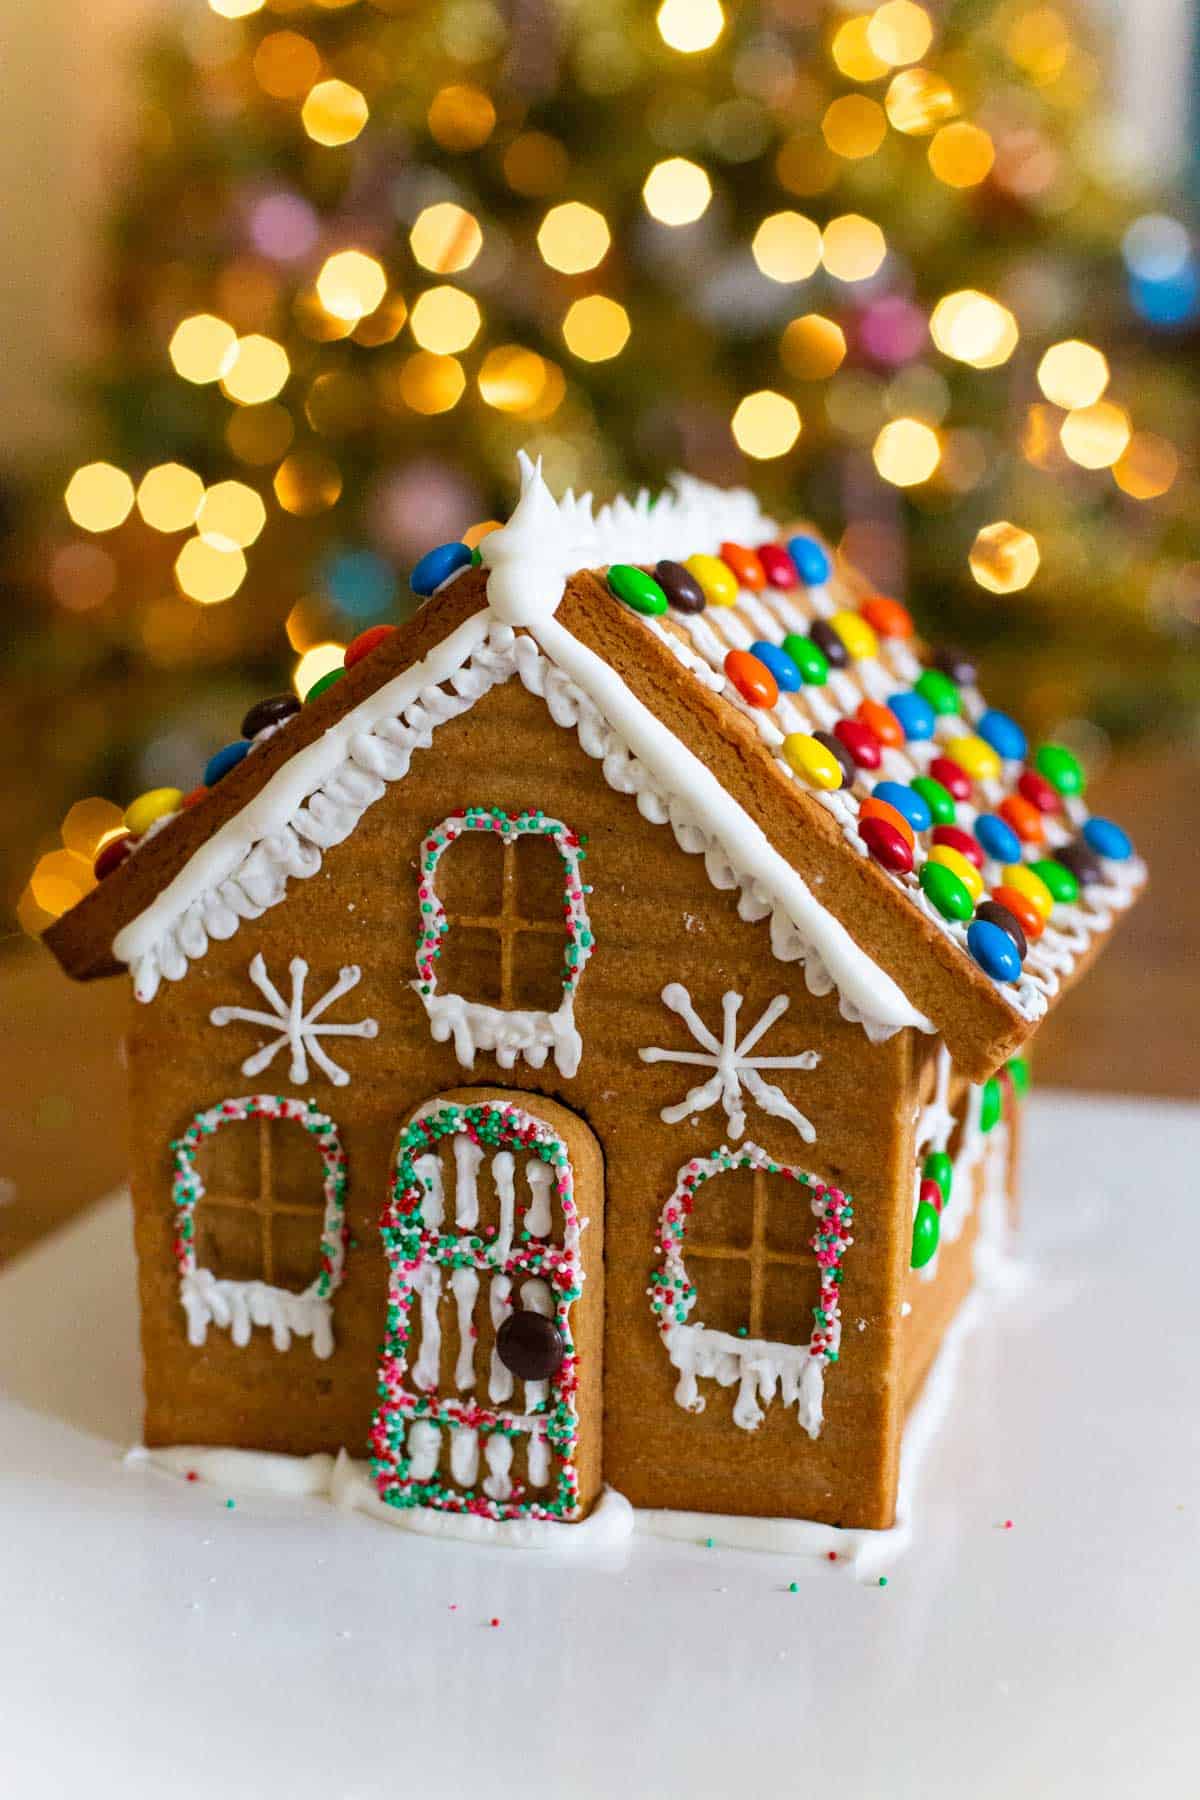
Just never underestimate the power of crisp white royal icing for icicles and snow on your house. I've seen stunning houses that use nothing but icing for decorations.
How to Assemble the House
After the kids got most of the decorations in place on the gingerbread pieces, we paused to assemble the houses.
The video at the top has the perfect visual explanation. She starts to assemble the house at minute 4:58.
- Essentially, you'll line up the four walls of the house.
- Pipe a thick line of icing along the bottom of the side pieces and up the sides on one end.
- Lift the sides and connect the end piece.
- Repeat on the other side.
- Pipe icing over the edges of the top of the house and place the roof pieces.
- Connect the two roof pieces with more icing. You may want to hold everything in place with your hands for a few moments to give the icing a chance to set.
Let the house dry completely before you attempt to move it!
The kids finished a few more final touches on the house and then proceeded to decorate the "yards."
Tips for Baking with Kids
This was such a wonderful experience to share with my girls last year. I can't wait to do it again this season.

If you plan to bake gingerbread houses with your kids, here are a few lessons I learned last year:
- Have Enough Houses: 2 or 3 houses' worth of pieces would not be terribly difficult to bake in one day and would absolutely be worth it. If you have more kids than that, perhaps consider assigning them into teams so that everyone gets a chance to work on the house.
- Have Enough Piping Bags: 1 bag of icing per kid will save you a TON of headaches.
- Share and Divide: Split the candy into separate working bowls so no one can complain about another kid using too many gumdrops.
- Bring a Book: One child decorated in a hurry and was off to the next fun activity. The other child took her time and fussed over every detail. She didn't want to be left alone while she worked on something so special, so I simply sat with her. We chatted, listened to Christmas music, etc. but you could also just read a book and share your company with the kids while they work.
What to Do If It Breaks
I'm certain you will find that the thick pieces of gingerbread are sturdier than any gingerbread kit you've ever purchased at a store.
But accidents happen.
If your gingerbread house fails, you could always add a dinosaur. If you're lucky, your Elf on the Shelf might bring one to play with.
More Christmas Desserts
This is such a festive time to bake with your family. Don't miss these other beloved Christmas treats to bake with kids.

📖 Recipe
Homemade Gingerbread House
Ingredients
- 3/4 cup butter softened
- 1/2 cup brown sugar
- 1 cup golden syrup *See Notes
- 1 tsp cinnamon
- 1 1/2 tbsp ground ginger
- 1 tsp nutmeg
- 1/2 tsp ground cloves
- 3 cups + 3 tablespoons all-purpose flour
Instructions Start Cooking
- Preheat your oven to 350°F.
- In the bowl of a stand mixer fitted with the paddle attachment, beat together the butter, sugar, golden syrup* and spices on low speed. Scrape the walls of the mixing bowl and add the flour. Continue to mix together on medium speed until the dough forms.
- Transfer the dough to a baking mat and roll it into a ball.
To Portion the Dough: (SEE VIDEO)
- Cut the dough into four equal pieces.
- Take THREE pieces and cut them in half to make six smaller pieces and set them aside.
- Take the ONE remaining from the original four pieces and cut it into four equal pieces. Add one of each fourth to four of the six smaller pieces.
- Use the two smallest of the pieces to fill the SIDE WALLS of the mold.
- The larger four portions should be used for the front and back walls of the house (with the door) and the two roof pieces (with the scalloped pattern.)
To Fill the Mold:
- Firmly press all the dough pieces into their portions of the mold. There are lots of crevices and details you don't want to miss, so use your fingers to really press and smooth the dough into every nook and cranny.
- Firmly pat the dough to make sure all air bubbles are released.
- Use a knife to straighten and clean all the borders and edges. (SEE VIDEO)
To Bake the Gingerbread House:
- Place the filled gingerbread house molds on a baking sheet and bake for 20 minutes, rotate the pans in the oven half way through baking.
- Place a cooling rack over the molds, pinch together and flip them over to turn out the gingerbread pieces. Let cool COMPLETELY before decorating and assembling.
Recipe Notes
HELPFUL TOOLS
Save This Recipe to Your Recipe Box
Find this delicious recipe next time you visit by saving it to your very own recipe box on my site. All your favorites stored in one easy place!

Thank you tiffany on the lovely gingerhouse,
whole family enjoyed it, and we added furniture too😂😂
🏚🍞🍭🍭🪑🛏
Is there a secondary mold you could suggest since the one you’ve linked is unavailable?
Thank you so much for this!
I've made this recipe with this mold for 8 yrs but always have to adjust UK measurements. Appreciate it!!
I loved it so much! My 3 little boys did not fight at all and keep asking to do it again!!! Defenitly an annual christmas tradition. Thank you again!
- Lizabeth Micheal