Make-Ahead Apple Slab Pie

This freezer-friendly, make-ahead apple slab pie is perfect for feeding a crowd at your party. Prep it ahead, keep it chilled in the fridge and bake it fresh just before your party. Better yet, you can freeze it and bake directly from frozen.

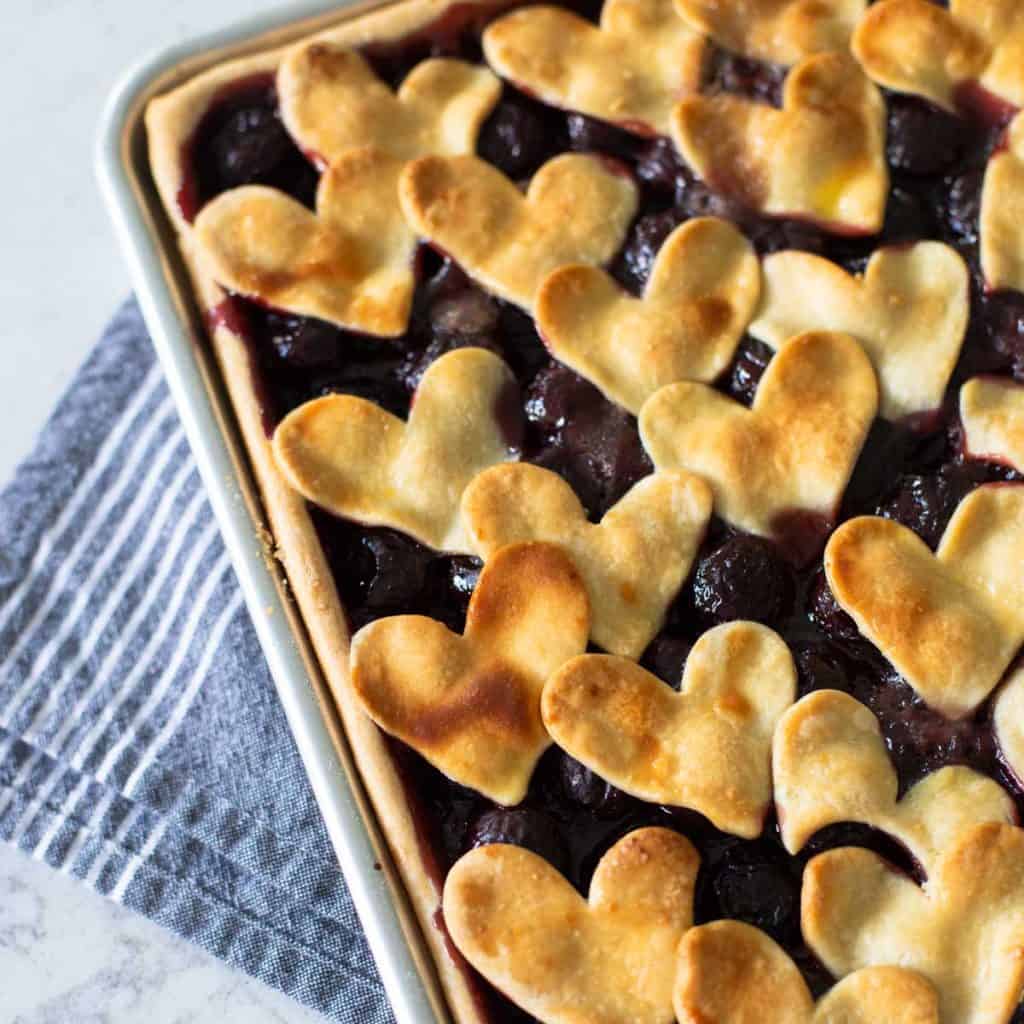
There is something just so fun and satisfying in cutting a square pie piece from an apple slab pie.
Even better, the pie tastes even better when you can do all the work in advance and just enjoy a fresh baked pie straight from your fridge or freezer.
Baking a pie from scratch tends to be one of the more intimidating things for beginner bakers. But this pie recipe is filled with all the tips you need to whip together a from-scratch pie crust and delicious apple filling in just minutes.
This would make such a fun all-American easy dessert for the 4th of July or a delicious Thanksgiving dessert for your buffet table.
Why Slab Pie is Better
A classic round apple pie is one of the first things we think of when we picture "as American as apple pie."
Honestly though, I prefer a rectangular slab pie every time because:
- Easier to Roll: The pie crust is so much easier to roll out into a perfect rectangle than a circle.
- Fits in the Freezer Better: Rectangular things take up less space than circles in my freezer.
- Fun to Slice: I love square/rectangular pieces of pie! More flaky, buttery crust per serving.
- Easier to Cut More Servings: There actually isn't that much more pie in this recipe than a regular circle pie but the square shape is easier to slice into more servings for a party.
Ingredients
Apple pie is so easy to make because the list of ingredients is so basic and easy:
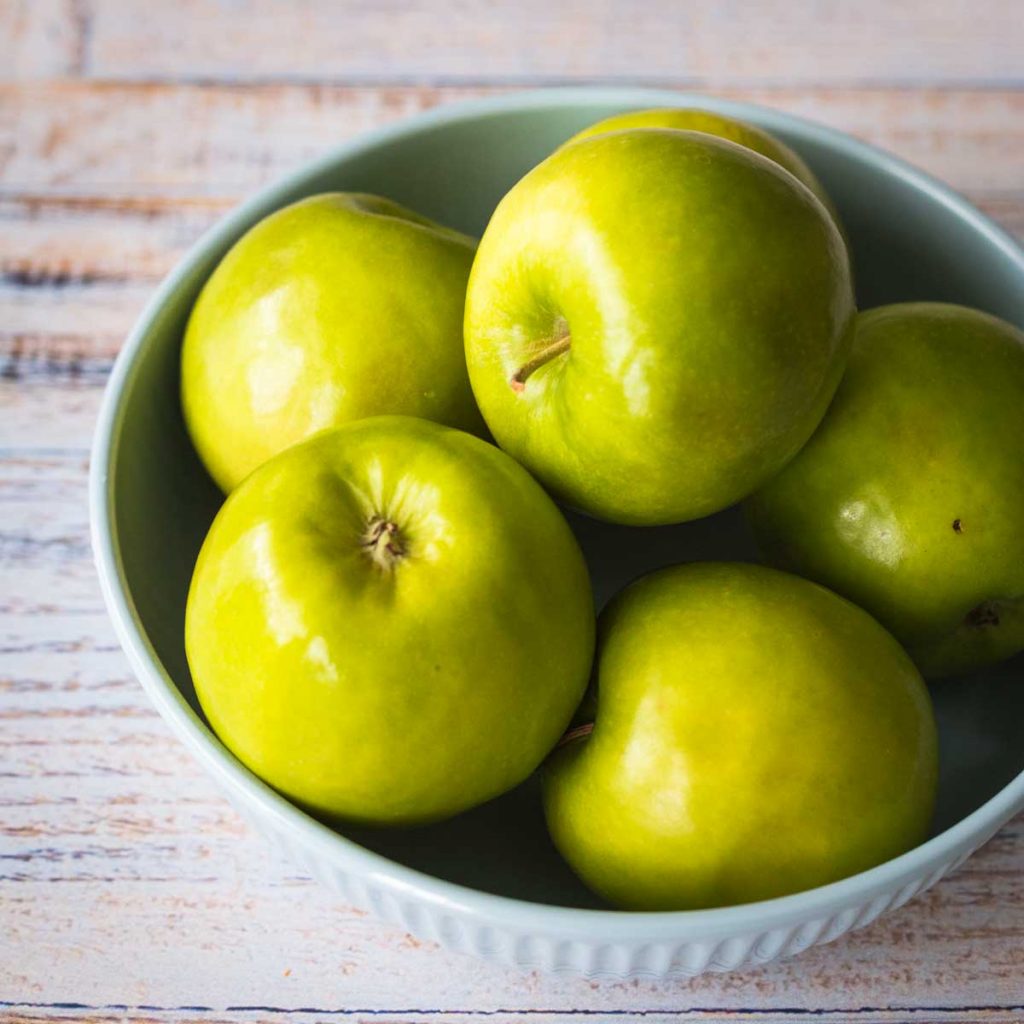
- Fresh Apples: I love to use Granny Smith.
- Fresh Orange and Lemon: These keep the pie from getting too sweet.
- Sugar
- Cinnamon
- Nutmeg
- Butter
- Flour
- Salt
See the recipe card for quantities.
Prepare the Pie Crust
I love this butter pie crust recipe because not only can you make it in advance, but it actually works even better when you do!
The rest and chill time helps keep it nice and flaky in the oven.
If you never baked a pie crust from scratch and want really detailed step by step instructions on the crust part of this recipe, be sure to check out the additional photos and instructions here.

Want to Save This for Later?
The key to a flaky apple slab pie is all in chilling the pie crust.
Once you've rolled out the dough, fill the pie pan with the bottom crust like this:
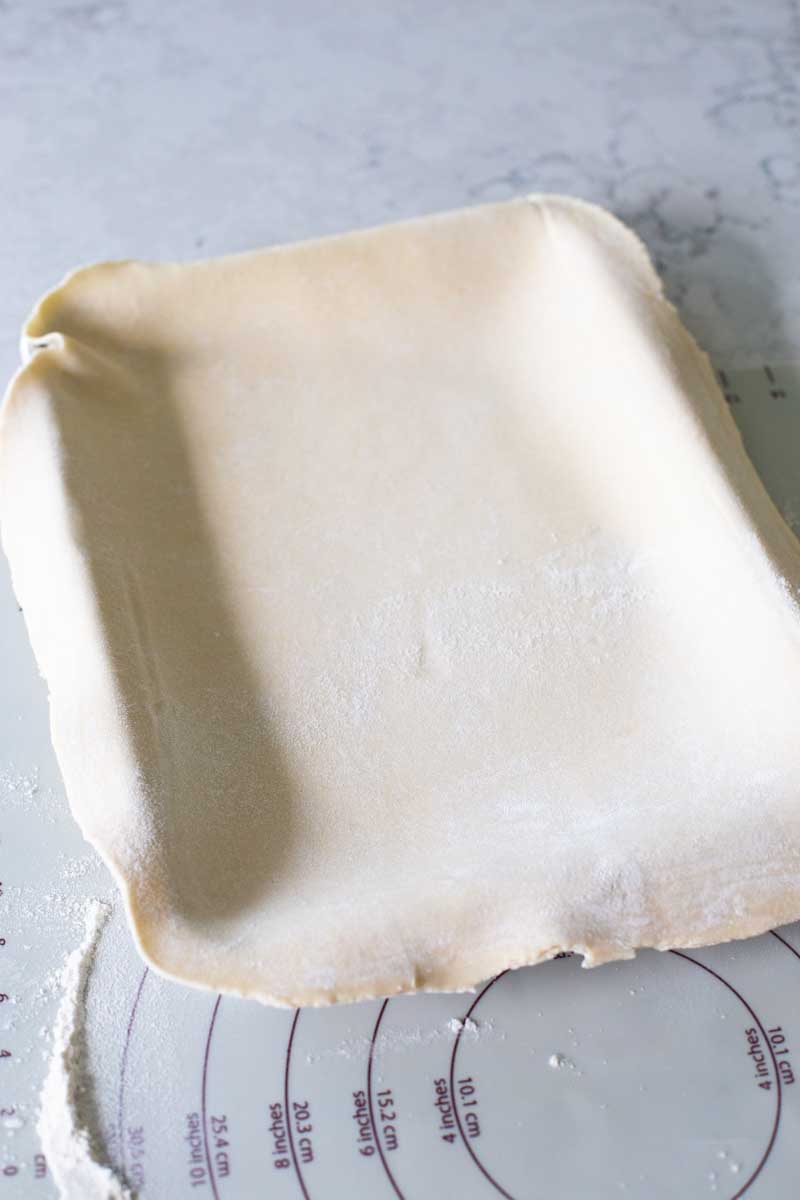
Chill both the pie pan and the top crust in the fridge while you prepare the apple filling.
Prepare the Apple Filling
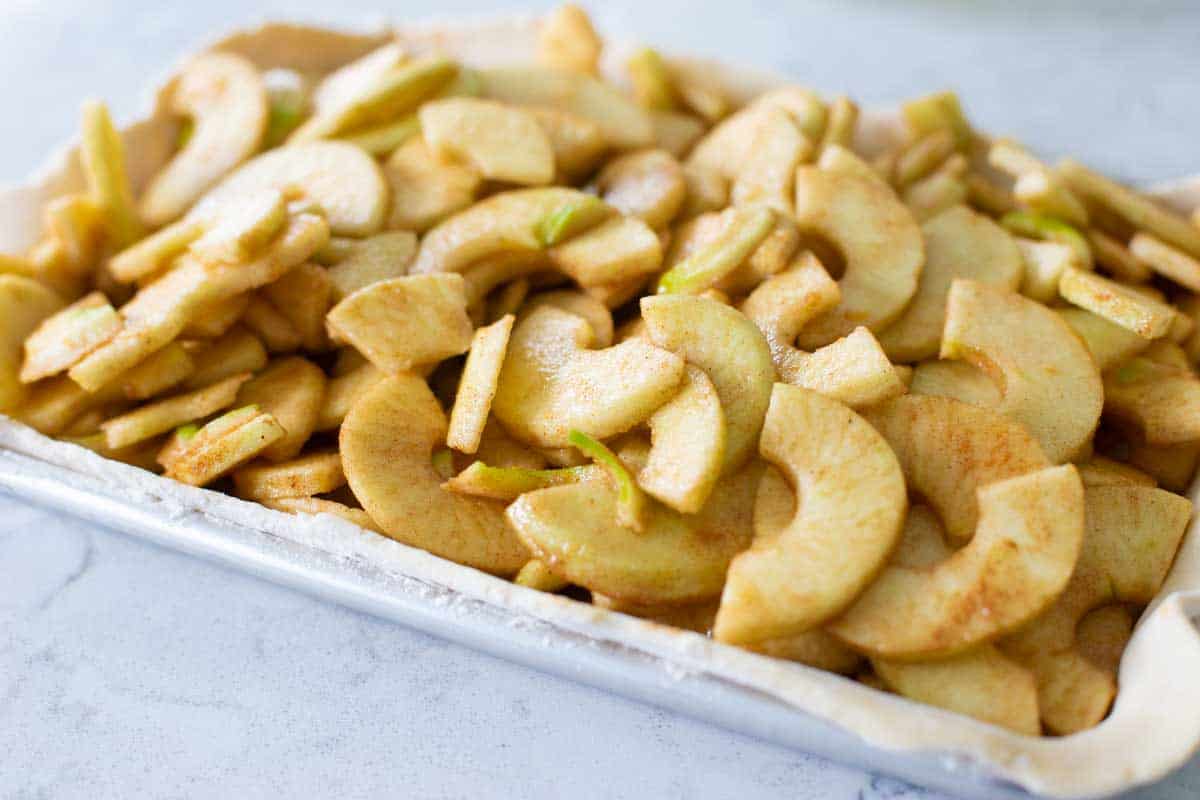
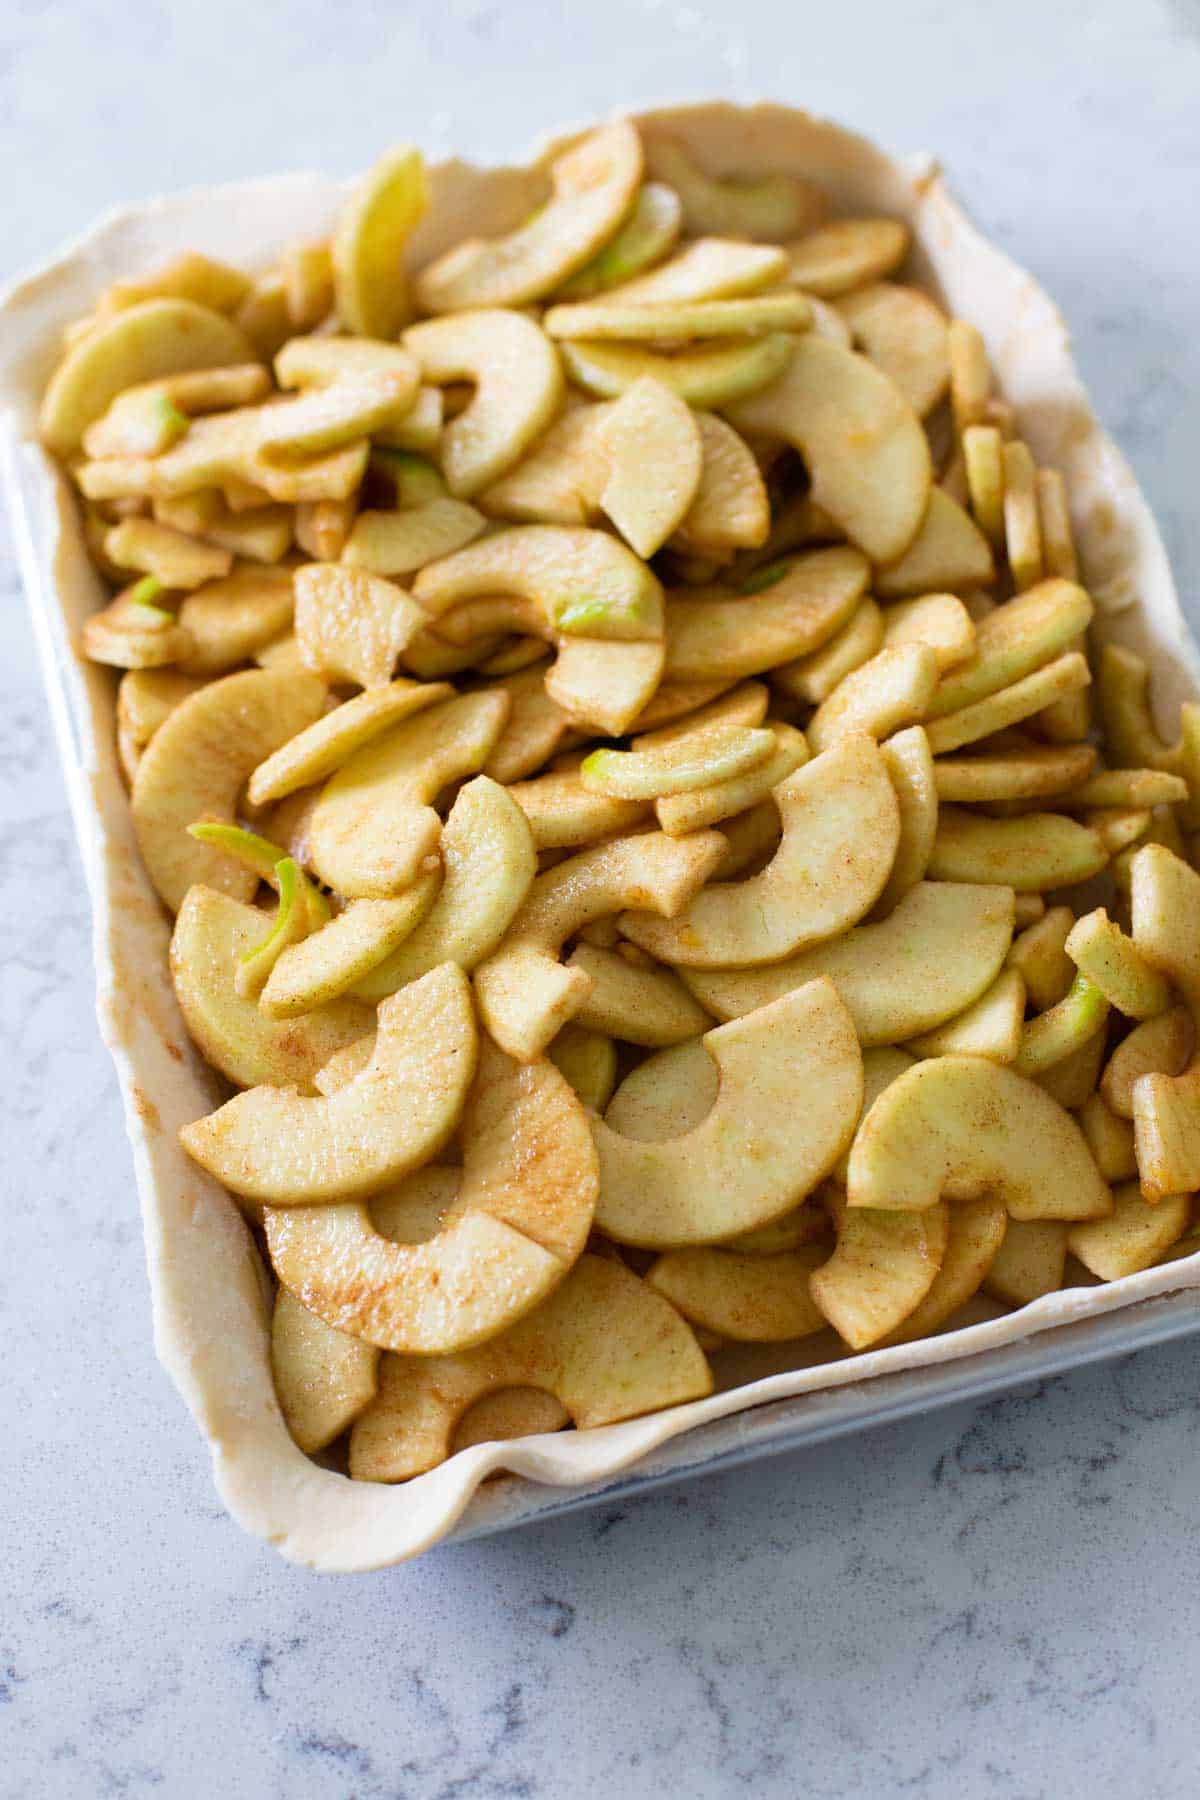
Peel and slice the apples. Place them in a large mixing bowl so it is easier to toss them in the sugar and spices.
Add the zest and juices of the orange and lemon, sugar, cinnamon, and nutmeg to the bowl and toss together with a spatula.
Pour the apple mixture into the prepared pie pan. It will look like a LOT of apples, but they will bake down in the oven.
Assemble and Bake the Pie
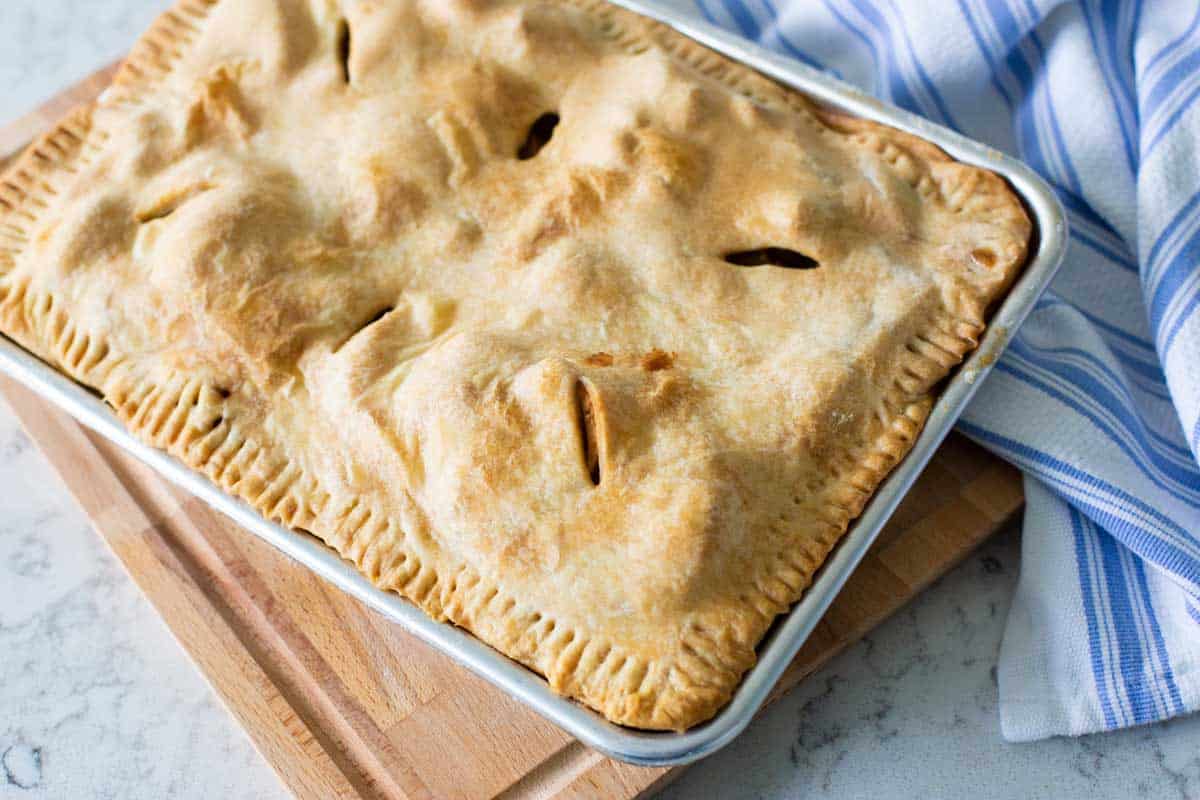
Place the top crust on the pie pan and crimp the edges together with a fork.
Use a paring knife to slice venting holes in the top.
TOP TIP: Place the fully assemble pie back into the fridge to chill while you preheat the oven. This lets the dough rest from all the handling and ensures the butter will stay nice and cold.
Preheat the oven to 375°F with a large baking stone or baking sheet turned upside down on the center rack.
The stone or baking sheet will help create an even baking surface so that the bottom of the slab pie will be nice and crispy.
Place the chilled slab pie directly on the preheated baking stone or baking sheet in the oven and bake for 45 minutes or until the filling is hot and bubbly and the crust is golden brown.
Make Ahead Instructions
There are several ways you can prep this apple slab pie ahead of time. My favorite is to assemble the pie the day before and bake it the morning of my party but any of these methods will work well:
1. Assemble the Day Before
Follow the recipe right up through to just before baking. Keep the fully assembled, unbaked pie in your fridge for up to 24 hours. Then preheat the oven and bake as directed.
2. Just Prep the Pie Crust Dough
You could prepare the dough for the pie crust and keep it chilled in the fridge for easy rolling and baking the next day.
The pie dough also freezes well by itself, just thaw in the fridge overnight before you try to roll it out.
3. Assemble and Freeze the Pie
You could fully assemble the apple slab pie and then flash freeze it for one hour. Then wrap it tightly in aluminum foil and freeze for up to 12 months.
When you want to bake the pie, you can bake it directly from the freezer. Just unwrap it from the foil but keep it loosely covered for the first 20 minutes of baking so the top crust doesn't brown too quickly.
You will need to add additional time to the baking time to ensure the pie filling gets hot and bubbly.
4. Bake It the Day Before
You could assemble and bake the entire pie recipe the day before your party and keep it at room temperature.
The pie will reheat well in the oven at 350°F if you want to serve it warm with a scoop of vanilla ice cream.
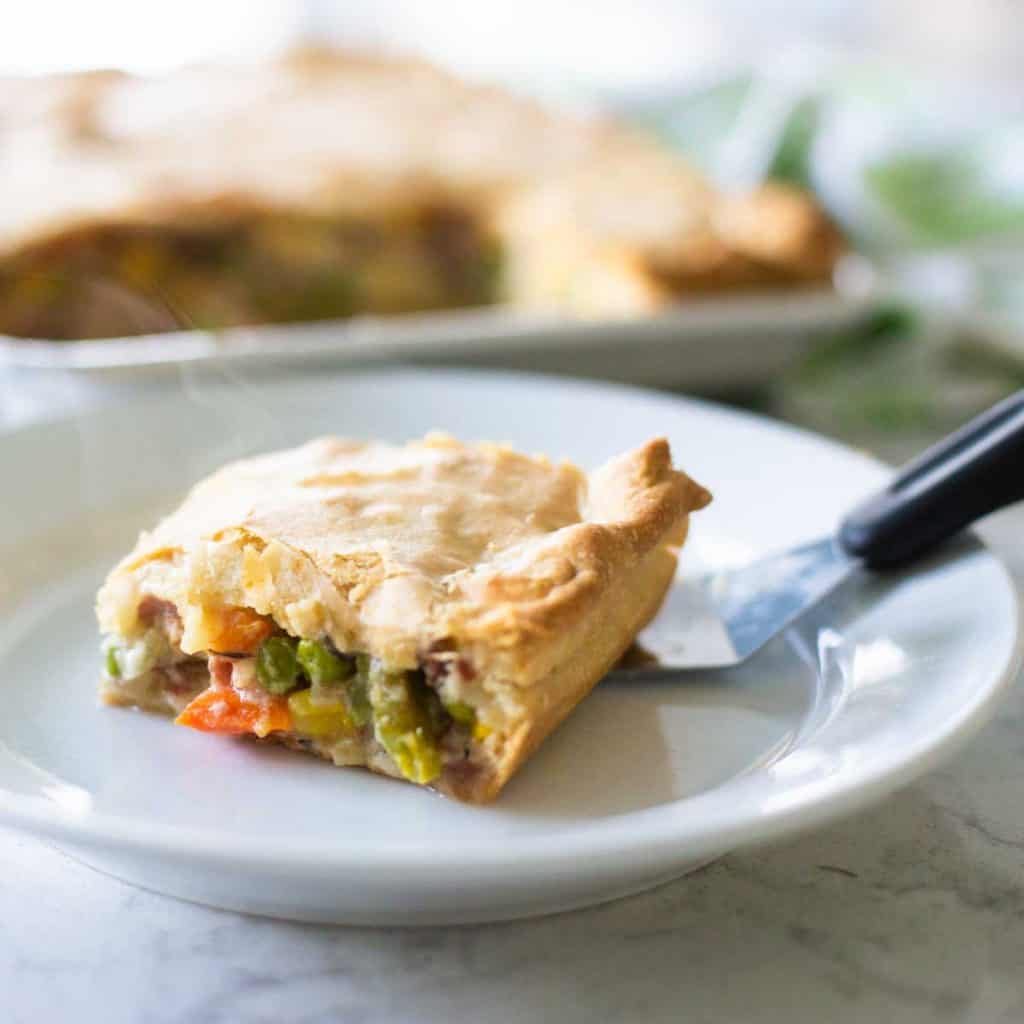
More Slab Pie Recipes
If you love this apple slab pie, you would also love my homemade cherry pie made with frozen cherries! It uses the same pie crust recipe and the filling is so easy.
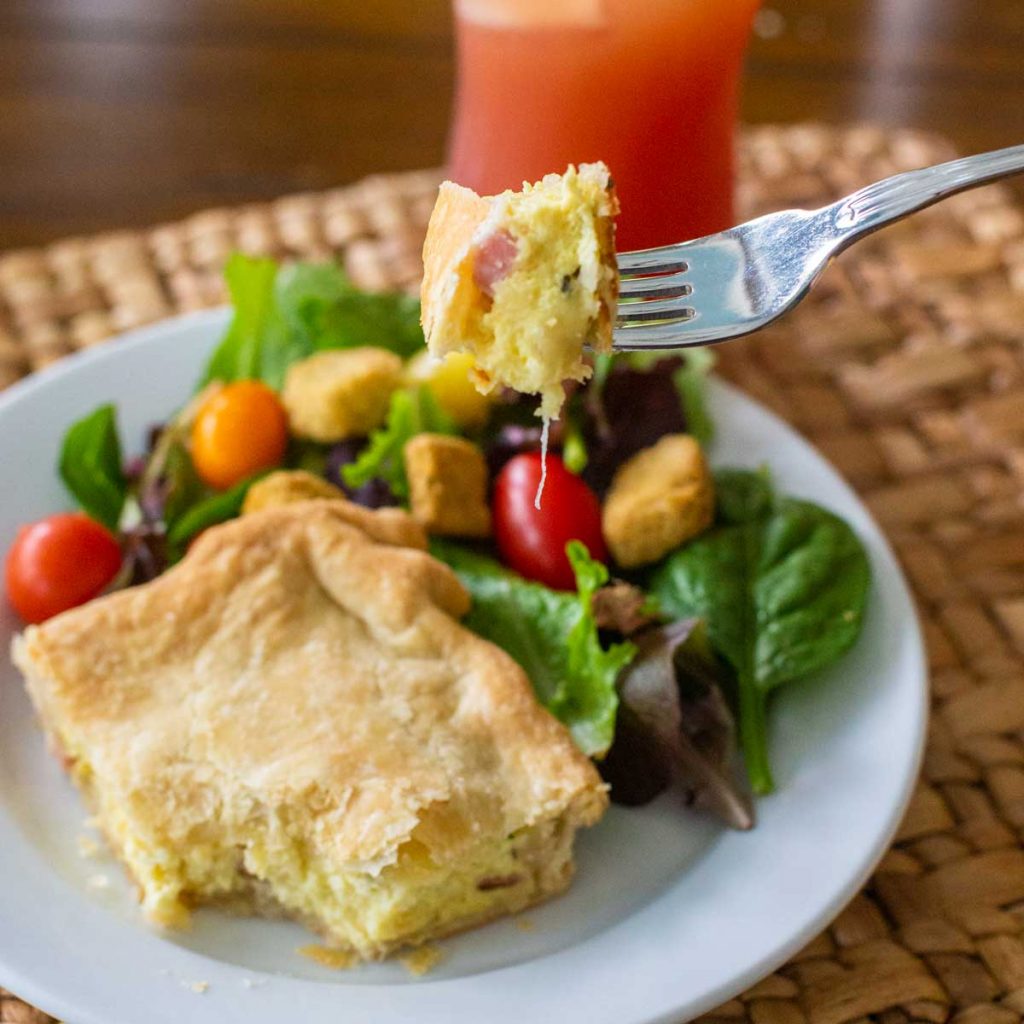
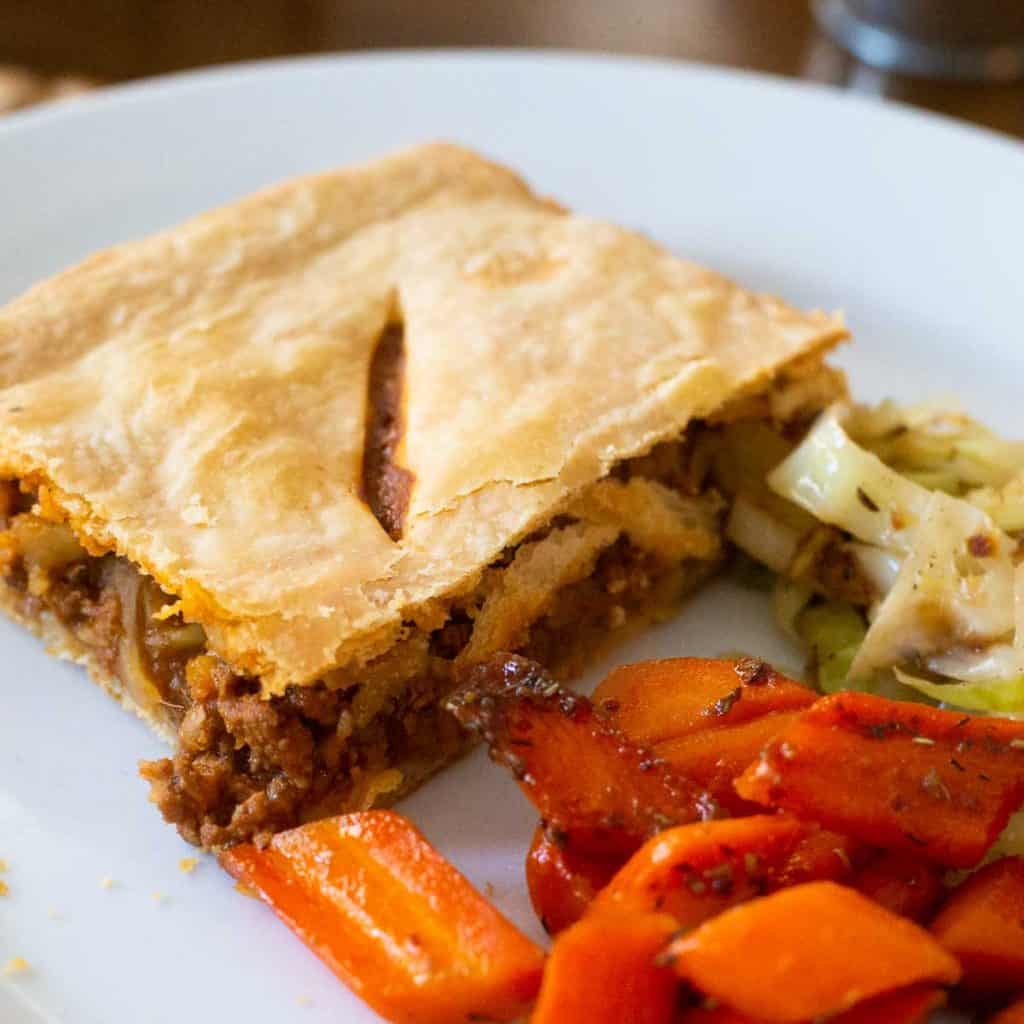
For something a little more savory, this cheesy egg and ham slab pie is perfect for a holiday brunch and I love making this ham pot pie using leftover ham.
More Fresh Apple Recipes
If you're still feeling anxious about making a pie from scratch, this apple pie filling tastes amazing in my freezer friendly apple crisp, too.
If you want a classic round apple pie, this apple pie filling is amazing.
And if you just have a ton of fresh apples on hand, don't miss my make-ahead apple cake with browned butter frosting.


📖 Recipe

Apple Slab Pie
Ingredients
For the Crust
- 16 tablespoons (2 stick) butter cut into large cubes and chilled
- 2 1/2 cups all purpose flour
- 1/4 teaspoon kosher salt
- 1/2 cup ice water fill the cup with 1/2 cup water and then add lots of ice
For the Apple Pie Filling
- 8 cups from 3 ¼ pounds of whole apples peeled, cored, sliced apples
- Grated zest from 1 orange
- Grated zest from 1 lemon
- 1 tablespoon fresh squeezed orange juice
- 1 tablespoon fresh squeezed lemon juice
- 1/2 cup sugar
- 2 tsp ground cinnamon
- 1 tsp ground nutmeg
Instructions
Prepare the Pie Crust:
- Chop the butter into large chunks and then place back in the fridge to chill for 20 minutes.
- Add the flour and salt to the bowl of a food processor. Sprinkle the cubes of butter over the top. Pulse 10 - 15 times or until the butter is in small pieces all throughout the flour.
- With the lid on the processor, slowly drain the ice and drizzle in the water through the feeding tube of the lid while the dough runs. Process the dough until a ball just begins to form. Less than one minute, usually.
- Pat the dough ball into a squat rectangle shape on a piece of plastic wrap. Wrap and cover it and place in the fridge to chill for at least 4 hours before you bake.
Roll the Dough:
- Divide the dough into two sections -- 1 slightly larger than the other. The larger half will serve as the bottom crust.
- On a lightly floured surface, roll out the bottom crust and lay it into your pie pan. Be sure to flour your rolling pin so it doesn't stick. Place in the fridge to chill.
- Sprinkle a little more flour on your surface and roll out the top crust. Roll it up in the baking mat and store in the fridge to chill.
Prepare the Pie Filling:
- Peel and slice the apples and place them in a large mixing bowl. Add the orange and lemon zests and juices, sugar, cinnamon, and nutmeg and stir to combine.
Assemble the Pie:
- Fill the prepared, chilled bottom crust with the apple pie filling. Gently unroll the top crust and lay it over the pie. Crimp the edges together and cut venting slices in the top.
- Place your assembled apple pie back in the fridge while the oven preheats.
Bake the Pie:
- Place a cookie sheet upside down on the oven rack you plan to bake your pie. Let it preheat inside the oven.
- Heat the oven to 375°F.
- Place your chilled pie directly on the preheated cookie sheet. The hot surface will help to evenly cook your bottom pie crust.
- Bake for 40 - 45 minutes or until your filling is done and the crust is golden brown.
Recipe Notes
Freezing Instructions
The assembled, unbaked pie can be frozen and kept for up to 12 months. Place it in the freezer for 1 hour to flash freeze the pie and then wrap tightly in aluminum foil. Bake the frozen pie directly from frozen. Unwrap the pie from the foil but then lightly cover the top with foil for the first 20 minutes or so to ensure it doesn't brown too quickly. You will need to add additional baking time, the filling should be hot and bubbly and the crust should be golden brown.Save This Recipe to Your Recipe Box
Find this delicious recipe next time you visit by saving it to your very own recipe box on my site. All your favorites stored in one easy place!

Comments
No Comments