
North Carolina Lemon Pie


North Carolina lemon pie is a classic Southern dessert that features a salty-sweet saltine cracker crust, creamy lemon filling, and fluffy whipped cream topping. This make-ahead recipe is the perfect dessert to bring to a potluck!
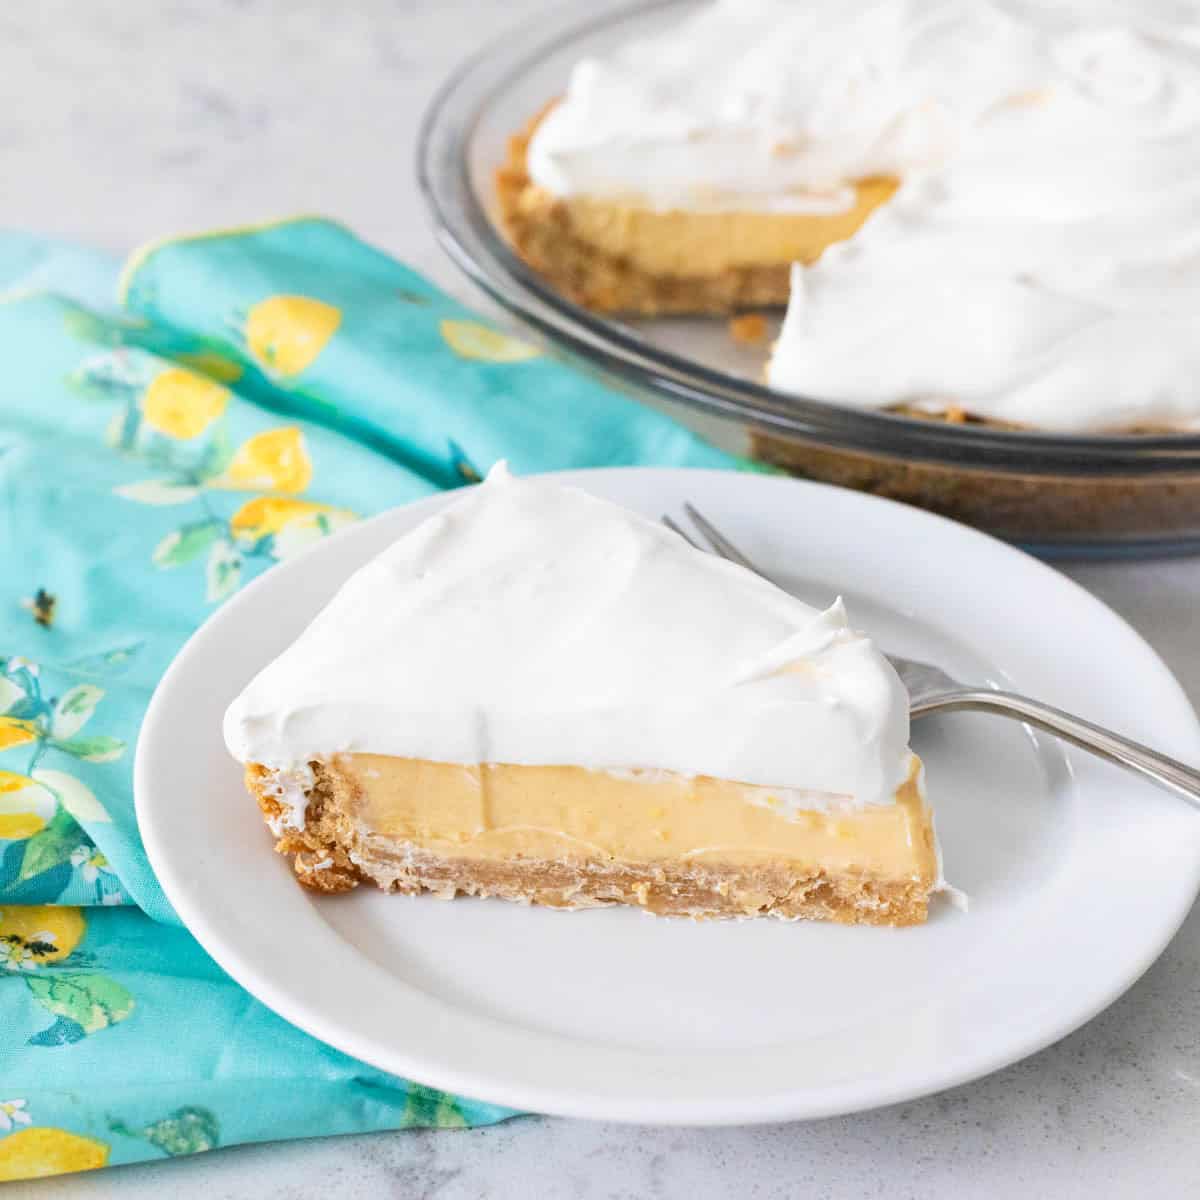
If you’re a huge fan of key lime pie like my dad and I are, you don’t want to miss this fun lemony variation!
North Carolina lemon pie features a similar firm but creamy texture as key lime pie but with a fresh lemony base.
The crispy saltine cracker crust adds a perfect complement to the tangy filling and the fluffy homemade whipped topping adds just the right amount of sweetness.
Why This is the Best Recipe
- Salty-Sweet Crust: The crushed saltine crackers in the pie crust are a fun twist on the more classic graham cracker crust.
- Easy, Wholesome Ingredients: Simple pantry staples like sweetened condensed milk, lemons, and cream make this recipe both budget-friendly and easy to prep.
- Make-Ahead Friendly: This pie has to chill and set in the fridge which makes it the perfect prep-ahead dessert to bring to a potluck party.
Ingredients
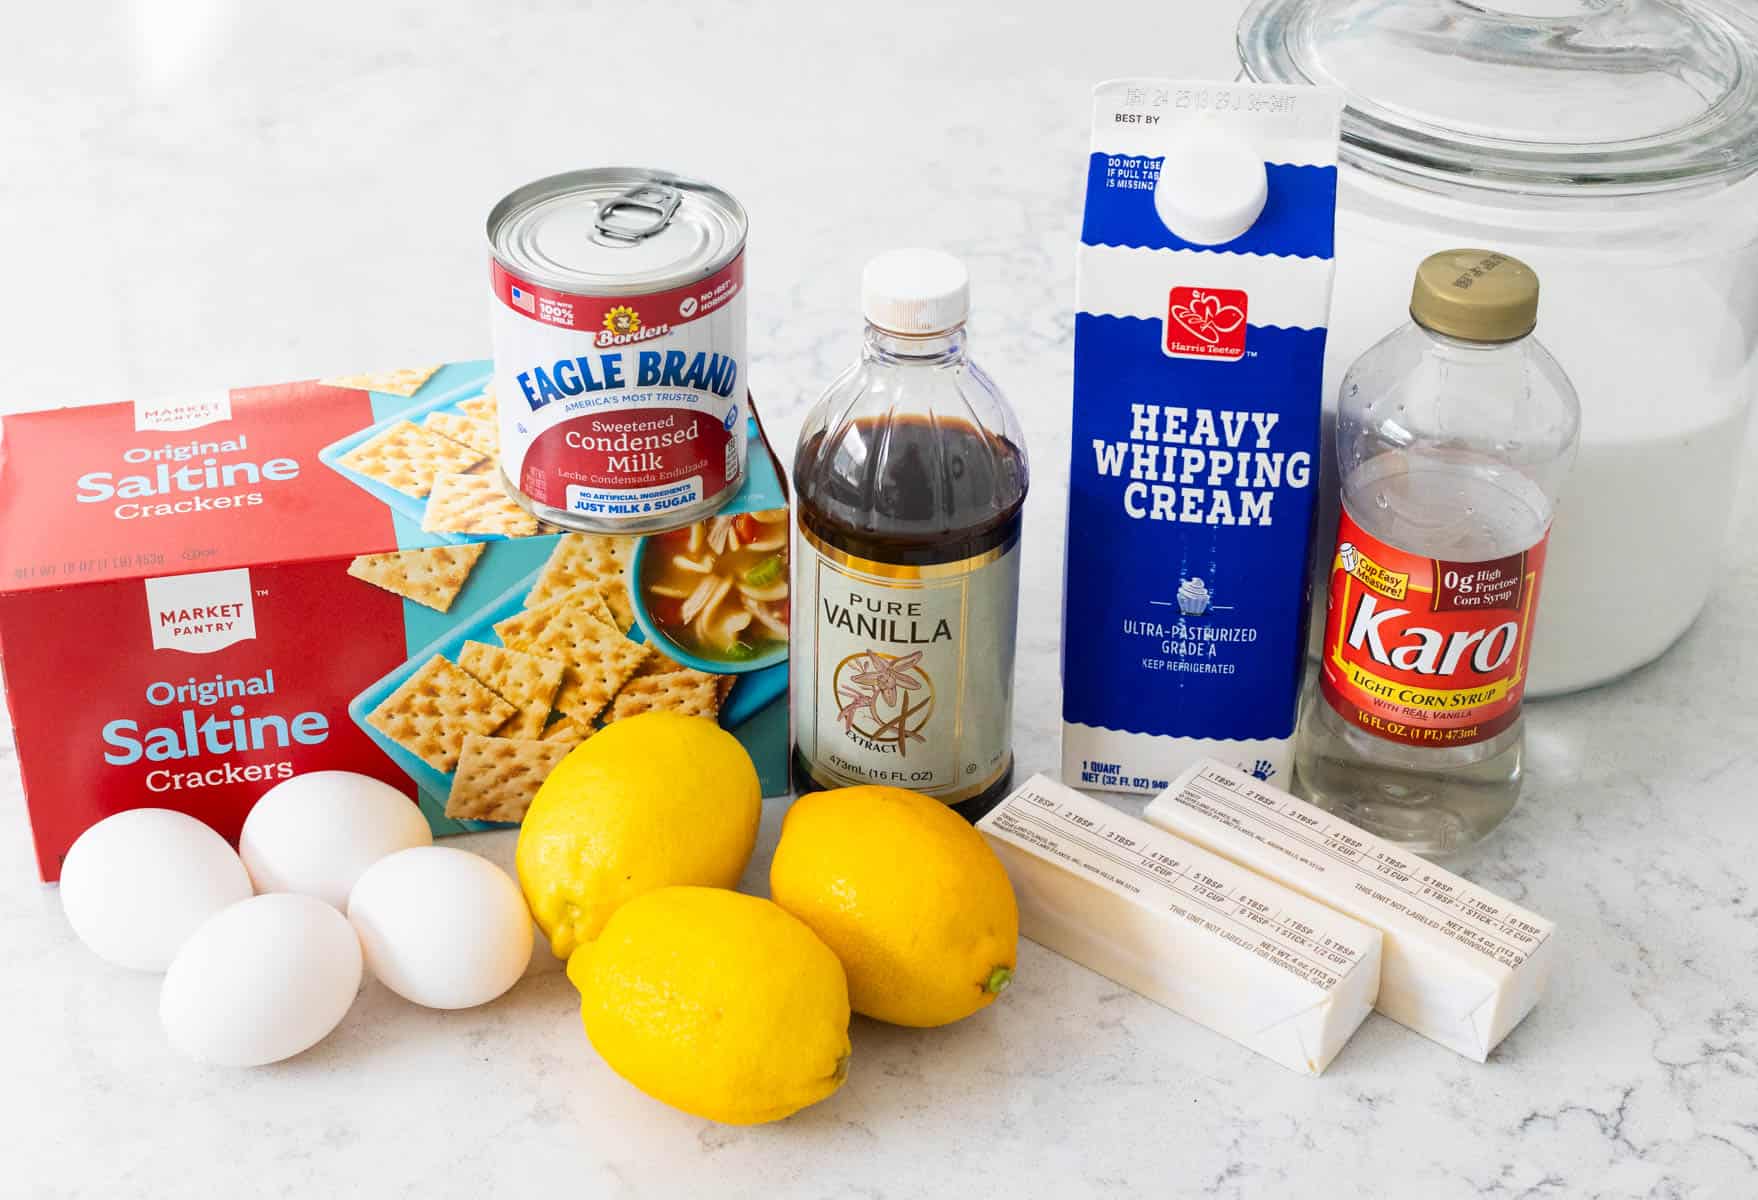
This easy dessert only needs a few simple ingredients:
- Fresh Lemons
- Saltine Crackers
- Heavy Cream
- Eggs
- Sweetened Condensed Milk
- Butter
- Sugar
- Corn Syrup
- Vanilla
- Salt
Want to Save This for Later?
Prep the Saltine Cracker Crust
I love how the salty saltine crackers pair with the tart lemon filling but if you prefer, you could always swap it out for my more traditional graham cracker crust.
If you want to try this fun variation in your pie routine, all you need to do is process the saltines in a food processor until they resemble coarse oatmeal.
Add the melted butter and corn syrup, pulse until they are well combined.
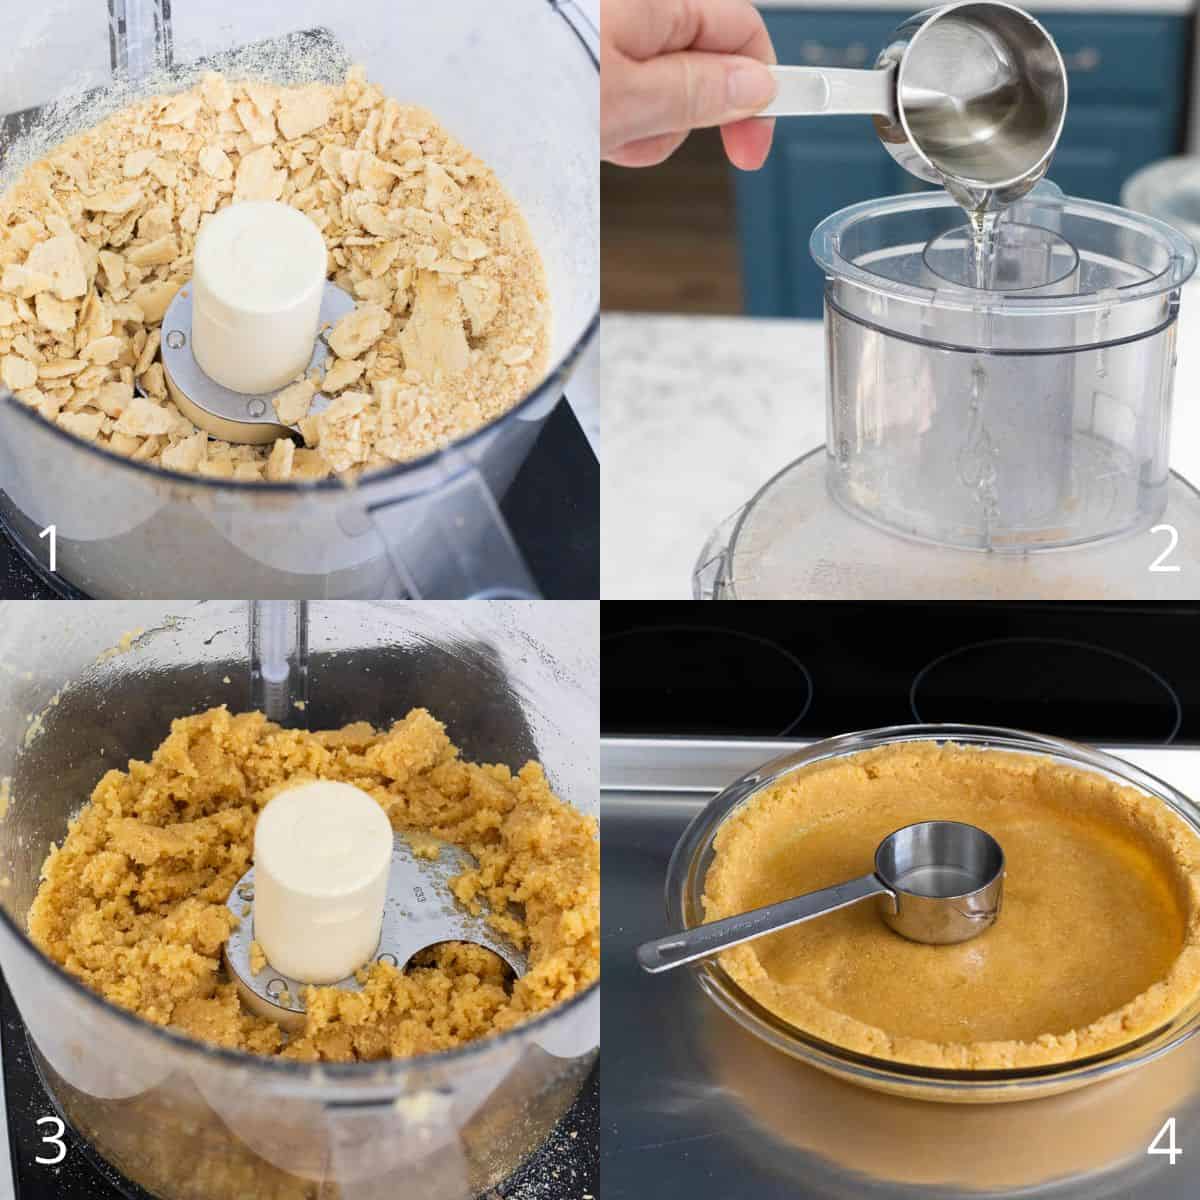
Press the mixture firmly into your pie plate to form the crust. I used the back of a measuring cup.
Bake at 350°F for 17 – 19 minutes or until golden brown.
For more detailed instructions and tips, more step by step photos, and a separate printable recipe card for you to use with other pie fillings, you may want to reference my saltine cracker pie crust here.
Prep the Lemon Filling
Zest your lemons before you juice them. Whisk together the sweetened condensed milk, egg yolks, heavy cream, lemon zest, and salt until smooth.
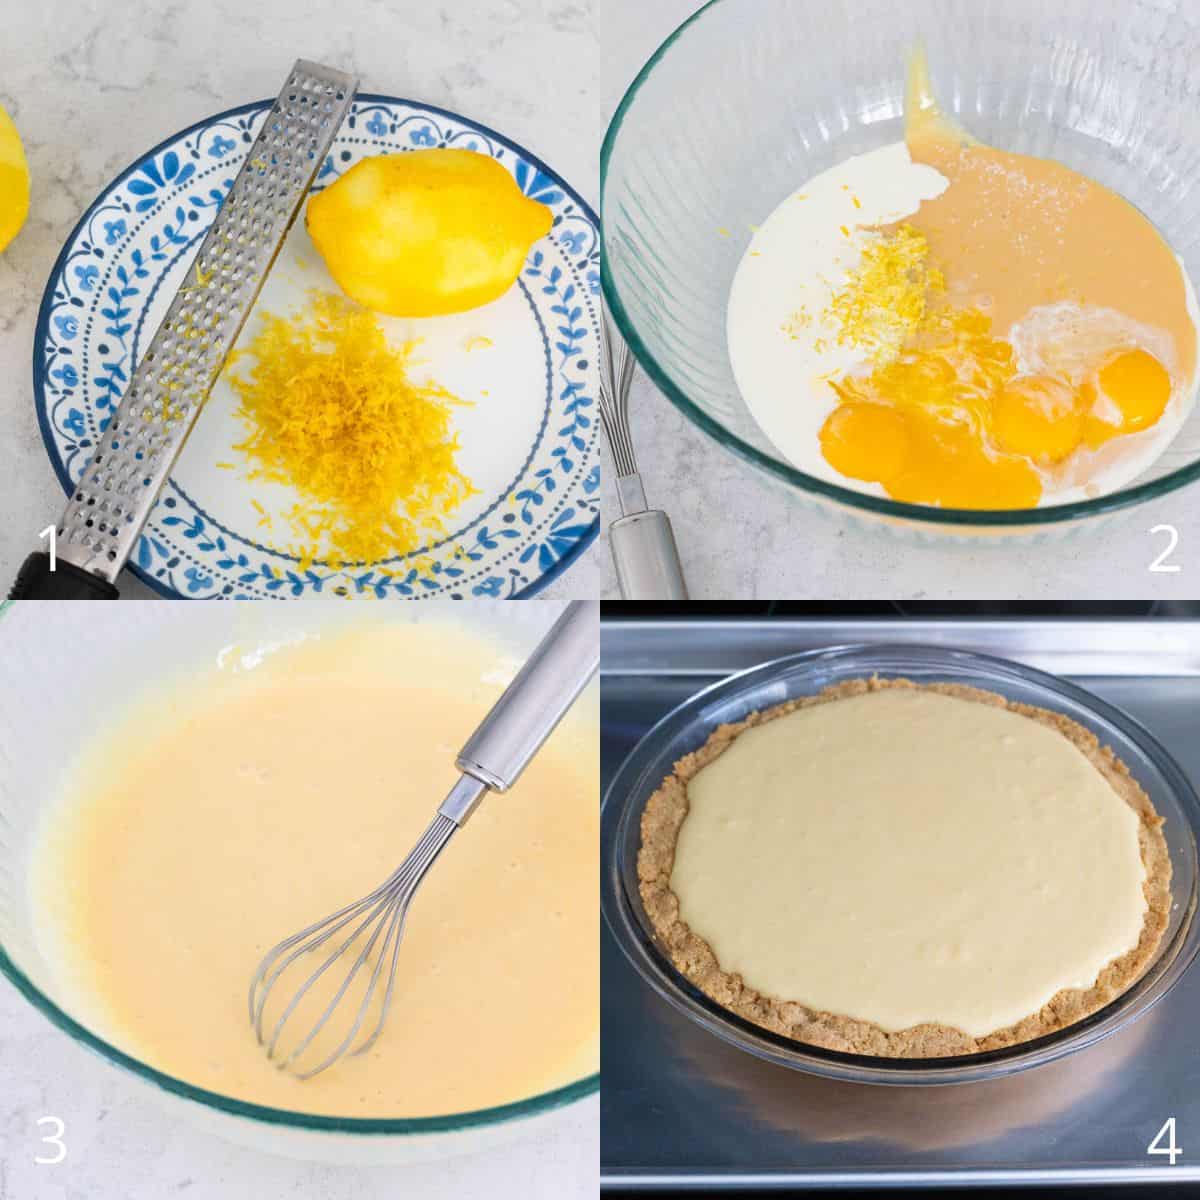
Slowly whisk in the lemon juice and then pour the filling into the prepared pie crust.
Place the pie on a rimmed baking sheet.
Baking Instructions
Your oven should still be at 350°F from baking the crust.
Bake the filled lemon pie for 15 – 17 minutes or until the edges are set but the center has a gentle wobble when you pull the edge of the baking sheet.
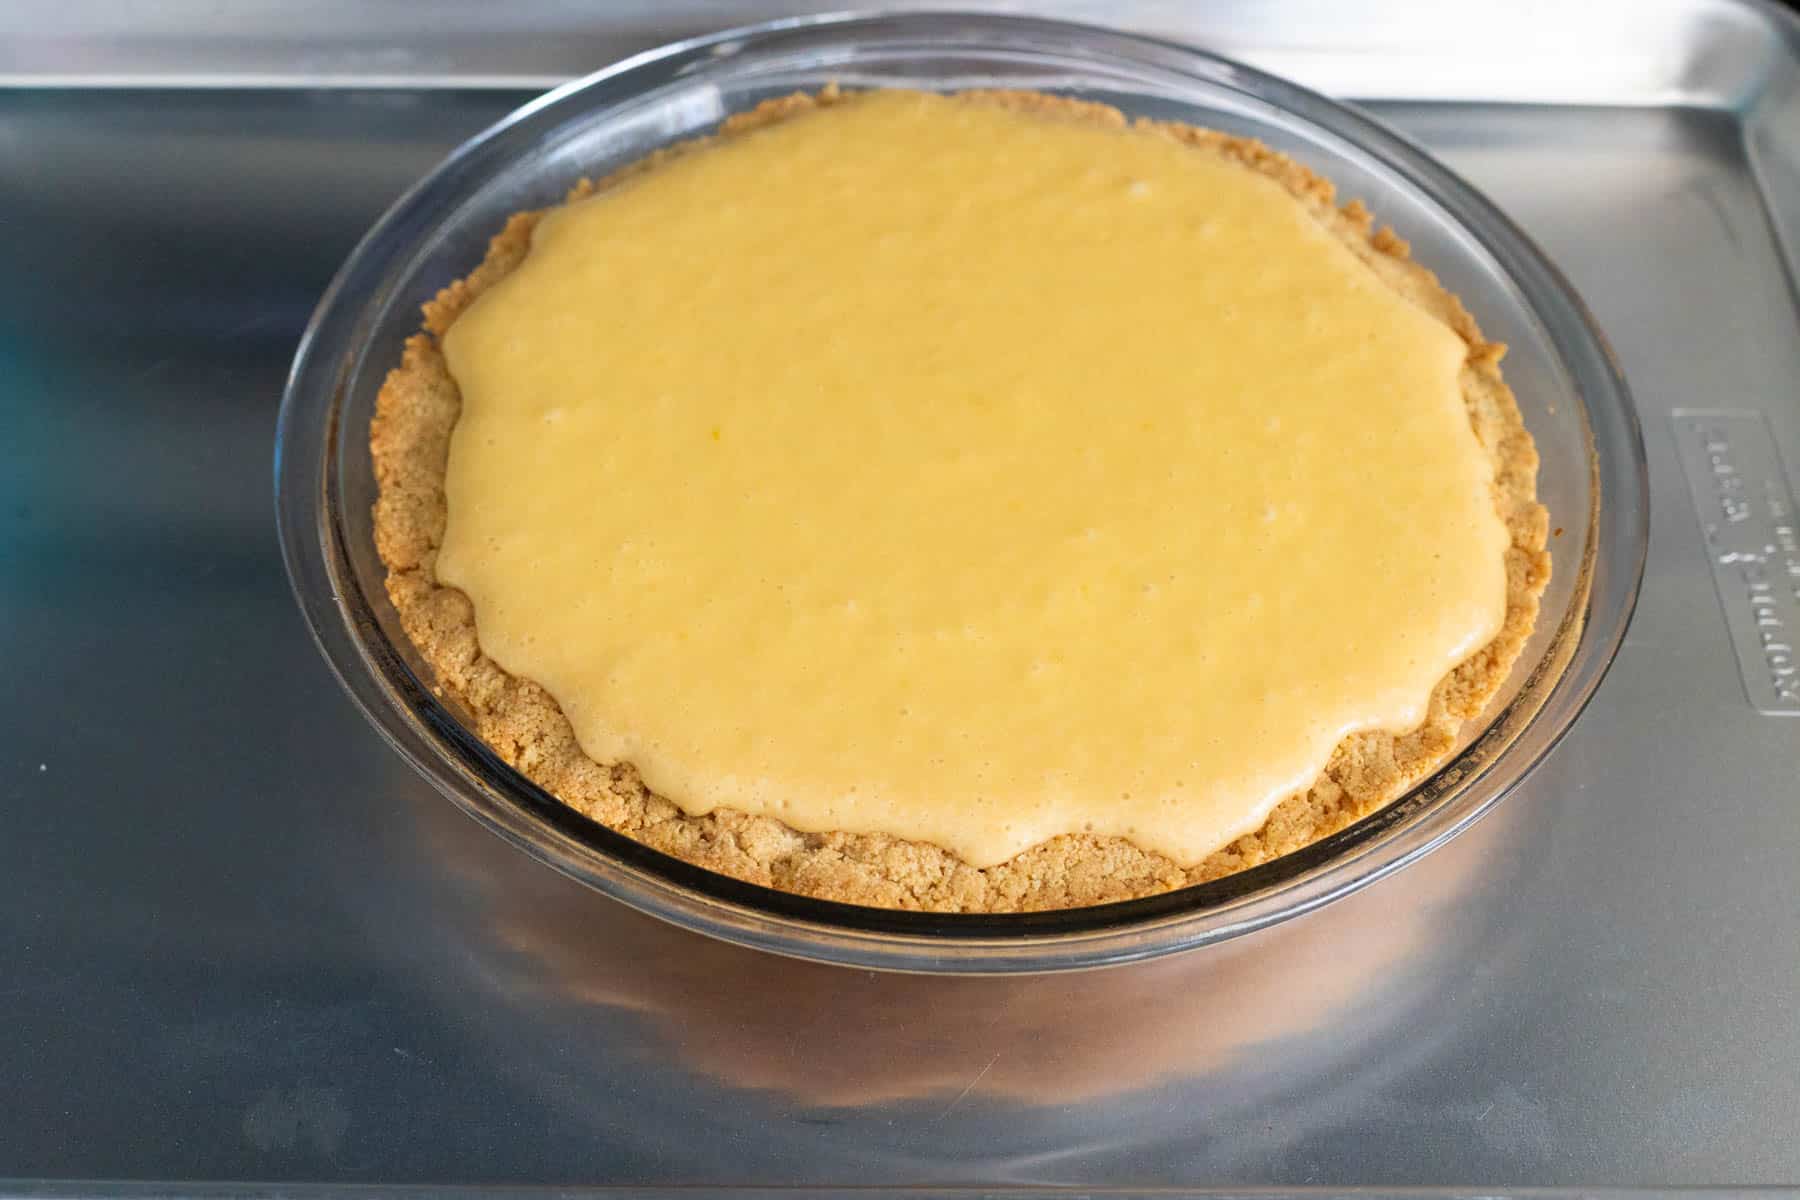
Let the pie cool completely on a wire rack so the bottom crust doesn’t steam and get soggy.
Once cooled, chill in the fridge for at least 4 hours or up to 24 hours in advance.
Prep the Whipped Topping
Could you use a container of prepared Cool Whip instead of homemade whipped topping? Sure, but this step only takes a few minutes and is literally the perfect icing on the pie!
Wait to make the whipped cream until just before serving so it stays nice and fluffy.
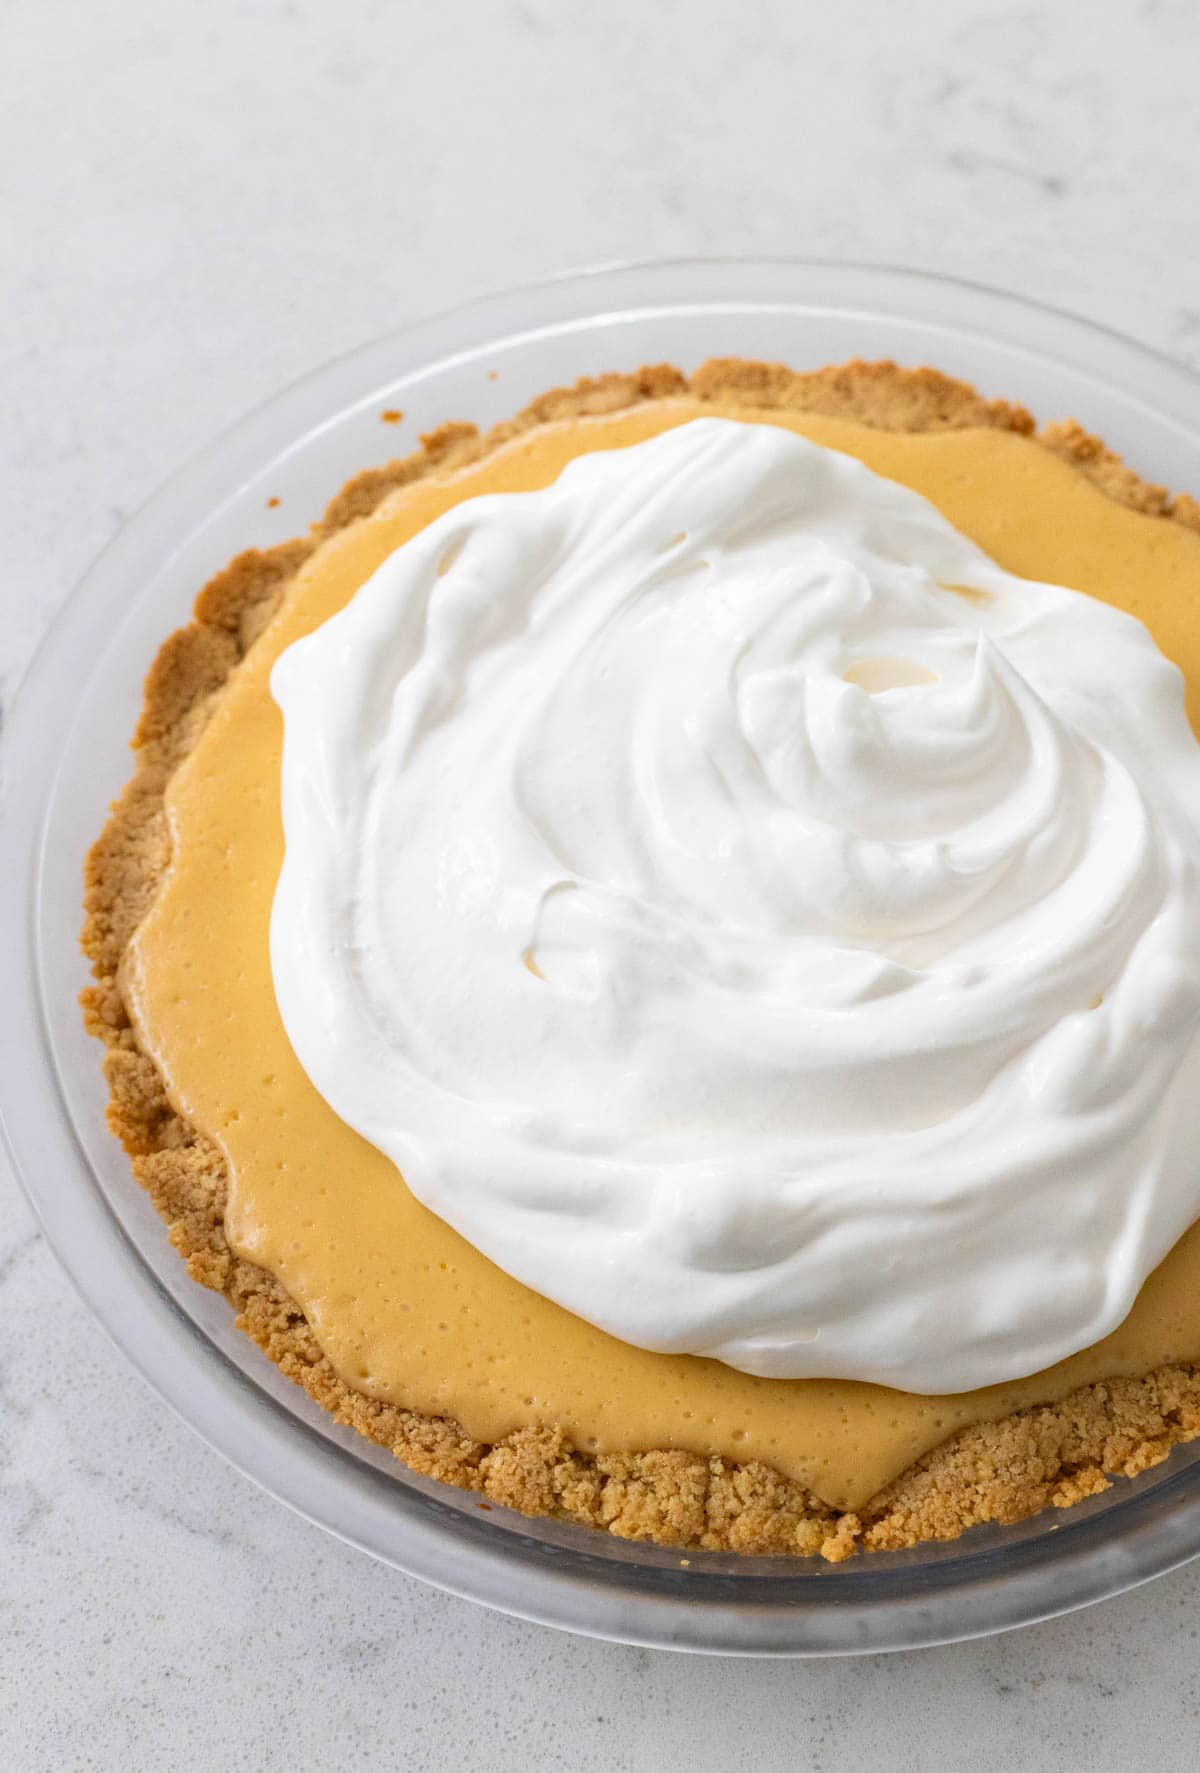
Whisk the heavy cream, sugar, and vanilla in the bowl of a stand mixer fitted with the whisk attachment until stiff peaks form.
Spoon the whipped topping over the pie and gently spread to cover the pie.
Make Ahead Tips
With the 4-hour chill time, this creamy lemon pie is the perfect make ahead dessert because it keeps perfectly in the fridge for 24 hours.
You could probably prep it even earlier but the crust may not keep its crispy texture.
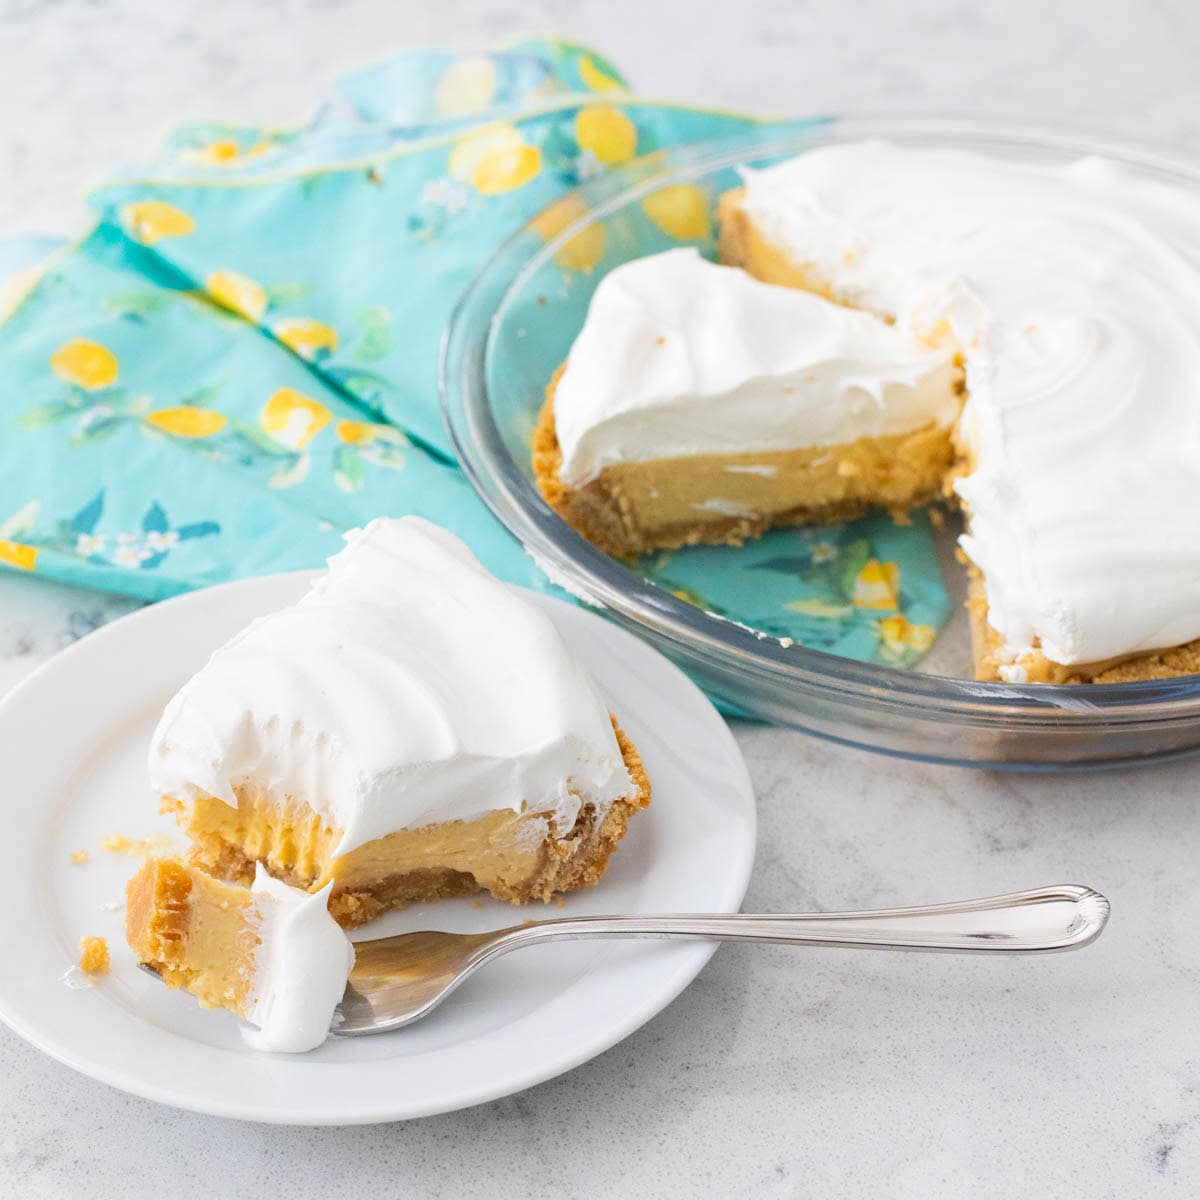
Wait to top it with the whipped topping until just before serving. If hosting a party, you could ice the pie and then keep it well in the fridge for an hour or so if you want to get that step out of the way.
Serving Suggestions

I treated my family to this lemon pie as a “just because” dessert because I wanted to sample it after reading about a similar pie in the Seven Year Slip, one of the Peanut Blossom Book Club book picks.
If I were hosting a book club meeting, this would be the perfect tie-in treat to serve!
I think you’d be the hit of the party if you brought it to any summertime potluck. It’s a fun twist on the more well known key lime pie and perfect for lemon lovers.
More Easy Pie Recipes
Pies are such great party desserts because they are easy to travel with and do well when made ahead. Don’t miss some of my other favorite recipes:


North Carolina Lemon Pie
Ingredients
For the Crust:
- 53 saltine crackers about 1 and a half sleeves of crackers
- 10 tablespoons salted butter melted
- 1/4 cup light corn syrup
For the Lemon Pie Filling:
- 1 (14 oz) can sweetened condensed milk
- 4 egg yolks
- 1/4 cup heavy cream
- 3 lemons zested and juiced, you should have 1/2 cup juice
- 1/8 teaspoon salt
For the Whipped Topping:
- 1/2 cup heavy cream chilled
- 2 teaspoons sugar
- 1/2 teaspoon vanilla
Instructions Start Cooking
Prepare the Crust:
- Preheat the oven to 350°F. Spray a 9-inch pie plate with cooking spray and set it on a baking sheet. Set aside.
- Add the saltines to the bowl of a food processor and crush them with about 15 pulses. Add the melted butter and corn syrup and pulse until the crackers are broken into oatmeal sized pieces.
- Scrape the saltine mixture into the prepared pie plate. Press the crumbs into an even layer on the bottom and sides of the plate. Transfer the crust to the oven and bake for 17 – 19 minutes or until golden brown. There's no need to let it cool before using in this recipe so you can prepare the lemon filling while it bakes.
Prepare the Lemon Filling:
- Pour the condensed milk into a medium-sized mixing bowl. Add the egg yolks, heavy cream, lemon zest, and salt. Whisk everything together until fully incorporated. Add the lemon juice and whisk it in.
- Pour the filling into the prepared pie crust. Bake the pie until the edges set but the center still jiggles when you pull the pan, about 15 – 17 minutes.
- Transfer the pie to a wire rack and let it cool completely. Do not let it rest on the hot sheet pan or the bottom crust may steam and get soggy. Once cooled, refrigerate for 4 hours.
Prepare the Topping and Assemble:
- You can prepare the whipped cream by hand or with a hand mixer or stand mixer fitted with the whisk attachment. Whisk the heavy cream, sugar, and vanilla on medium speed until foamy. Increase the speed to high and whisk until stiff peaks form, about 1 – 3 minutes.
- Spread the whipped cream over the pie just before serving.
Save This Recipe to Your Recipe Box
Find this delicious recipe next time you visit by saving it to your very own recipe box on my site. All your favorites stored in one easy place!

About Tiffany
Tiffany is a home-cooking enthusiast, three-time cookbook author, and creator of the sites Peanut Blossom, Peanut Blossom Book Club, and Don’t Just Fly. She believes that family dinner can be manageable, fun, and — most importantly — tasty. She lives in Charlotte, North Carolina, with her husband and two daughters and can often be found baking a loaf of bread with her beloved bread machine, reading a good book, or planning her family’s next adventure.