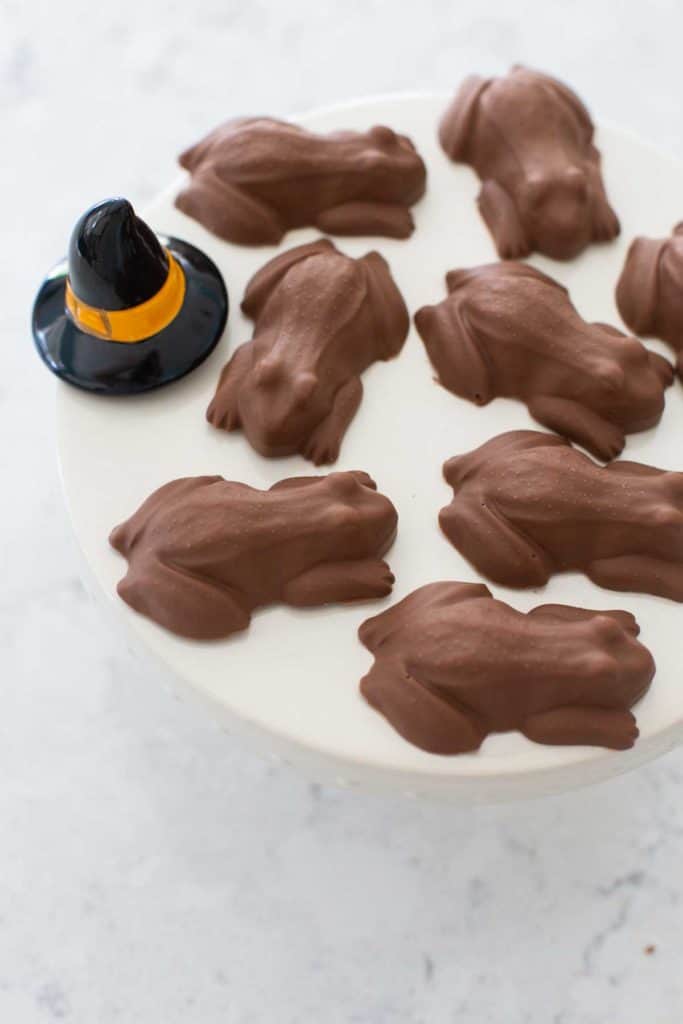
Harry Potter Chocolate Frogs Recipe
This easy chocolate frogs recipe is perfect for making for a Harry Potter themed birthday party or special movie night for when your family has finished reading the books together. Made with just 2 ingredients, these easy chocolate candies are fun to make with kids.
After years of reading Harry Potter aloud with my kids, we finally reached the bittersweet end of the series.
As we crept towards the end of book 7, the girls were eagerly looking forward to an EPIC Harry Potter movie night to celebrate.
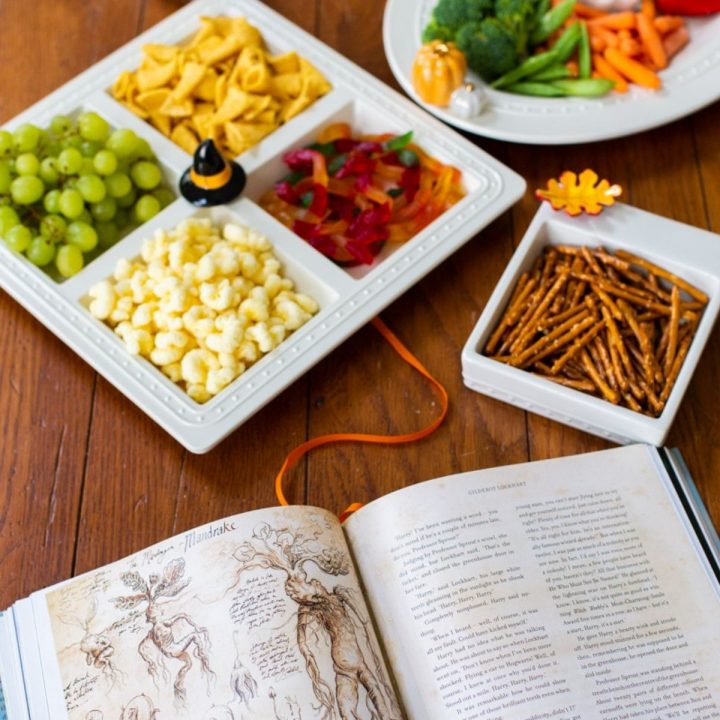
While I always served fun Harry Potter snacks during each of the first seven movies, the very last movie deserved extra-special treatment.
I arranged a simple baking day with my kids to make homemade chocolate frogs for our movie treat. It was a great way to spend the morning together and the girls had so much fun!
The Peanut came up with the idea of making four different flavors:
- Plain chocolate frogs
- Heath bar crunch frogs
- Marshmallow filled frogs
- Caramel pecan chocolate frogs (my favorite ones!)
Jump to:
What You Need to Make This
This is the easiest candy recipe you will ever find. You only need a few very simple things:
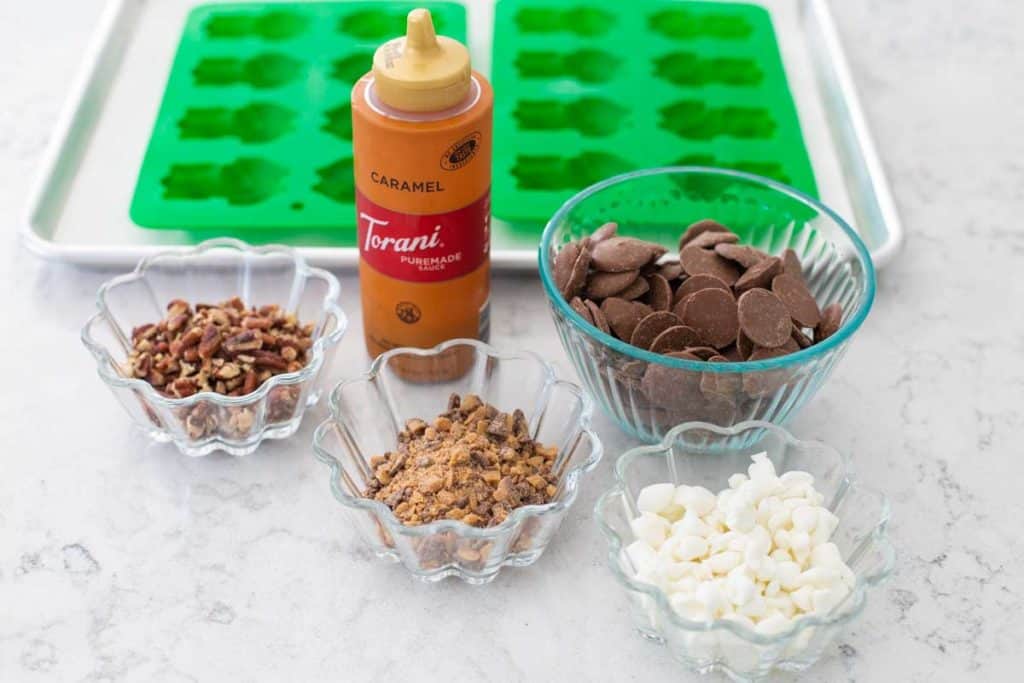
- 1 bag of chocolate candy melts: I picked up what we needed at Michael's, but you could use these candy melts, too
- Silicone frog candy molds: I ordered this set on Amazon. We are seriously considering making Jello jiggler frogs or frog ice cubes with the set, too. So fun!
- Filling mix-ins (Optional): Chopped pecans, caramel sauce, crushed Heath bar candies, mini marshmallows
See how we used the filling items below and don't miss the other variations you could try.
Want to Save This for Later?
Instructions
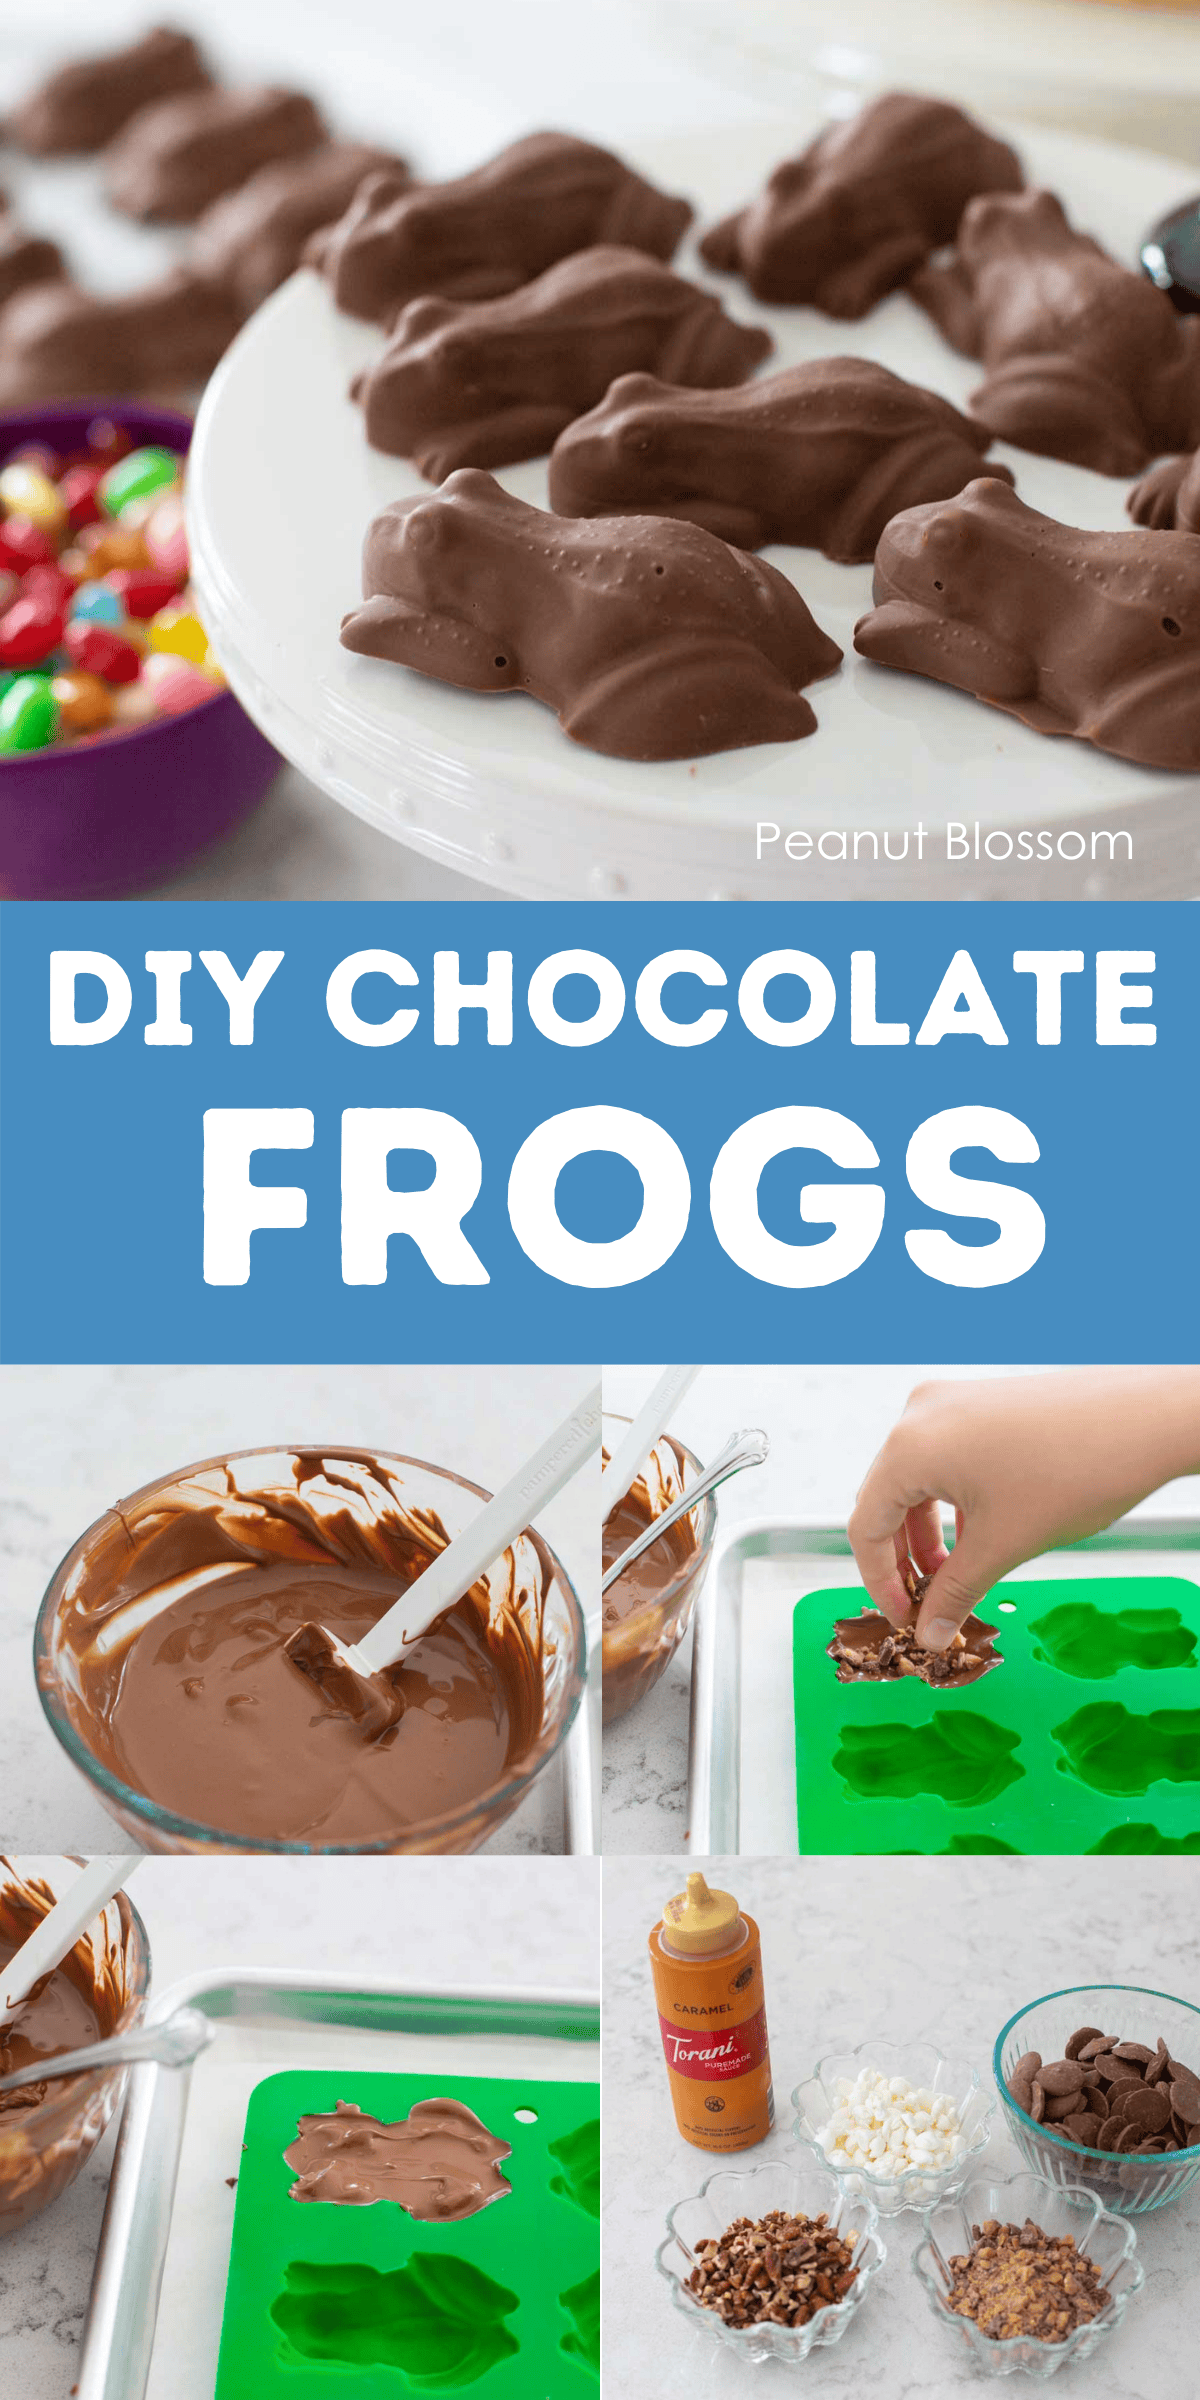
Before you begin: Place the clean, and absolutely dry, silicone molds on a large baking sheet lined with parchment paper.
This will help you move the molds around your kitchen once they are filled but before they have set. It also helps keep your counters clean from chocolate drips.
Step 1: Melt the Chocolate
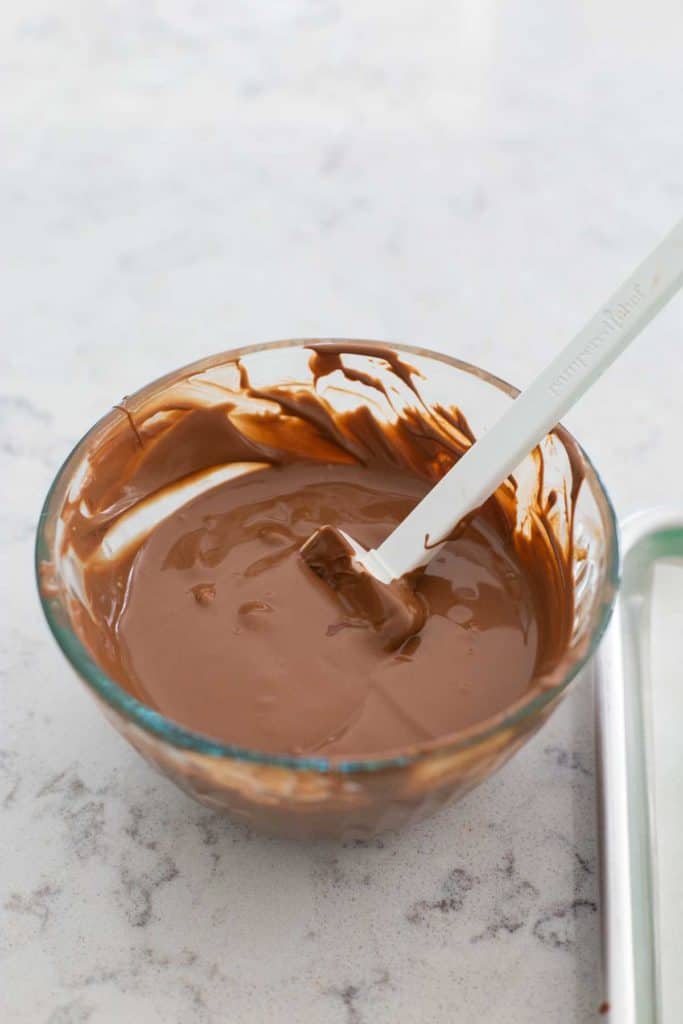
Place the chocolate melting wafers in a microwave-safe bowl. Heat on 50% Power for 1 minute.
Stir the candy wafers with a spatula. Return the bowl to the microwave and heat again in 30 second increments. Stir vigorously after each turn in the microwave. You don't want to overheat the chocolate.
It will melt and become smooth with stirring.
Step 2: Line the Mold
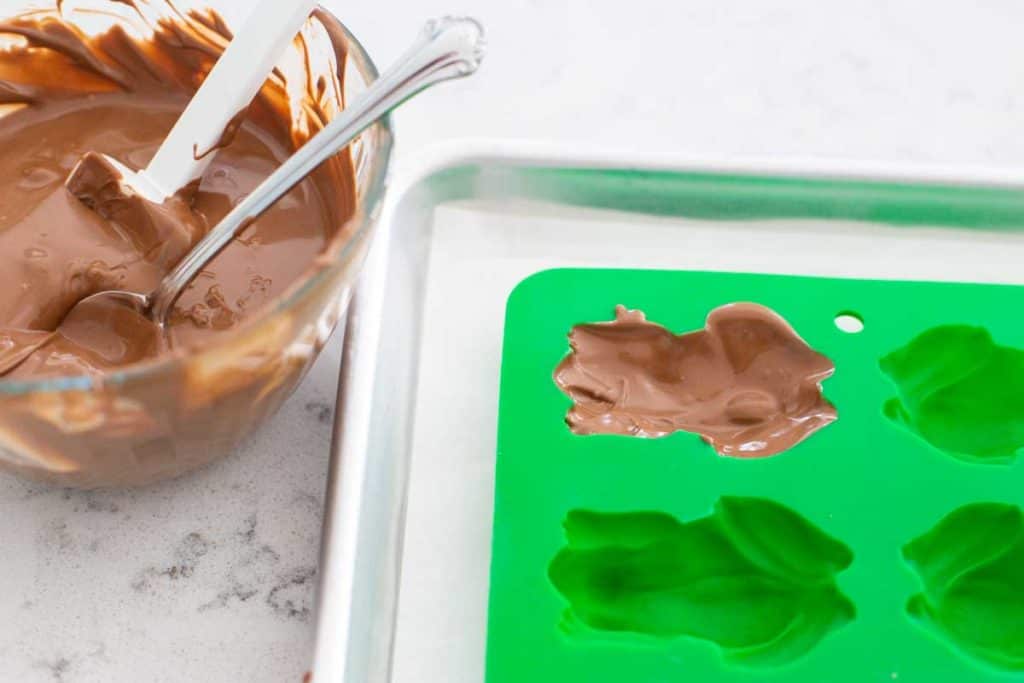
Use a small spoon to add a dollop of melted chocolate to the first frog well.
Nudge the chocolate all around the bottom and edges of the shape using the tip and edges of the spoon.
This creates the top of your chocolate frog. You want to be sure to cover all the little details with chocolate: toes, tail, nose, sides, etc.
But, the well should only be about 1/3 full of chocolate so you have room for fillings.
Step 3: Add the Fillings
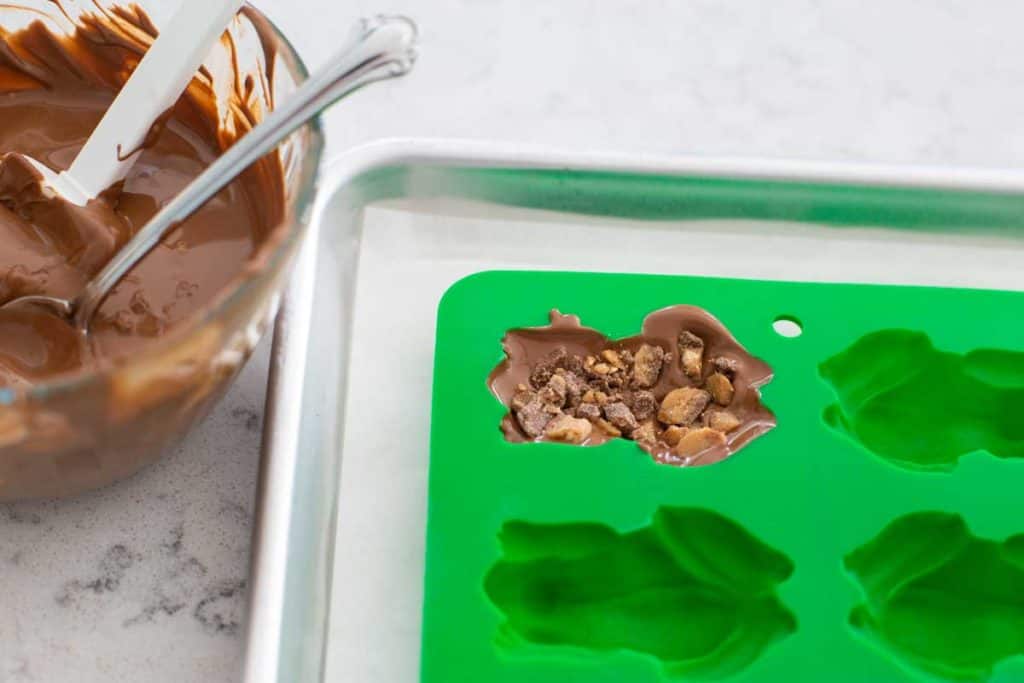
Sprinkle in the fillings and very gently press them into the chocolate but not so hard that they push through to the very bottom of the mold.
The fillings should not come up past the top surface of the mold, you want to have room to add the top layer of chocolate.
Filling Option 1: Chopped Heath Bar candies, we used the pre-chopped candies in the baking aisle but you could break up your own candy bar to use.
Filling Option 2: Chopped mini marshmallows. A full mini marshmallow would still be too big. I simply cut up a small handful of them with my chef knife to make them itty-bitty pieces for adding to the molds.
Filling Option 3: Chopped pecans and caramel sauce. I had a bag of chopped pecans in my pantry, but you could hand chop your own full size pecans. We used a regular ice cream caramel sauce I had on hand. It was very runny and thin, so I used just a very little bit. Be sure to see the note on how to finish the frog if you make this flavor.
Filling Option 4: Plain chocolate. If you don't want to add anything to your frogs, you can proceed directly to the next step.
Step 4: Seal the Frogs
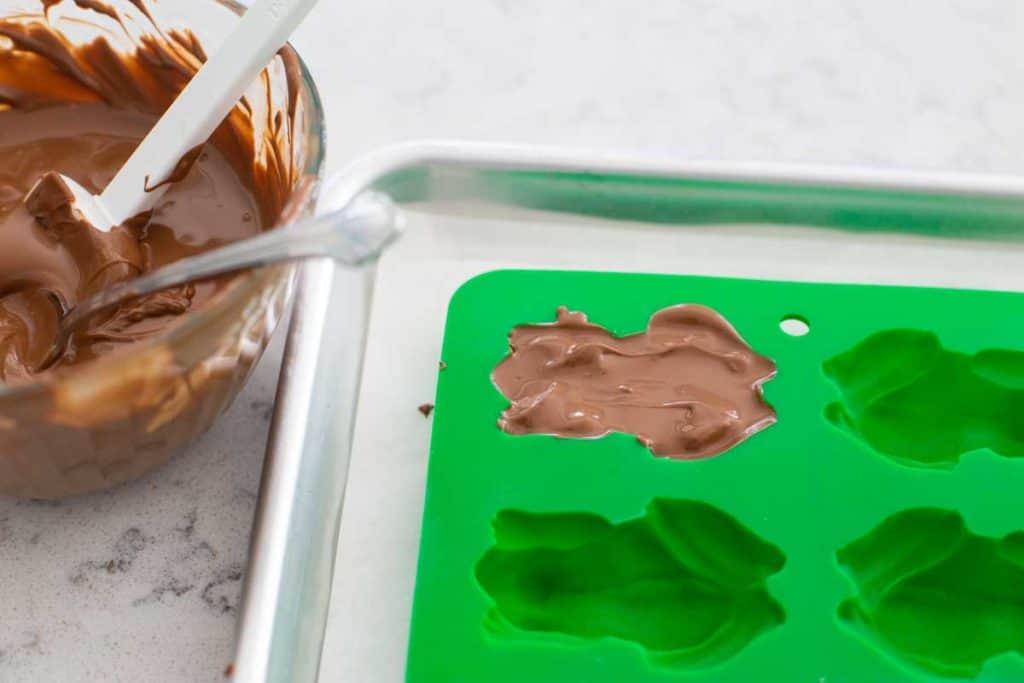
Use your spoon to add a final dollop of chocolate to the mold.
Gently nudge the chocolate all over the top of your fillings and make sure the entire well is filled from end to end.
NOTE: If you made the caramel-pecan frogs, be extra careful with adding the chocolate over the top. You want to be sure the caramel is completely covered by chocolate or it will leak out of the sides of your finished candy. It helps to add just a scant bit of caramel to the mold so you have plenty of room to add more chocolate over the top.
Top Tip
Work one frog at a time, don't try to work the first step across the entire mold and then move on to fillings. The chocolate will dry fairly quickly and you want to be able to press the fillings gently into the still-soft chocolate.
Step 5: Let the Chocolate Set
Set the filled molds aside to harden and set. The surface will appear dried within an hour but the centers will still be soft.
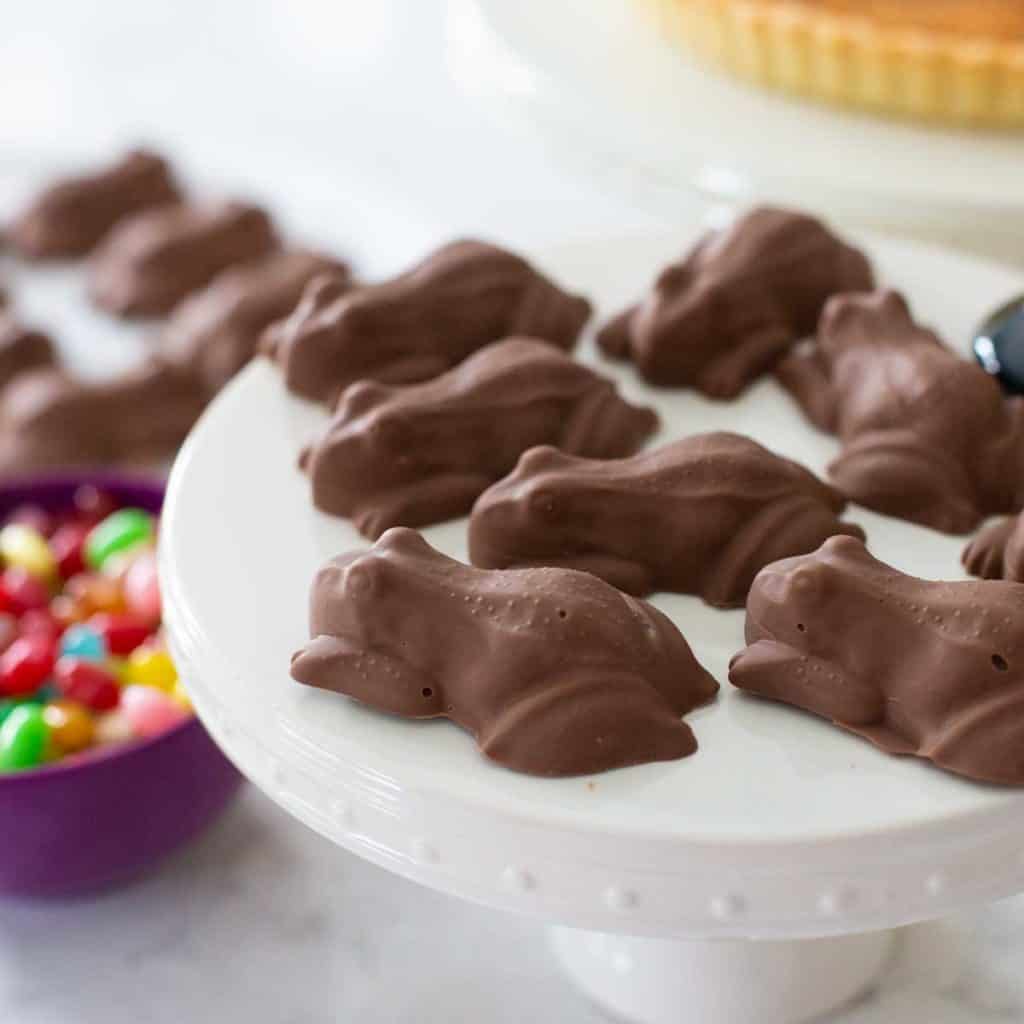
We gave the candies 3 - 4 hours to fully set before popping the chocolate frogs out of the mold.
Some of our caramel pecan frogs had some of the filling eventually ooze out of the sides, so be sure to place them on a rimmed cake plate or platter. They were still utterly delicious and by far my favorite flavor of the bunch.
Variations
The girls had so much fun coming up with other ideas for filling the chocolate molds:
- Pretzels - crush up salted pretzles of any shape
- Oreo Cookie - cookie crumbs would be even easier to add than bigger chunks
- Trail Mix - chopped up dried cranberries and peanuts
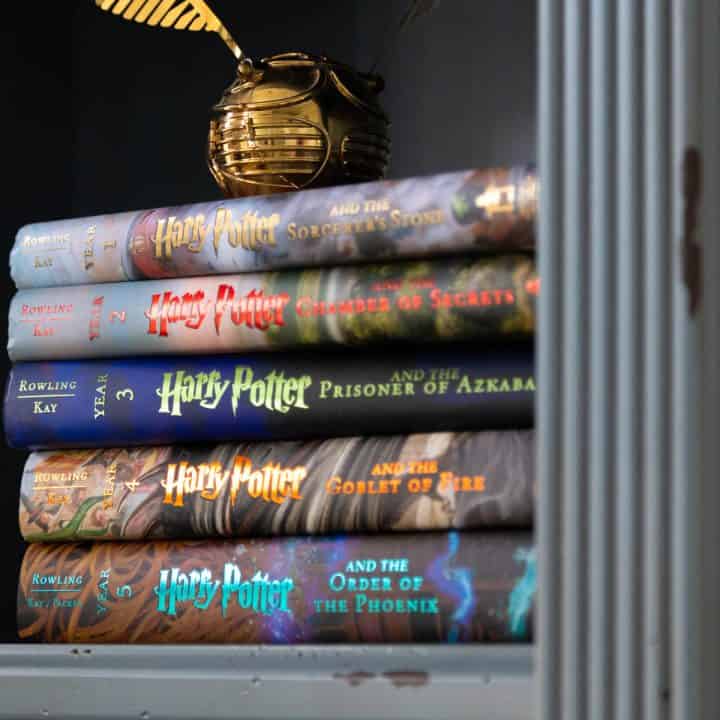
More Harry Potter Ideas
If you're excited to share Harry Potter with your kids, why not start your own family Harry Potter Fan Club??

📖 Recipe

Harry Potter Chocolate Frogs
Ingredients
- 1 (12 oz) bag of chocolate melting wafers
Fillings (Optional)
- 1/2 cup crushed Heath bar candies
- 1/2 cup mini marshmallows chopped
- 1/2 cup chopped pecans
- 1 container of caramel sauce
Instructions
- Place silicone frog molds on a large baking sheet with parchment paper. This will help you move the chocolate frogs around your kitchen while they are filled but not yet set.
- Place the chocolate melting wafers in a microwave safe bowl. Heat the candy at 50% power for 1 minute and stir. Continue to heat the candy in 30 second increments, stirring vigorously each time. Do not overheat the chocolate. It will melt and become smooth with enough stirring.
- Use a small spoon to add a dollop of chocolate to one frog well. Nudge the chocolate all around the bottom and sides of the shape. Be sure to coat all the details (nose, tail, toes, etc.) in chocolate but the well should only be 1/3 full.
- Sprinkle in your desired combination of fillings, but be sure to leave room to fill the top of the shape with more chocolate. Gently press the fillings into the soft chocolate below but don't press it all the way down to the edge of the mold.
- Add another dollop of chocolate over the fillings and gently nudge it all around the surface so that the chocolate meets the sides and completely covers all the fillings.
- Work one frog at a time. Once the first is finished, repeat with the remaining wells.
- Set the candy tray aside for 3 - 4 hours to completely set before popping the candy out of the mold.
Recipe Notes
Save This Recipe to Your Recipe Box
Find this delicious recipe next time you visit by saving it to your very own recipe box on my site. All your favorites stored in one easy place!
My thought was playing with my fiance Craig is helping me with my games 🎮 of Harry Potter puzzles and spells, and Harry Potter Hogwarts Mystery. Or Hogwarts Legacy deluxe edition games.