How to Use Cake Strips for Perfect Layers
How to use cake strips to bake perfect flat cake layers for a homemade birthday cake. This simple trick works best with a boxed cake mix or your favorite cake recipe.
One of the most common frustrations for beginner bakers is how to bake a perfect layer cake with even layers.
I struggled with that for many years before I finally discovered the best solution to baking even cake layers.
Now my layer cakes turn out perfectly each and every time, as long as I take a few minutes to prep my baking pans and use fabric cake strips.
You can use these tricks on a boxed cake mix or your favorite cake recipe that works in 2 round cake pans.
Why This is the Best Method
When I first started baking homemade birthday cakes for my family, I was consistently frustrated by cake layers that baked up with a rounded dome top.
Trimming that top always made a crumby mess and made the cake extremely difficult to frost.
Once I discovered this baking method using cake strips for perfectly even layers, all my layer cakes turn out flat each and every time.
Flat cake layers are so much easier to frost and stack and make a much more stable birthday cake.
Supplies You Need
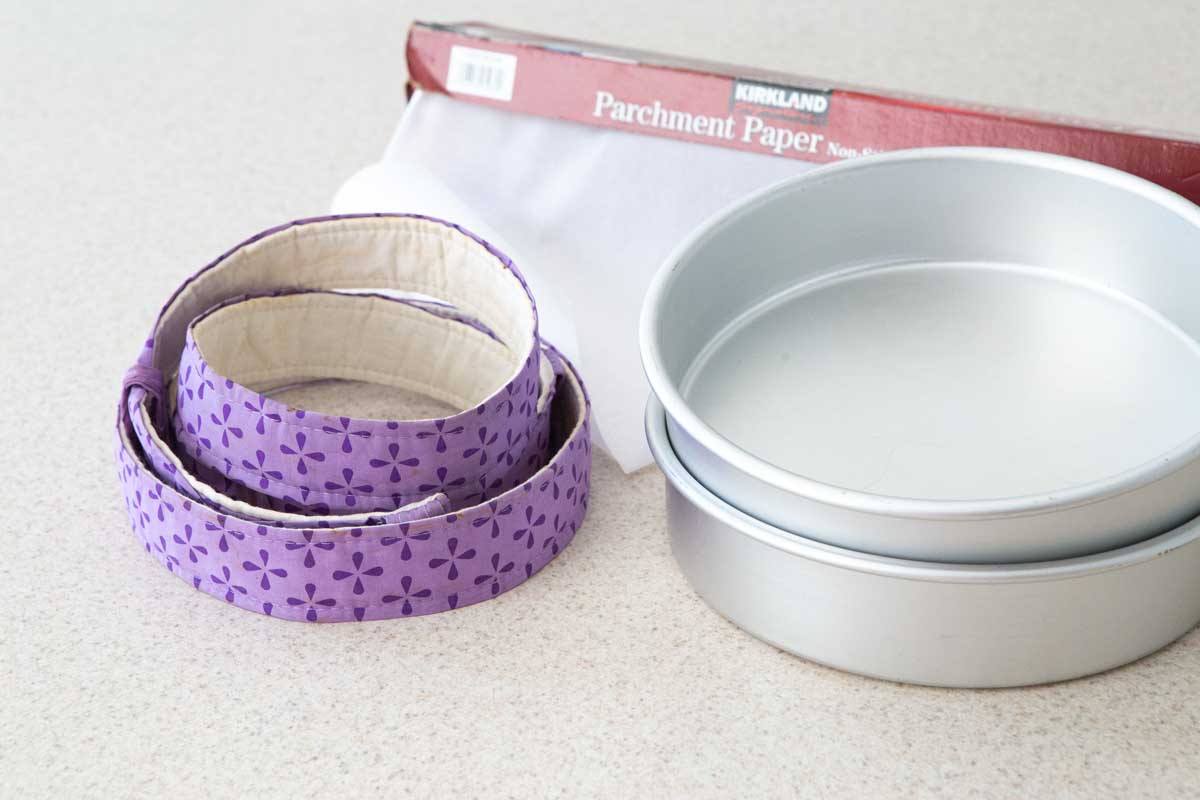
If you want to bake perfectly even cake layers for a homemade birthday cake, you will have the greatest chance at success if you stock up on a few very simple but essential tools:
- Round Cake Pans: Round cake pans are the easiest to work with when baking a layer cake. I prefer this set here.
- Fabric Cake Strips: Cake strips are my absolute favorite tool for making perfectly even cake layers. All the tips you need to know in how to use them are listed below. You can buy a set of fabric cake strips here.
- Parchment Paper: A baker's essential. This will help ensure your perfect cake layer comes out of the pan without breaking.
- Pencil or Marking Tool: To help trace the pan on the parchment.
- Scissors: To trim the parchment to fit the pan.
- Softened Butter: To grease the pans to help the cake release properly.
- All Purpose Flour: To help ensure your cake releases from the pan.
Why Cake Strips Work
The science behind the simple fabric cake strips makes so much sense!
When you add cake batter to a metal baking pan and put it in a hot oven, the heat from the oven warms the pan itself before it can get to the cake batter.
This means that the cake batter touching the hot metal pan will bake faster than the cake batter in the center of the pan.
The slower-cooking cake batter in the center has a longer chance to rise than the outer edges touching the hot pan.
By wrapping the metal cake pan with cold water-soaked fabric cake strips, you keep the temperature of the metal pan cooler so that the center batter has a chance to bake for the same time as the batter closer to the edge.
Thus, perfectly even cake layers!!
Soak the Cake Strips
The very first thing to do is to soak your cake strips in a large bowl of cold water.
Completely submerge the cake strips in the water so they can become completely saturated.
You may need to place a heavy plate or bowl over the strips to help keep them from floating on the top.
Let the cake strips soak while you prepare the cake pans and cake batter. They should be ready to be placed on the pan edges just before you're ready to pour the batter into the pan.
Prepare the Cake Pans
Want to Save This for Later?
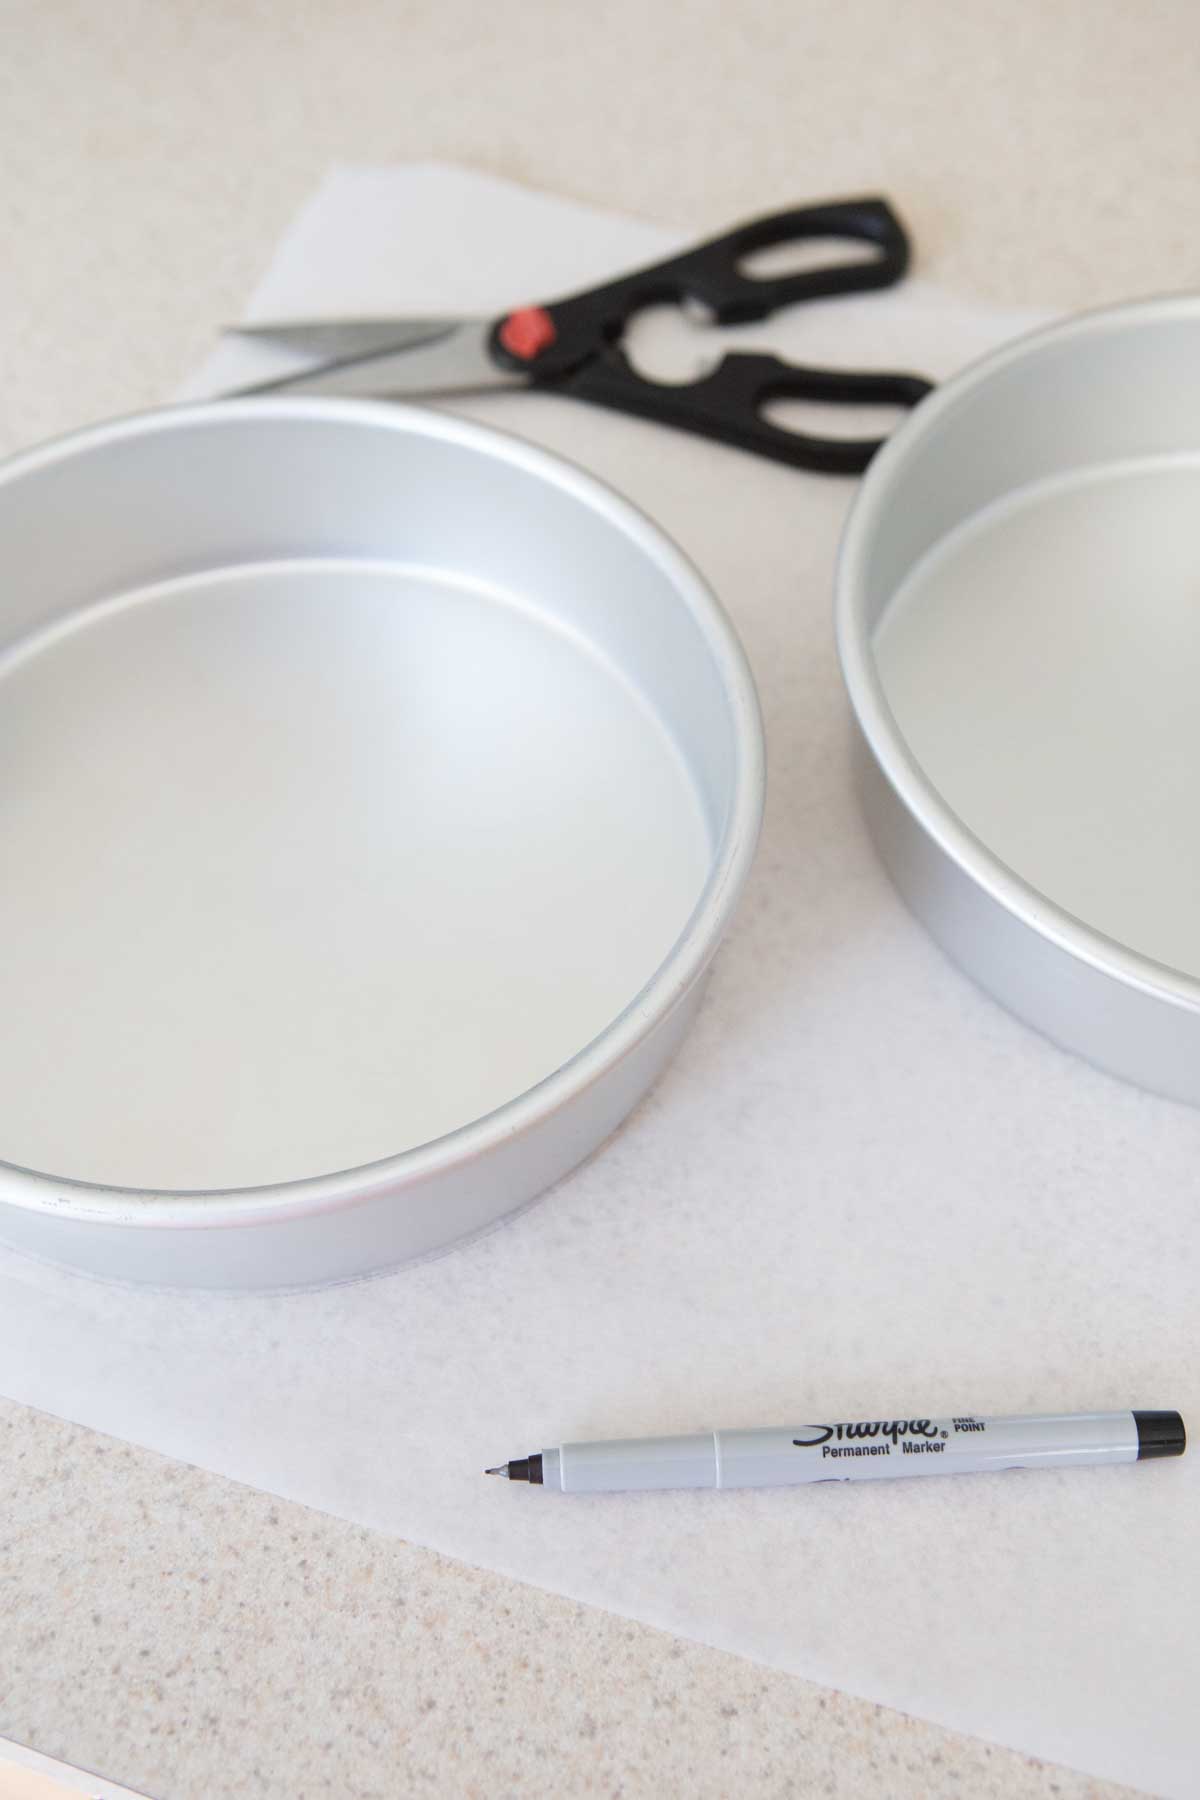
While the cake strips are soaking, place the cake pans on a piece of parchment paper.
Trace the pans with a marking tool: a pencil, pen, or sharpie will work just fine.
Use a scissors to trim the parchment circles just around the INSIDE of the circle you traced.
This is important for two reasons:
- You want to trim away the marked lines so that you don't have pencil or marker baking into your cake.
- The slightly smaller circle will help ensure the paper lays flat on the bottom of the pan.
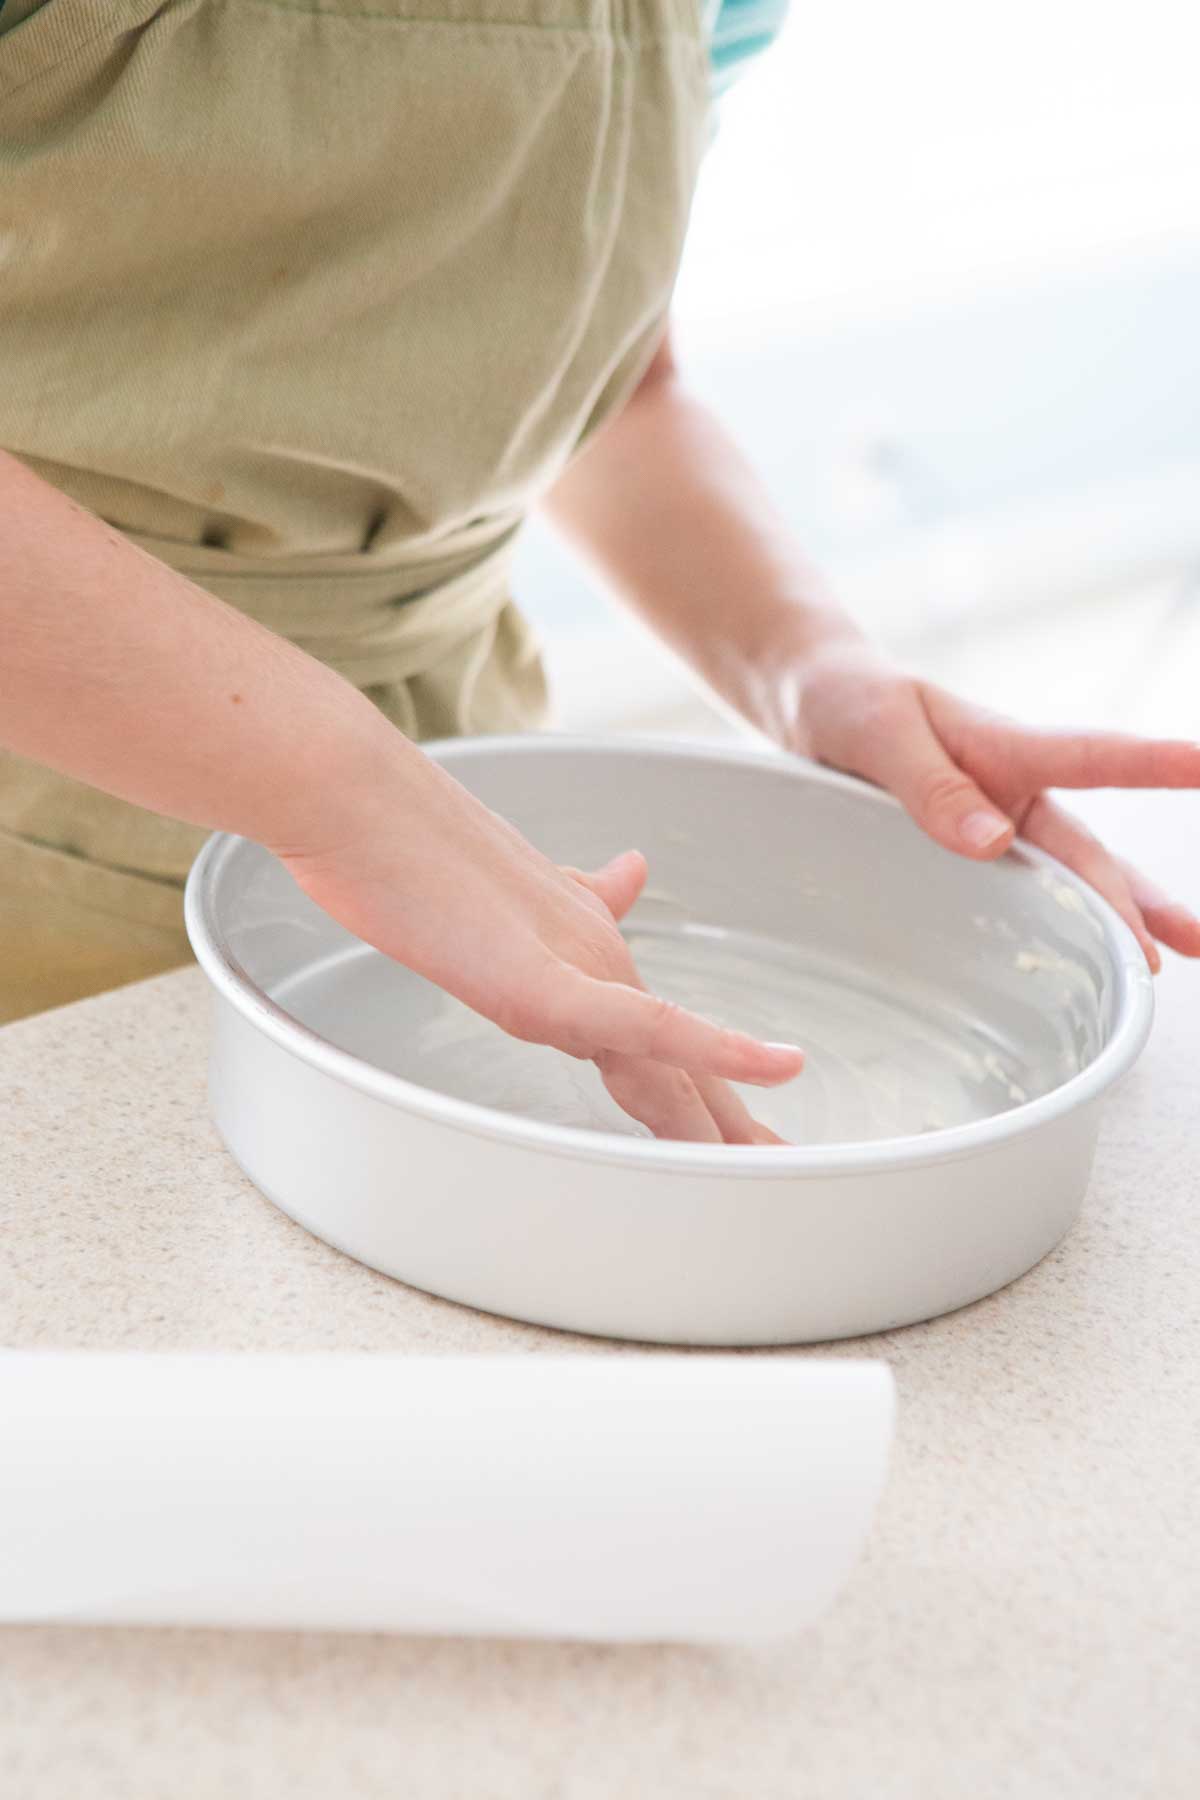
Rub 1 tablespoon of softened butter all around the inside of each cake pan.
While your hands are still greasy from the butter, place each parchment round on the bottom of the pans.
Use your buttery hands to rub all excess butter onto the top of the parchment paper and smooth it into place.
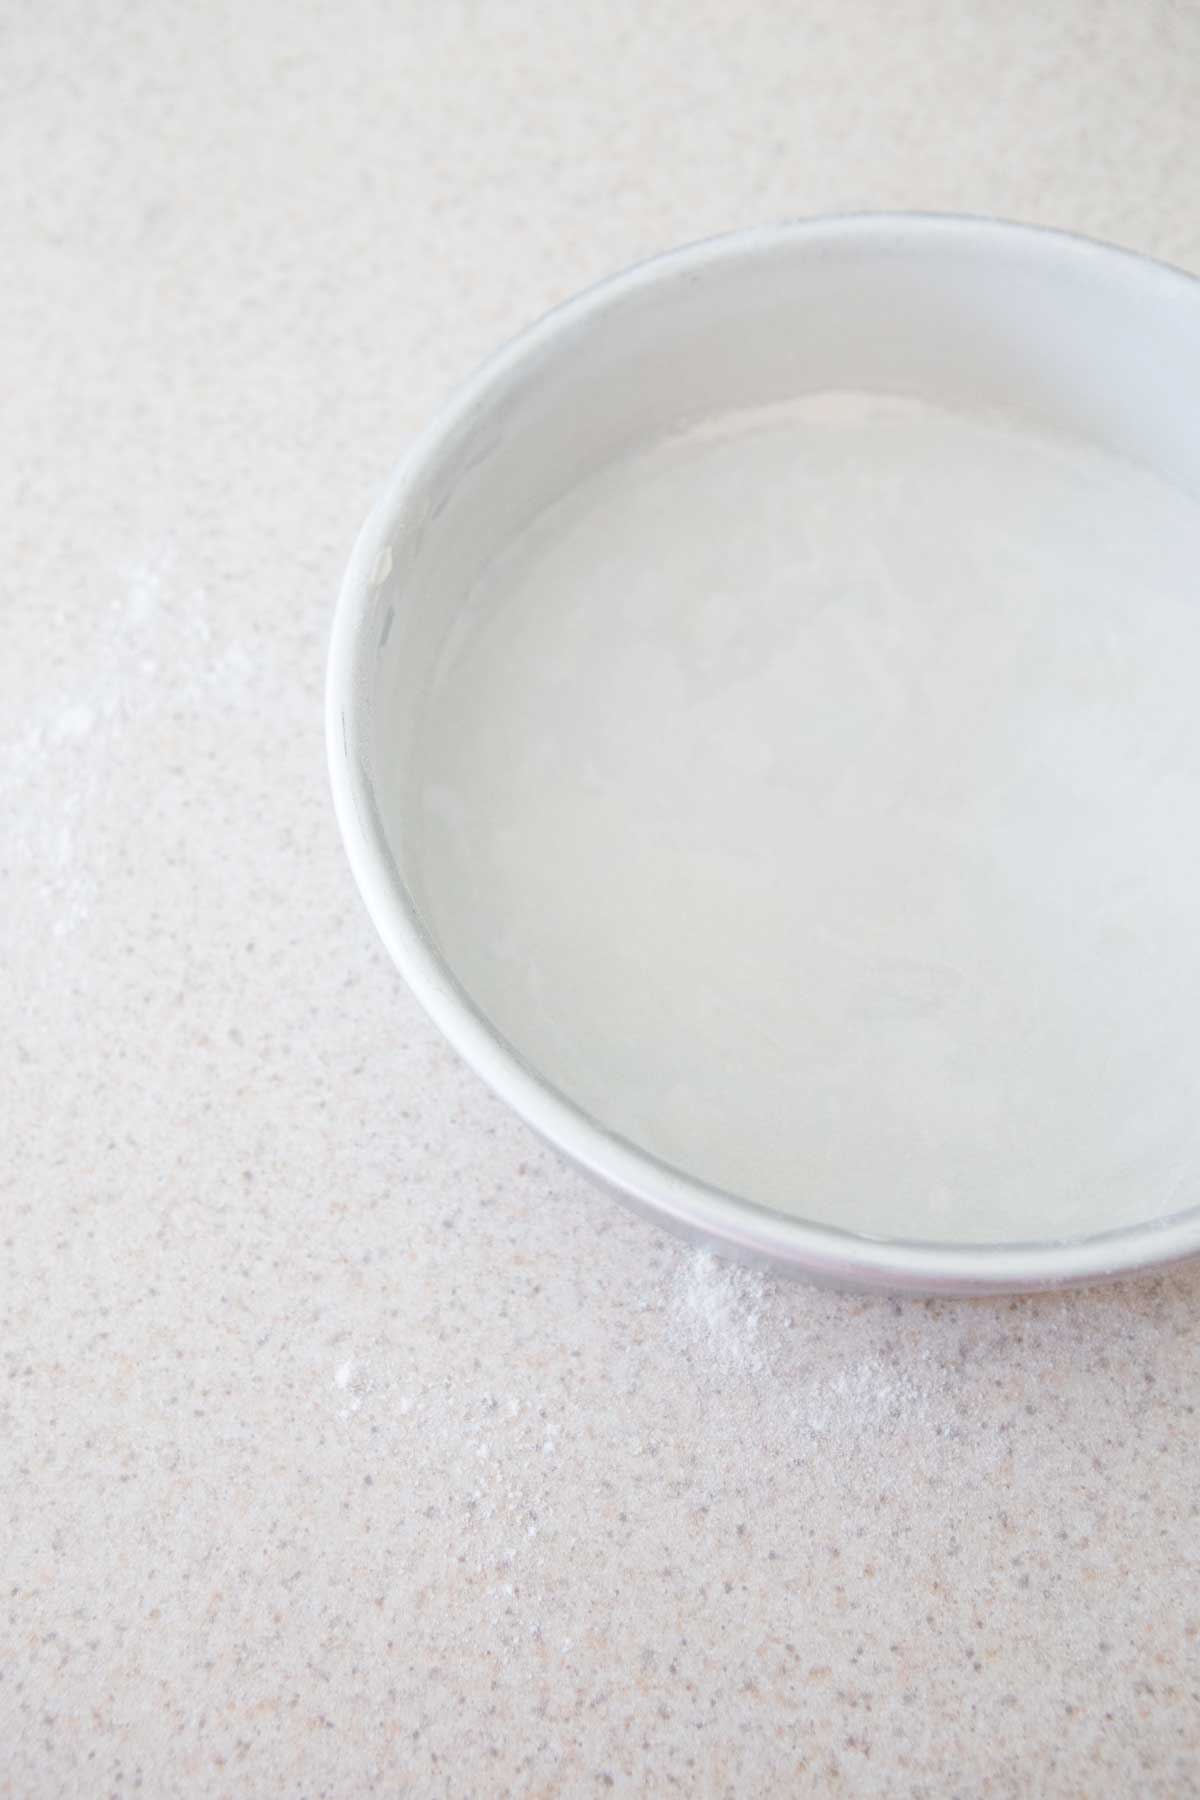
Add a tablespoon of all purpose flour into one of the cake pans.
Jiggle the pan around so that the flour coats the entire bottom and sides of the pan.
Tap any excess flour into the second pan and repeat with the second pan.
Tap any excess flour from the second pan into the sink.
Prepare the Cake Batter
It is important to prepare the cake pans before you begin to work on the cake batter because you don't want the batter to sit too long while you work on the pans.
It is more efficient to be able to just pour the batter into the prepared pans.
At this point, mix together your cake batter recipe.
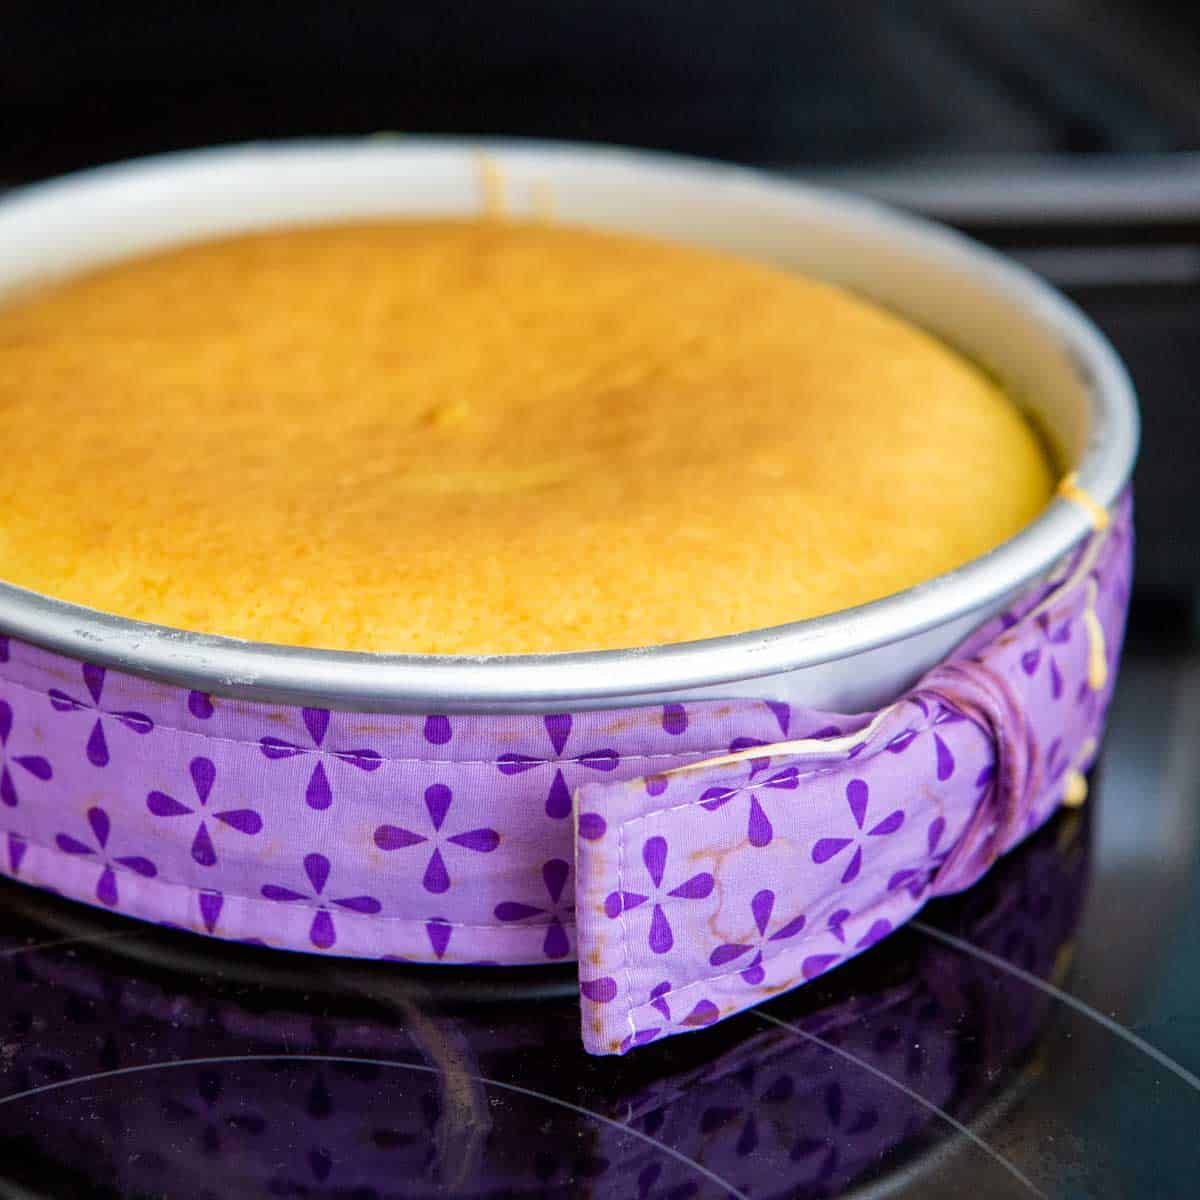
Apply the Cake Strips
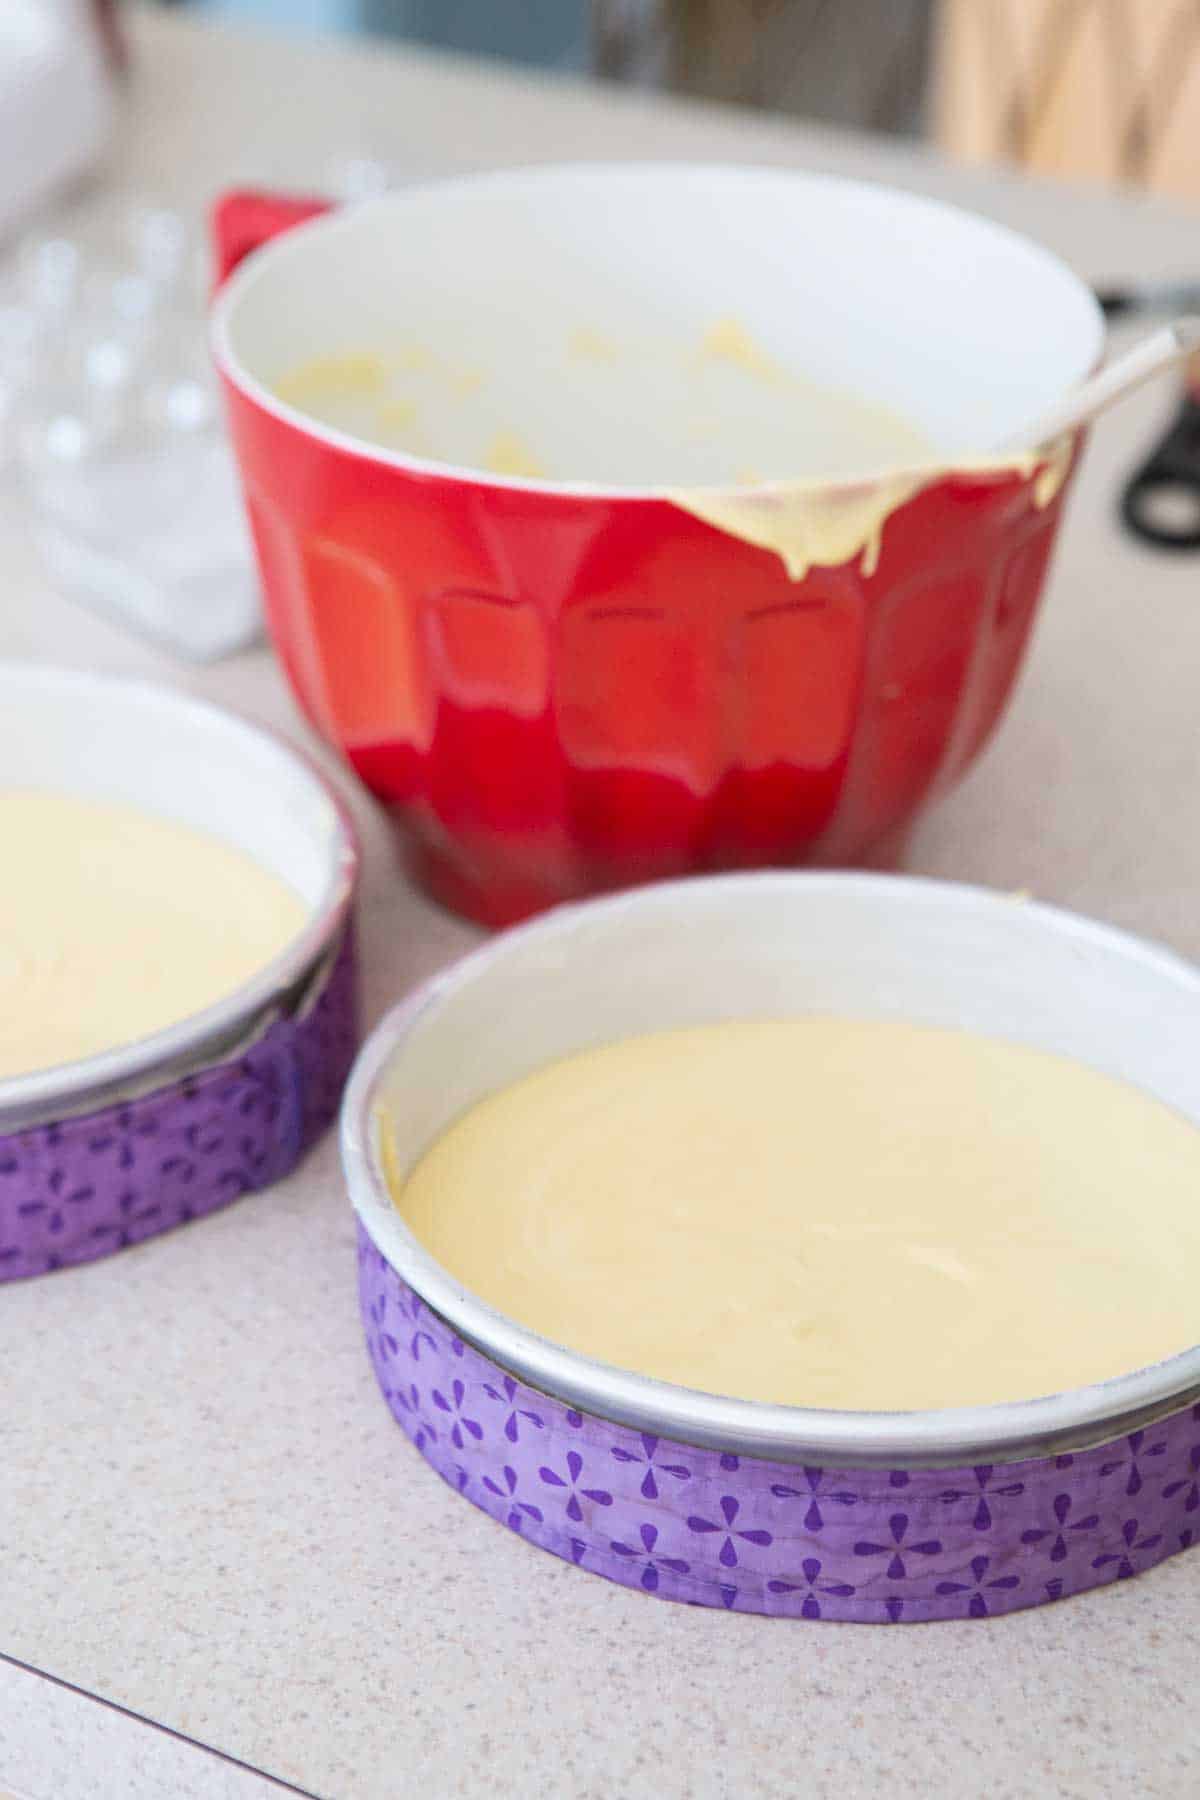
Before you pour the cake batter into the pans, get the cake strips into place.
Drain them from the water and squeeze them over the sink to remove as much excess water from the cake strips as you can.
Wrap one cake strip around the outside of each baking pan and secure them into place. They should fit snuggly up against the side of the pan.
Pour the cake batter into the prepared pans.
Bake the Layer Cake
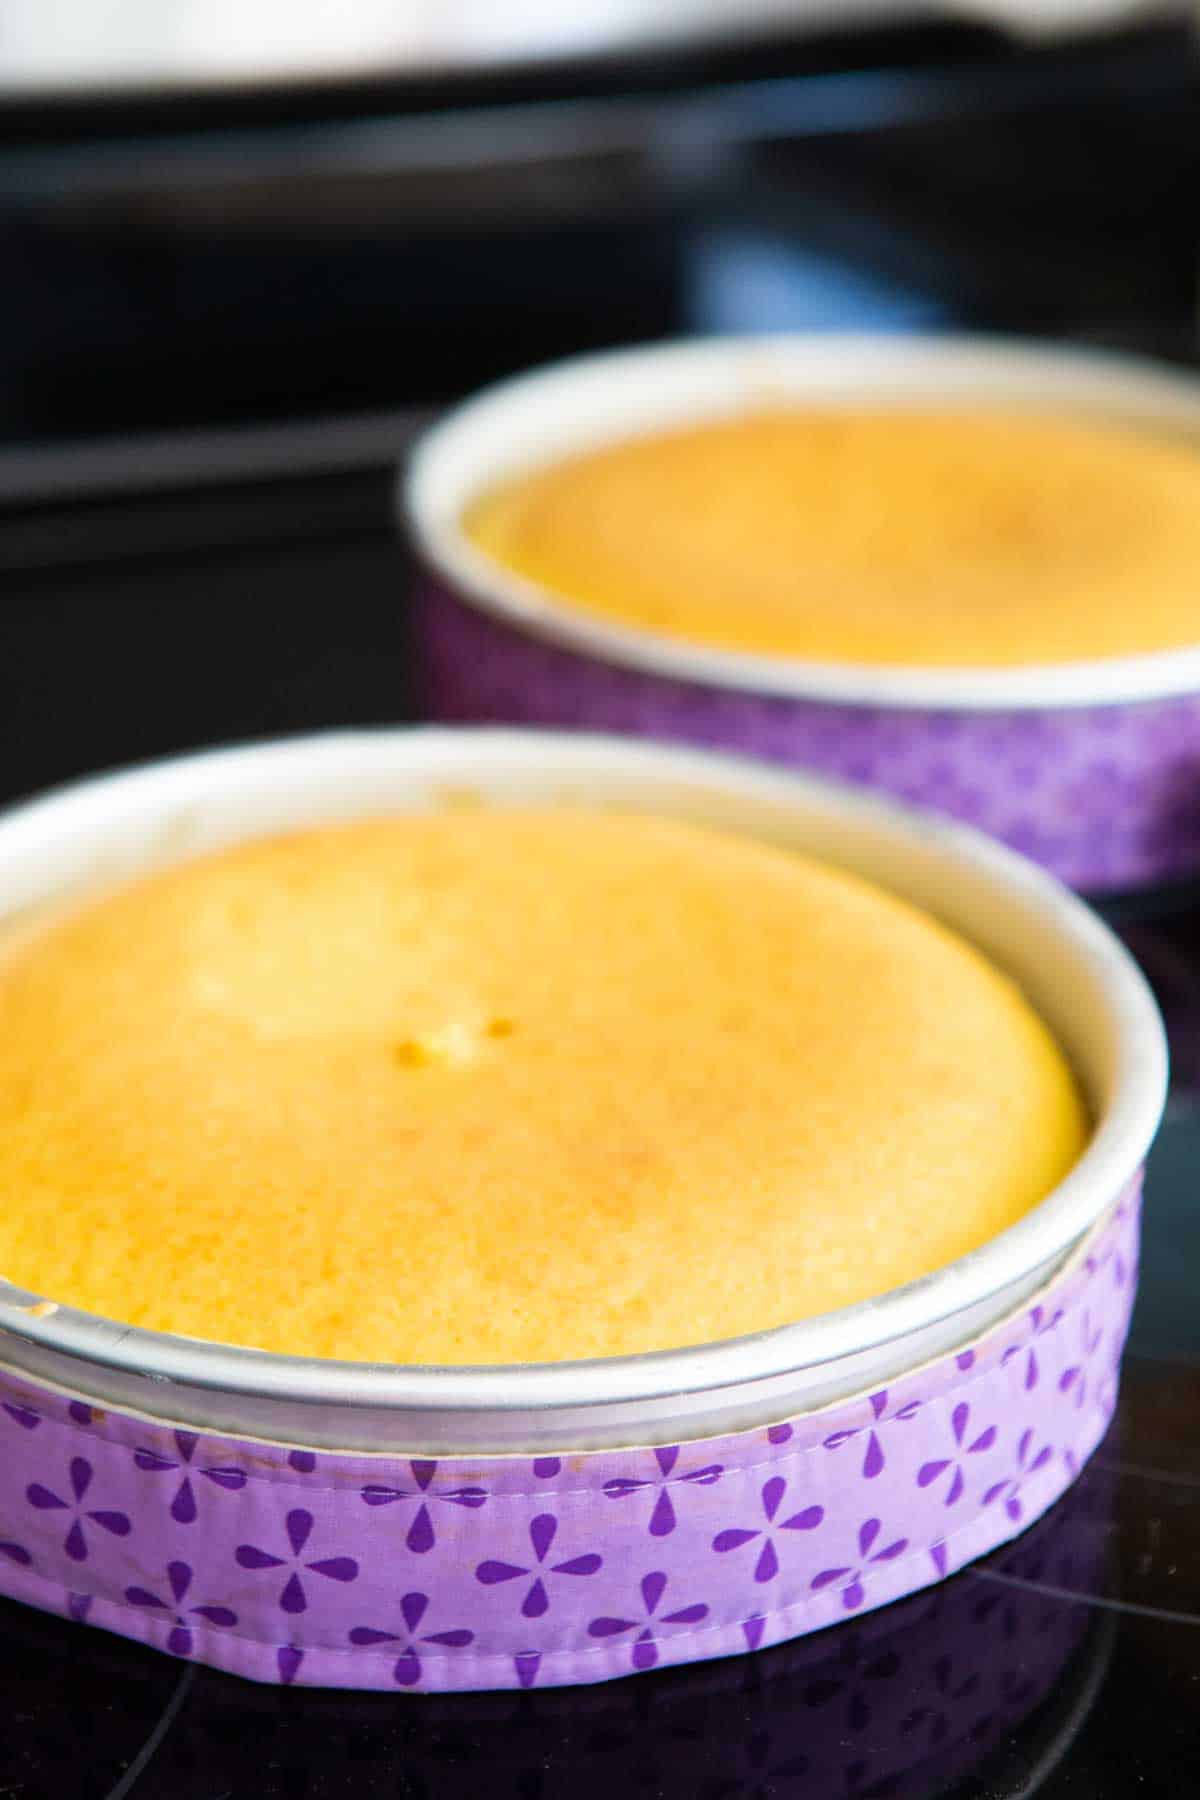
Bake the cake according to your recipe's instructions.
The batter should cook perfectly evenly but the pans may still need to be rotated within your oven for even browning.
FAQ
Cake strips are excellent tools for helping you bake perfectly even cake layers because they keep the temperature more consistent while the cake bakes. They should not require additional time for baking but you should still test your cake with a toothpick to ensure doneness before taking it out of the oven.
Fabric cake strips are incredibly practical baking tools since they can be reused multiple times. Simply soak the cake strips in cold water before each use. Since they are made from fabric, you can wash them between uses as needed.
📖 Recipe

Perfect Flat Layer Cake
Ingredients
- 1 boxed cake mix in your favorite flavor prepared according to package instructions
- 2 tbsp softened butter
- 1 tablespoon all purpose flour
- Prepared frosting or 2 cans of canned frosting
- Optional: Sprinkles and assorted cake decorations
Instructions Start Cooking
How to Prepare the Cake Pans
- Soak 2 fabric cake strips in cold water while you prepare the cake pans and cake batter.
- Trace the round cake pans on a large piece of parchment paper with a pencil. Cut the parchment rounds just on the inside of the line so the circle is barely smaller than the cake pan itself. This ensures it will lay flat on the bottom of the pan.
- Rub 1 tablespoon of softened butter all around the inside of each cake pan. Cover the bottom and sides completely. Lay one parchment circle on the bottom of each pan and use the excess butter from your fingers to rub it into place and coat the top of the parchment with butter. Wash and dry your hands.
- Sprinkle the flour into one cake pan. Over the sink, jiggle the pan so that the flour coats the entire bottom and sides of the pan. Lay the second cake pan in the sink and tap the excess flour from the first pan into the second pan. Coat the second pan with the flour and tap any excess flour out into the sink.
Prepare the Cake Batter
- Prepare the cake mix according to the box instructions. Set aside.
- By now, the cake strips should be ready. Wring them out over the sink so they are not overly saturated with water. Wrap one cake strip around each prepared cake pan and secure tightly. The cake strip should fit snuggly around your cake pan.
- Pour the cake batter evenly between the two prepared pans.
- Bake the cake according to the package instructions. You will not need extra time with the cake strips, they will just help your layers to bake smoothly.
Decorate the Cake
- Let the cake layers cool before turning out onto a cake plate for decorating.
- Carefully run a butter knife around the inside of the cake pan to loosen the cake from the pan.
- Place your cake plate over the cake pan, pinch it together and flip the cake layer out onto the plate. Frost as desired.
- Flip the second layer over onto a clean plate or cooling rack and carefully transfer it on top of the first frosted layer. Finish frosting and decorating as desired.
Recipe Notes
HELPFUL TOOLS
Save This Recipe to Your Recipe Box
Find this delicious recipe next time you visit by saving it to your very own recipe box on my site. All your favorites stored in one easy place!
i have pans that are wider/higher than the cake strips. should the strips be even with the top of the pans or should they be wrapped with the bottoms touching the bottom?
Hi Steph, I usually put my cake strips sort of in the middle. If I had extra-tall pans like you're describing, I'd put them in the middle/towards the bottom. You want them to keep the sides of the cake cool so that the center of the cake can get a jump start on baking before the sides warm up. Hope that helps!
Tiffany