Can't Find it in Stores? DIY Rae Dunn Halloween
Make your own Rae Dunn Halloween inspired Harry Potter decor. Perfect for celebrating Harry Potter's birthday in July or for any Halloween party.
Are you a Dunn hunter?? Do you have any idea what I'm even talking about? Maybe you've spotted the mugs and canisters all over social media with long, skinny letters saying cute phrases. They are most often created by Rae Dunn for Magenta.
Last fall I became a huge fan of the Rae Dunn pieces found at HomeGoods, Marshall's, and TJ Maxx. I learned about them just before Halloween and spent the next few weeks scrambling to collect enough pieces for a fall display.
If you're new to this, seasonal and holiday Rae Dunn is nearly IMPOSSIBLE to find. Shoppers flock the stores before opening and scramble over each other to get the super in-demand holiday pieces. Local trading groups are all over Facebook to help outpace the upsellers who clear the shelves to sell pieces for triple the price (or more!) online.
So what's a Rae Dunn fan with zero time for hunting (and a budget that can't meet upseller demands) supposed to do??
Take the collection you've got and stretch it even farther with a little DIY help!
When Rae Dunn Halloween pieces started appearing in our local HomeGoods this summer, the black and white farmhouse look totally inspired me to turn a few pieces into a Harry Potter display for our Harry Potter movie party on his birthday.
I had been collecting clearance and slightly damaged canisters and pieces whenever I could find them for months for just this DIY project. I'm so excited to finally share my DIY tutorial with you today:
How to make a DIY Rae Dunn Halloween inspired display:
STEP 1: Get some Rae Dunn ceramics
To begin, you need a few Rae Dunn pieces. I look for 2 separate categories:
Items I enjoy as-is that have blank backs: I have several non-holiday pieces that can be used all year long. Examples include: a "cookies" canister that lives in my kitchen, white mugs that say "hello, dream, create," etc. and black mugs that say, "happy, gulp, drink" etc.
Items I can paint: I stalk the clearance section of our stores and look for canisters with painted designs (not the engraved long letters) or even cheaper pieces that have minor blemishes or cracks that can be covered up with spray paint.
STEP 2: Plan your display
I knew I wanted to have a Harry Potter theme that could be flipped around to be more spooky Halloween. I could not find any of the coveted black canisters for my display so I had to DIY them. I don't feel comfortable consuming food & beverage out of spraypainted pieces, so I was thrilled when I found some black mugs at the store that I knew I could flip around to the back and personalize.
I had an idea of which words I wanted to use and then just got creative with the pieces and planned to use a lot of backsides of things I already had around the house.
Want to Save This for Later?
STEP 3: Gather your supplies
To make your DIY Rae Dunn Halloween pieces, you will need the following supplies:
- Rae Dunn canisters, mugs, and other assorted pottery
- A Silhouette Cameo (or Cricut): Don't miss our great intro to Silhouette for beginners here.
- Removable black matte vinyl for white pieces or removable white matte vinyl for black pieces
- Transfer tape
- Matte black spray paint
- Rae Dunn-inspired font: You can find several options over on Etsy.
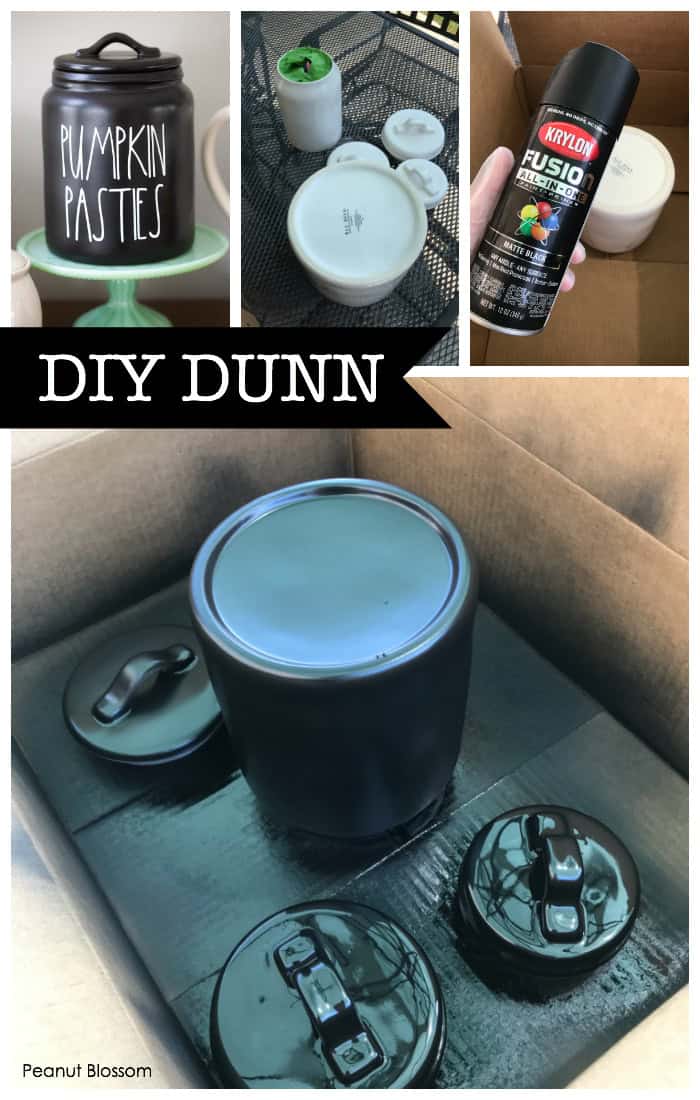
STEP 4: Paint your ceramic pieces
This step is optional if you're just going to work with the colors of pieces you already have. However, if you want some black Rae Dunn Halloween pottery and haven't been able to spot it at the store, this is how you can convert the white pieces to black.
I used this matte black spray paint with great success. I've held up my DIY pieces to the real black mugs and I can hardly tell the difference!
Here are some tricks I learned along the way:
- Crumple up pages from an old magazine or newspaper and fill the canisters to the brim. This will keep the insides the original white color and food-safe if you still plan to use them for storage.
- Use painter's tape to create a clean line around the inside perimeter of the canister. Make sure the edge is far enough in so that when you place the lid on top the edge doesn't show.
- Work in LIGHT even sprays to avoid drips. The paint container said it covers in 2 coats. You are better off with 3 light coats than 2 thicker ones.
For the canisters:
Start with the canister upside down. Spray paint 2 - 3 coats and let it thoroughly dry. Flip right side up and add another 2 - 3 coats around the tapered neck that likely got missed when it was upside down. Let completely dry before moving.
For the lids:
Remove the plastic ring seals and store separately while you paint the lids. Wear a pair of disposable gloves to avoid getting paint on your hands. Spray paint the lids by holding them up with one hand so you can get up under the arch of the lid handle first. Then place the lid down flat and paint the top and sides of the arch.
I made the mistake of spray painting the top of the lid first and then flipping it upside down on the box to paint the underside. When I lifted the lid up, the paint on the top stuck to the box and chipped away. It was hard for me to get an even coat again. If you make sure to keep it upright while drying, you'll avoid this trouble.
STEP 5: Make your vinyl decals
This part was the most fun for me! I loved getting creative with the phrases to put on our Harry Potter canisters and mugs. Don't miss my brainstorm list at the bottom of this post!
Before you create your decal, make sure to measure your piece. If it currently has long letters on it, match the height of the letters already there so you have a better idea of the spacing.
Secondly, measure the width of the piece where you want your decal to go. I made the mistake of making one far too long. Either change the words you plan to use or adjust the height accordingly.
Tips for picking good words for your Rae Dunn decals:
- Shorter words definitely work better.
- If you're using more than one word, be sure the words are similar in length.
- Be flexible about which piece you put each phrase on. Sometimes a word fits better on a canister than a mug, etc.
Great Harry Potter Rae Dunn Halloween decal phrases to use:
Some of the phrases we included in our display were:
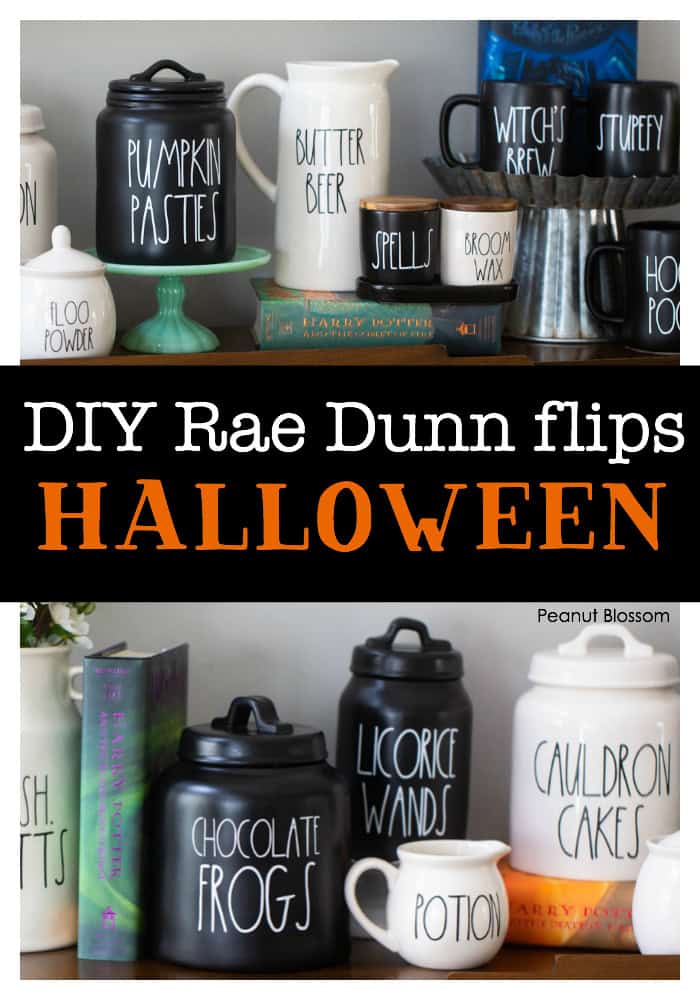
- Cauldron Cakes (on a painted clearance canister)
- Pumpkin Pasties (On a painted clearance canister)
- Licorice Wands (On a painted clearance canister)
- Chocolate Frogs (On a painted cracked Flour canister)
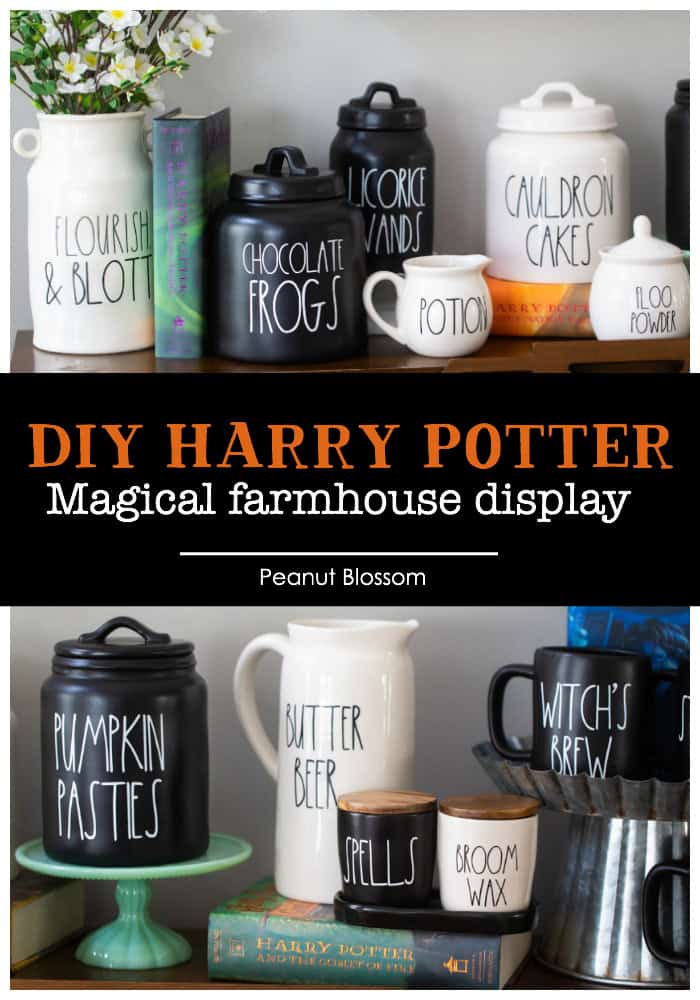
- Butter Beer (on the back side of a Drink pitcher)
- Floo Powder (on the back side of my Sugar bowl)
- Potion (on the back side of my Cream pitcher)
- Broom Wax & Spells (on the back of the salt & pepper set)
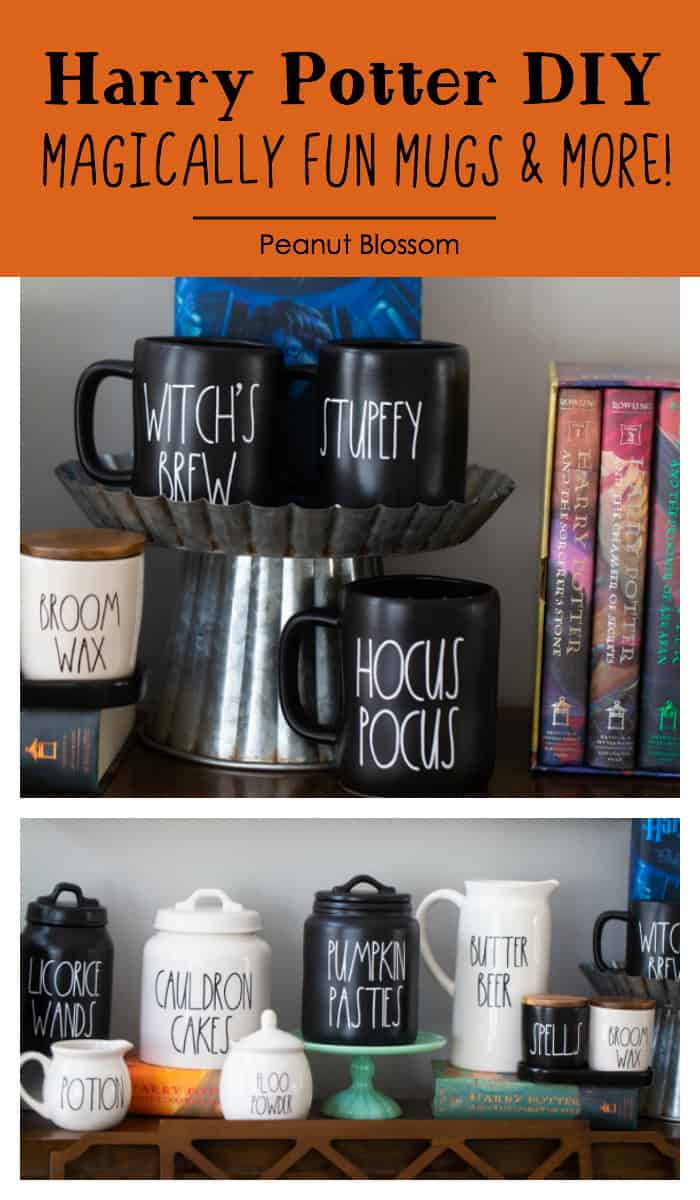
- Witch's Brew, Stupefy, and Hocus Pocus (on the back of black mugs)
- Flourish & Blotts (I added "& Blotts" to the Flourish handled jug)
Have you painted mugs? What color paint would you use for the orange and red like Rae Dunn?
Hi, these are great! What font did you use?