Custom DIY Advent Calendar
One of my favorite Christmas traditions is the children's Advent calendar. Every year, my mom would give us one of the paper calendars with little chocolates hidden behind each door. It was thrilling to be allowed such a treat first thing every morning for 25 days.
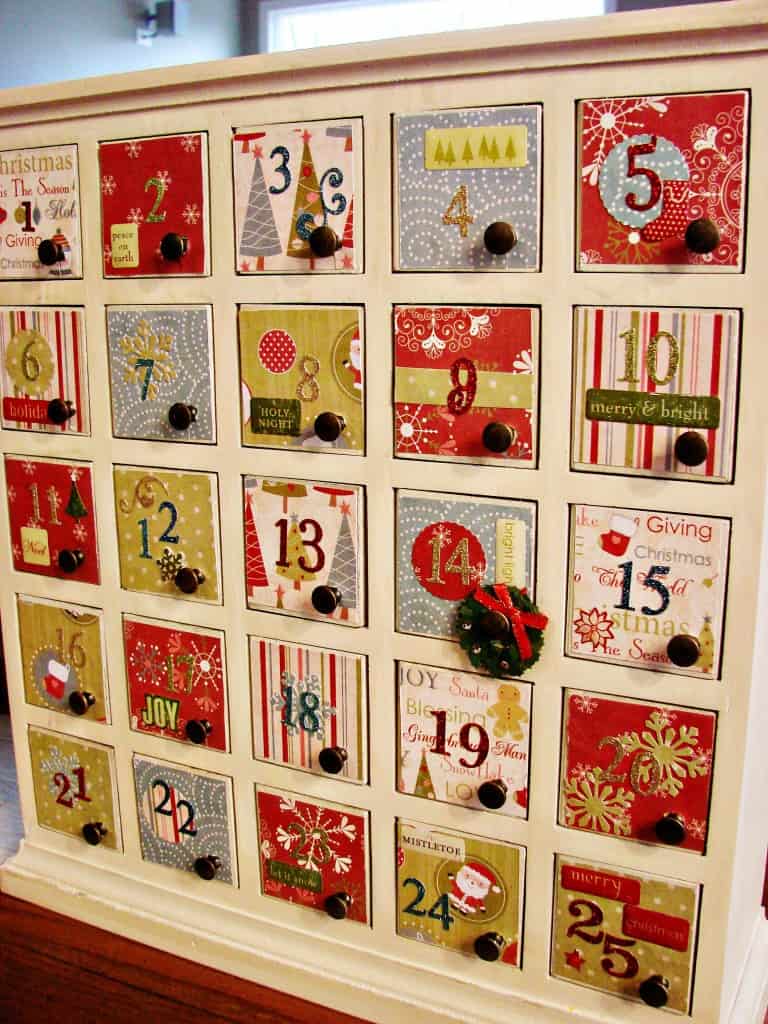
In recent years, more permanent versions of those calendars have been popping up in so many catalogs and stores. I love the little wooden doors and various shapes--houses, cabins, etc. Last year, I was inspired by a crafter on Etsy that had decorated an elaborate wooden house with items from her scrapbook collection. Her calendar was far outside of my holiday budget, so I set out to make my own:
I found the wooden base at Target for $29. The rest of the supplies needed are:
- holiday paper of your choice--a little goes a long way
- numerical stickers
- 1 bottle of Mod Podge
- sponge tip applicator
Lucky for me, my little square doors were exactly the same size as my Creative Memories square maker punch. I just looked at their site and can't find a link for you anywhere and am reeling with shock that they may have discontinued it.
I punched out enough little squares for each of the doors. Then I used a hole punch to make room for the tiny door knobs. I cut a small slit from the bottom of the square to the hole so the square would fit easily around the door knob.
Using the sponge tip applicator, I spread a thin even coat of Mod Podge onto the paper, slipped it over the door knob and held it firmly in place for a few seconds. Once all the papers were glued to the doors, I let it dry overnight.
Want to Save This for Later?
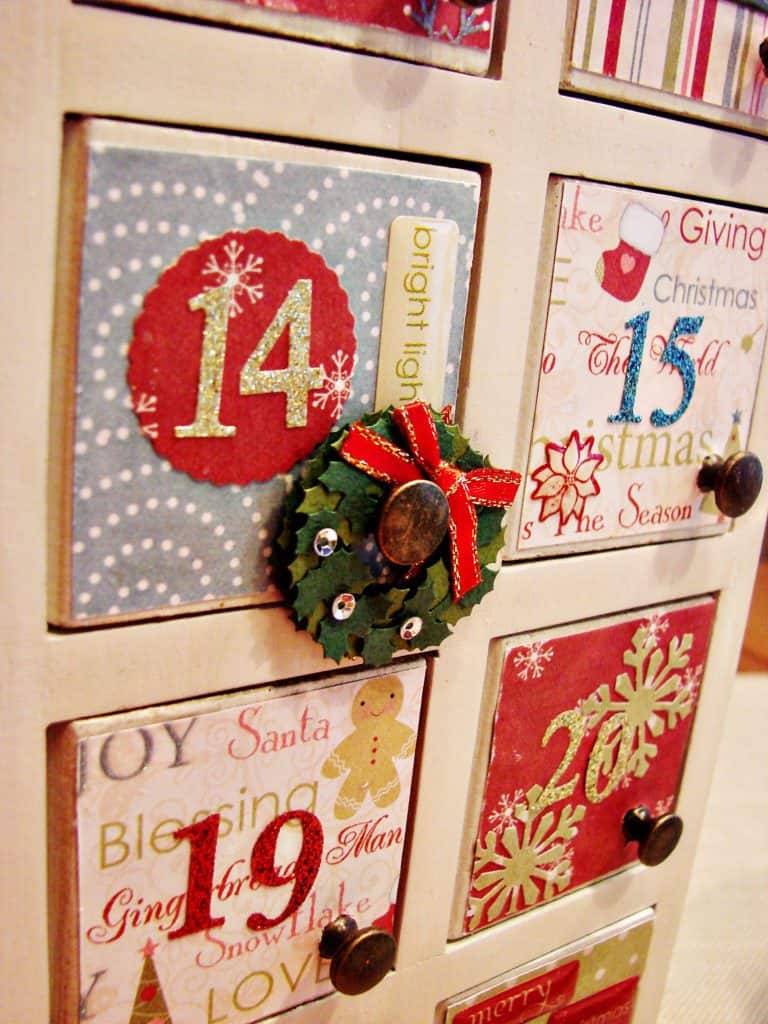
The rest was easy peasy decorating with some bling-y stickers I found at the craft store.
My favorite tiny touch was the miniature paper wreath I use to mark which day we are on in the calendar. I found that in the sticker section and just stuck two wreaths back to back to make it sturdier.
Last year the peanut was too little to be giving candies to, so I just set this out for decoration. This year I plan to put it into full use. I think I'm going to do a mix of candy and small toy items vs. all chocolate. It will depend on what I find in my shopping spree.
Thought I'd share this with you now in case you want to try it yourself before Dec. 1. I'm sure these wooden calendars can be found just about anywhere now!
P.S. If you're looking for supply ideas for the materials I used to make this, you might be interested in these links:
- A mat pad of scrapbooking paper, gives you a nice variety for little cost. A little paper goes a long way with this project.
- The snowflake punch I used for decorative layering
- The scalloped circle punch
- Some simple decorative stickers
- Glittery numerical stickers
- Mod podge!


What was the wooden drawer thing that you found at Target called?? I would love to try to make something similar!! It is beautiful!
Hi Sarah, It was actually a wooden Advent calendar with little doors. The usually carry them each year but the designs and colors vary from year to year. I didn't like the original numbers on the doors but the white went well with my furniture. So I spruced it up. If you find one you could always paint it before starting if you don't like the base color. Good luck!
This is one of my favourite advent calendars! Absolutely gorgeous. Thanks so much for sharing it!
I hope you don't mind but I even posted it on my FB page http://www.facebook.com/EasyFreeSantaLetters
SO. CUTE. Thanks for sharing; I love it!
Bellissimo!
Oh! I just love this! I think I need one of these!
Absolutely gorgeous. I remember the paper ones too - my next door neighbor always gave my sister and I one! Thanks so much for sharing.
This is just beautiful!
Thank you for visiting my blog. We are in Germany with the US Army. We move back to the US in March.
I read an article about putting notes in the pockets drawers. Nice things you and the peanut could do that day. Things like, call grandma, give dad a hug, the dog a bone, draw a picture for auntie, etc.
The only reason I suggest this is because Lola went crazy last year about the candy. Almost to the point that it wasn't fun. She was demanding it 24/7. We actually had to take ours down from the wall for a day. 🙂
Oh wow! That is seriously awesome!!!