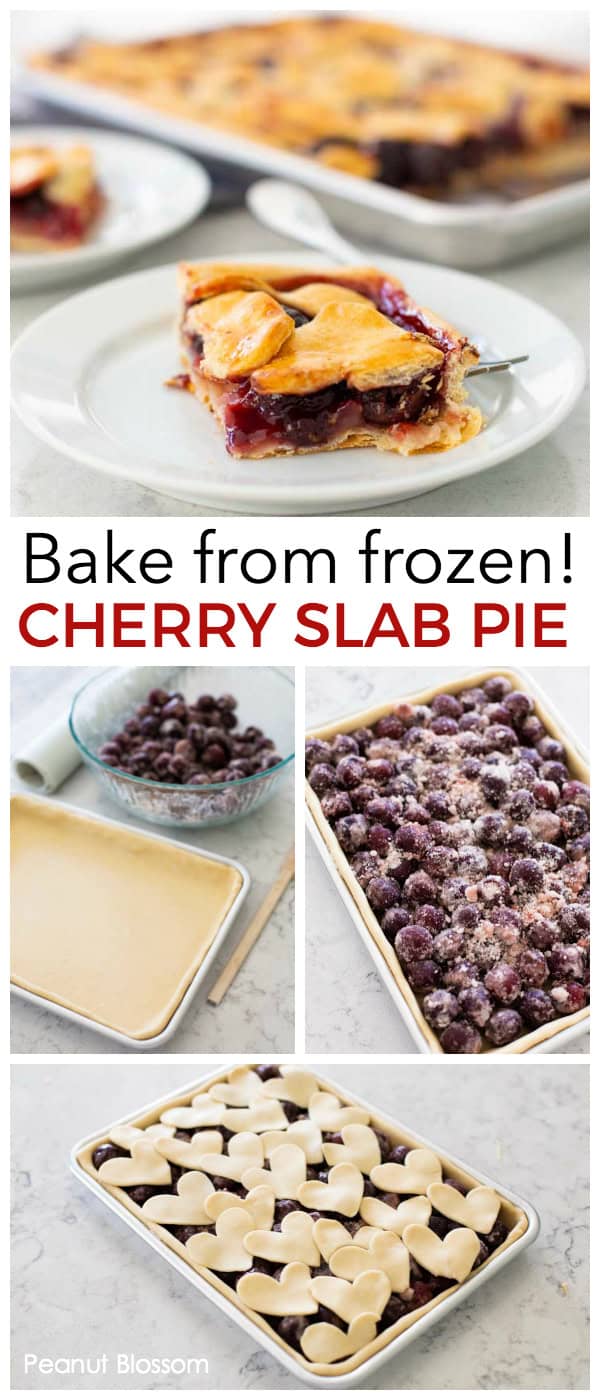
Easy Cherry Pie {With Frozen Cherries}


You can make this delicious cherry pie from frozen cherries all year long! Missed cherry season? Just pick up a bag of frozen cherries at the store. No need to thaw them!

On any given day of the year, you are likely to find a bag of frozen cherries in my freezer.
We have the best uncle ever who supplies us with cherries fresh from his orchard every summer and I love to spread the joy out throughout each season.
This year, I found a whole new way to use our family's favorite fruit. It turns out that using frozen cherries is the secret key to making an extra-flaky pie crust!
The best pie crusts start with very cold dough. Frozen cherries help to keep the crust chilled as you prepare the top crust.
You can assemble the entire cherry slab pie and store it frozen or bake it with the frozen berries the same day you assemble it.
Either way, the slices come out neat and clean from the pan and the crust is so crispy you can almost eat it like a pop tart with your hands!
We enjoy cherry pie all year long but you might particularly enjoy it as a Thanksgiving or Christmas dessert.
This is the perfect make-ahead dessert for your holiday menu.
Jump to:
Ingredients
This recipe is really so easy, the ingredient list is very short and manageable. All you'll need is:
- Fresh cherries: Frozen works best. You can buy them from the freezer section and use them straight from your own freezer. (Want to use canned cherry pie filling? Be sure to see my notes in the assembly section on how to substitute it.)
- Sugar
- Cornstarch
- Almond Extract
- Egg
- Pie Crust Dough
You can use whatever pie crust dough you prefer but my favorite pie crust recipe has been tested for the exact slab pie pan recommended for the cherry pie.
The recipe is shared here for your convenience, but if you want more details you'll definitely want to click here for tips on how to make a perfect pie crust dough.

Frozen Cherries or Canned Pie Filling?
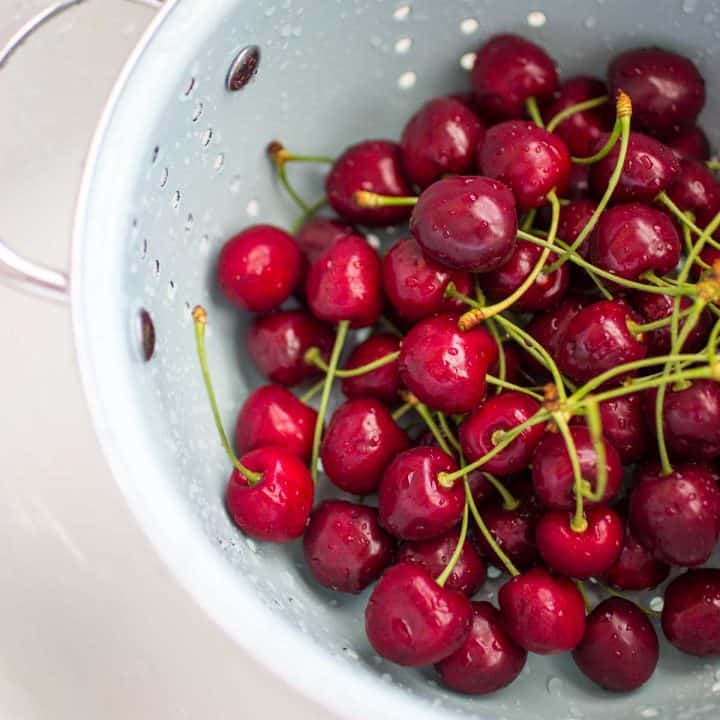
Obviously I prefer to use real fresh cherries, but they work amazingly well in this recipe once they are frozen!
You can buy cherries during their peak season and then learn how to freeze fresh cherries here.
Found them on sale? Stock up because I have 30 fresh cherry recipes you're going to want to try next.
Sometimes fresh cherries don't fit the family grocery budget. A small container of them can get quite pricey, especially if they are out of season.
If you can't find, or afford, fresh cherries right now, you can absolutely still make this recipe with canned cherry pie filling.
I recommend chilling the cherry pie filling in the fridge so that it helps keep the pie crust cold but I do not recommend freezing the canned filling because it would be too hard to spread into the pie crust.
Tools You'll Need
I invested in a few key pieces of equipment and have been using them over and over for a variety of slab pies I'm excited to share with you. These are the items that will help your pie turn out just like my pictures:
- Slab pie pans: This pair of pie pans are so useful for making slab pies or bars. I simply love this pair of baking pans.
- A pastry mat: This is a really handy work surface for rolling out pie dough. Not only does it have a nice ruler for measuring built-in, but I can use it for rolling up a pie crust and keep it in the fridge really easily. I have one from Pampered Chef but this pastry mat is very similar.
- A food processor: You can make the pie dough by hand, but it takes just seconds with a food processor like this.
How to Make Cherry Slab Pie with Frozen Cherries
You can assemble and freeze the entire pie and bake directly from frozen.
Alternatively, you can use frozen cherries and then just bake the pie once you've finished assembly. Either way works!
Step 1: Prepare the Pie Dough
I like to make my pie crust the day before I assemble the pie for a few reasons:
- It breaks down the work into really easy small chunks.
- I only have a small handful of dishes to clean at a time.
- It gives the crust plenty of time to chill before rolling out.
Making the dough takes less than 5 minutes if you have a food processor. The time comes in with the need for it to chill and rest before rolling. If you do that ahead of time, the crust is ready when you are to bake.
If you don't have time to make it the day before, you'll need to plan for 4 hours of chilling time before rolling the dough. I make the crust first thing in the morning so it can chill before lunchtime and then finish the pie in the afternoon.
Step 2: Roll the Pie Crust
Cherry pies create a lot of moisture from all those lovely fruit juices. Since we're using frozen berries, there's even a little more moisture as they thaw and steam in the oven.
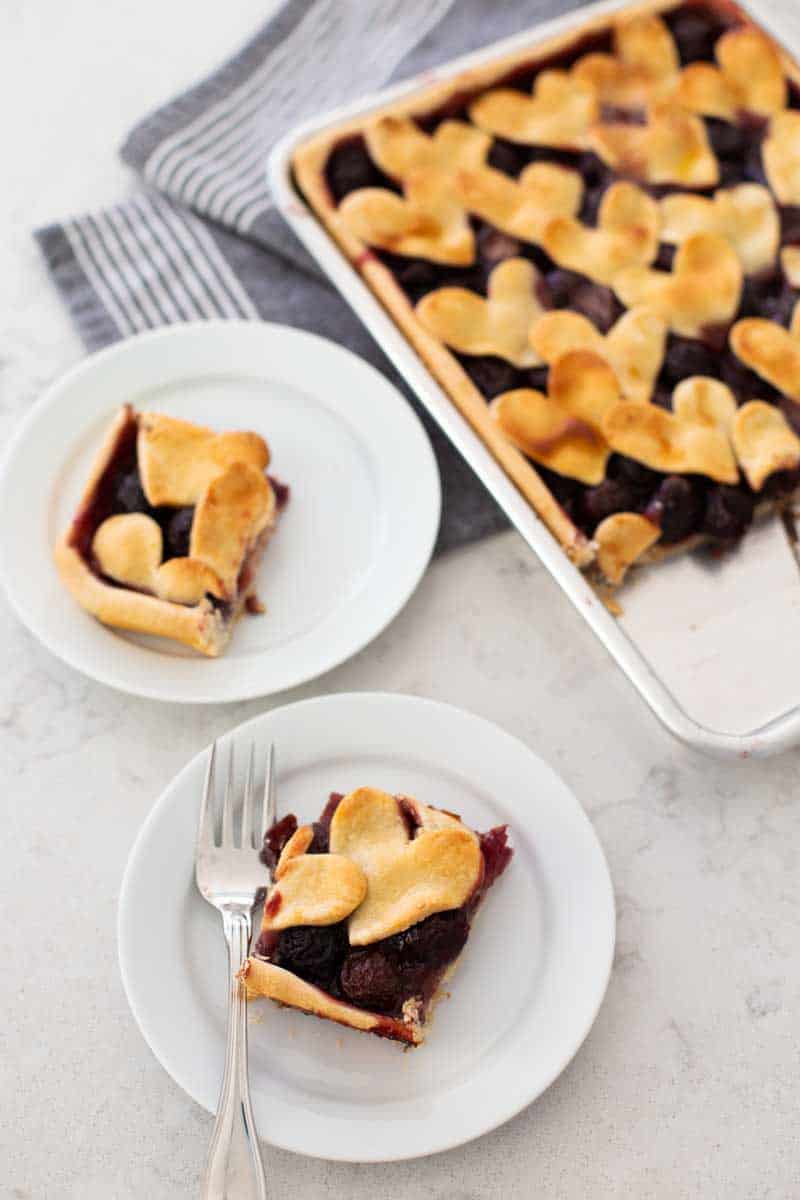
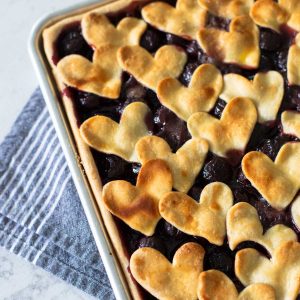
To help prevent a soggy crust, you'll want an open style top crust for the slab pie. One of the easiest methods for making this crust is to use a cookie cutter to cut shapes to scatter over the top, leaving plenty of space between them for the moisture to escape.
You can use a single cutter or pick two in varying sizes/shapes for variety. I loved the sweet and simple hearts scattered over this pie but if you're making this for Thanksgiving, maybe consider a leaf shape. Christmas time could call for Christmas trees or snowflakes. Such a fun way to add some personality to your pie.
First, you'll divide the dough into two pieces -- one for the top crust, one for the bottom.
Roll out the bottom crust first. Drape it gently into your slab pie pan and form a pretty edge. Place the pan in the fridge immediately to keep it cold.
Then roll out the top pie crust. Don't cut it with the cutters just yet. Roll it up and store it in the fridge to keep cold while you prepare the filling. You can roll it up on a piece of parchment so it doesn't stick, but I roll my pie crusts out on a baking mat very similar to this one and then just roll the entire mat up for keeping in the fridge.
Step 3: Prepare the Cherry Filling
There is no need to thaw the cherries before preparing the pie filling.
You just want to be doubly sure that the cherries have already been pitted. I always pit my cherries before I freeze them.
If you bought frozen cherries at the store, just double-check the pits have been removed.
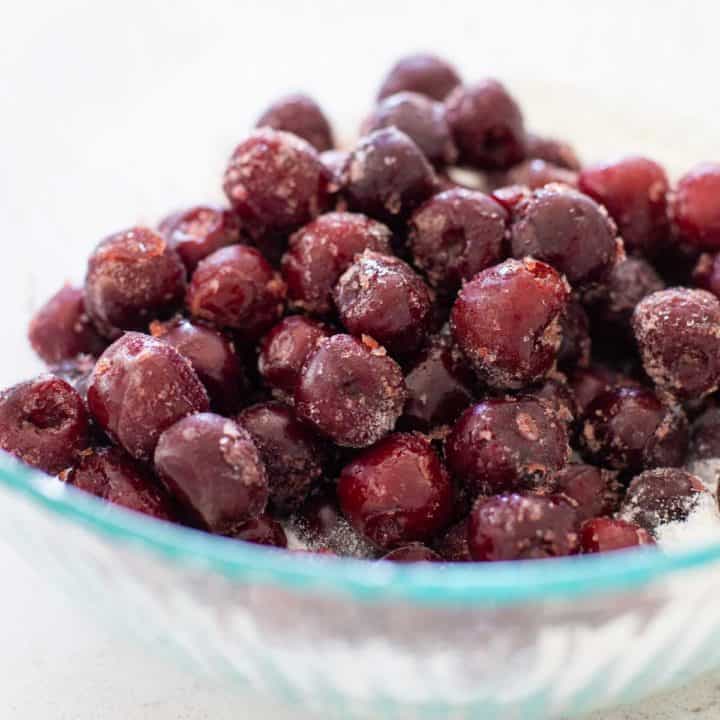
Toss the berries with sugar, cornstarch, and almond extract. Once they are completely coated, scrape the entire mixture into the pie pan and spread into an even layer.
Canned Pie Filling Substitution:
If you prefer to use canned pie filling, do not add the sugar or cornstarch to the mix. The pie filling will be plenty sweet enough on it's own.
However, if you stir in the almond extract, it will help your cherry pie to taste even more delicious. I strongly recommend it!
Step 4: Prepare the Top and Freeze
Now that your pie pan is filled with frozen cherries, it's time to make the top crust. Unroll your reserved top crust and use your favorite cookie cutter to cut shapes for scattering over the top of the pie.
Start at one edge of the pan and work your way across the pie. I made sure that my shapes gently touched the edge of the pie crust all around the pan perimeter. Each piece of pie crust touches at least one other cut shape but there is still plenty of room for the cherries to breathe
Brush the crust with an egg wash and then chill in the fridge while the oven preheats OR freeze the entire pie at this point for baking another day. You'll bake the pie directly from frozen, so this is a great make-ahead recipe for the holiday season.
Step 5: Bake from Frozen
While the oven preheats to 425°F, you can store the pie in the fridge or the freezer. The colder, the better.
Be sure to place a large cookie sheet upside down inside the oven while it preheats. Put the pie on this flat surface for baking and it will help to ensure your bottom crust is baked evenly and comes out perfectly crispy.
Bake the pie for 20 minutes and then reduce the oven temperature to 375°F. Continue to bake for 40 - 45 minutes more or until the crust is golden brown on top and the cherry filling is bubbling.
More Pie Recipes
My favorite pie crust works for a wide variety of delicious homemade pies.
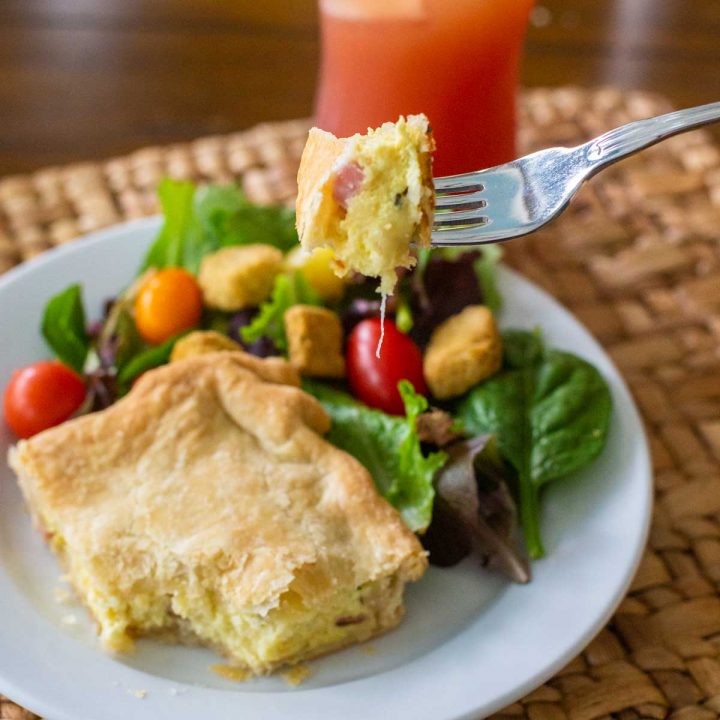
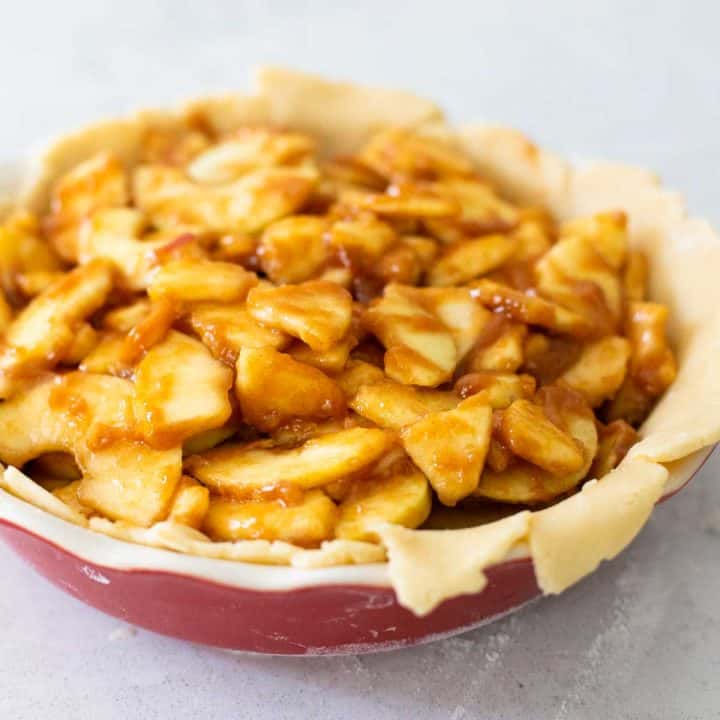
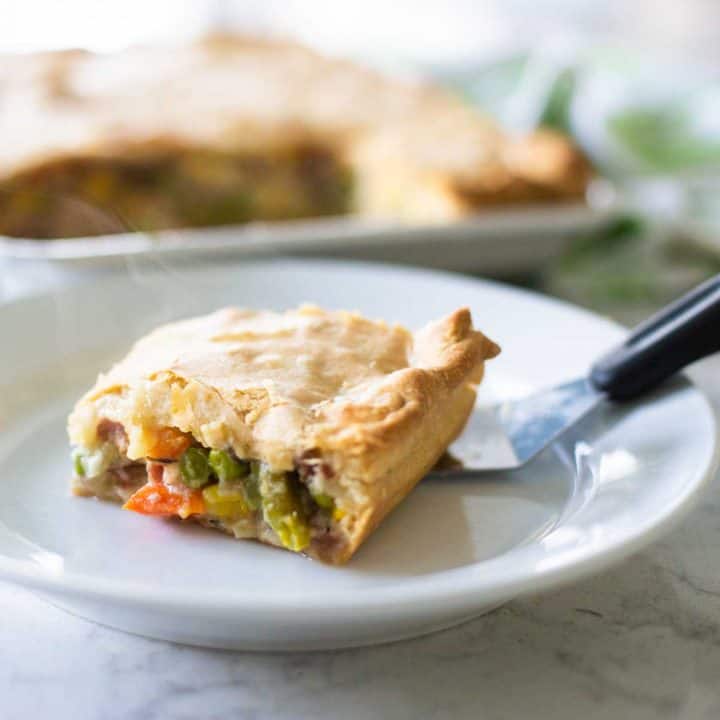
Here are some of my favorites but I know you'll love my apple slab pie for sure!

📖 Recipe
Cherry Slab Pie
Ingredients
- 1 batch of butter pie crust for slab pies see notes
- 5 cups frozen cherries pitted
- 3/4 cup sugar
- 1/4 cup cornstarch
- 1/2 tsp almond extract
- 1 egg yolk
- 1 tbsp cold water
- 1 tbsp sugar
Instructions
PREPARE THE PIE CRUST & CHILL THE DOUGH:
- Prepare the butter pie crust at least 4 hours before you assemble the pie and store it in the fridge to keep it cold. Using a food processor will make it a quick job, about 5 minutes total. Strongly recommend using our favorite flaky butter pie crust recipe here.Chill the dough for a minimum of 4 hours or overnight.
ROLL OUT THE PIE CRUST:
- Lightly flour a working surface. Take the chilled pie crust and cut it in half, making one half just a smidge larger than the other half. Roll the larger half out to an 11 x 15-inch rectangle.
- Gently drape it into the bottom of your slab pie pan and carefully press it up the sides and into the corners of the pan. Tuck the raw edges under to make a pretty crust edge. Place the pan in the fridge to keep cold.
- Roll out the second half of the crust to a 10 - 14-inch rectangle and roll it up in a piece of parchment to store in the fridge while you prepare the filling.
MAKE THE FILLING:
- Using frozen cherries helps to make a flaky pie crust, do not thaw them before using. In a large bowl, combine the frozen cherries with the sugar, cornstarch, and almond extract. Stir together until they are coated in sugar.
- Pour the cherries and scrape all the sugar into the prepared slab pan. Spread them out evenly in a single layer as best you can.
PREPARE THE PIE TOP:
- Unroll the prepared top crust dough. Use a cookie cutter to cut shapes and scatter them evenly across the pie top. You definitely want to leave spaces in between the shapes for steam to escape. You can use different size cookie cutters for a fun variation pattern or keep it uniform with just one size.
- In a small bowl, whisk together the egg yolk, water, and sugar. Brush the mixture over the cut-out shapes (but not the bottom crust's edge).
CHILL THE ASSEMBLED PIE WHILE THE OVEN PREHEATS:
- Place the assembled pie in the fridge or freezer for 30 minutes while the oven preheats.
- Place a large baking sheet upside down on the center oven rack. Preheat the oven to 425°F.
- Place the pie on a large piece of parchment paper to catch any drips from the cherry juices. Place the pie and parchment paper directly on the preheated baking sheet inside the oven. Bake for 20 minutes.
- Reduce the oven temperature to 375°F and continue to bake until the juices are bubbling and the crust is toasty brown, about 45 minutes longer.
- Cool for 3 hours before serving.
Recipe Notes
Save This Recipe to Your Recipe Box
Find this delicious recipe next time you visit by saving it to your very own recipe box on my site. All your favorites stored in one easy place!