How to Make a Tutu: No sewing required!

How to make a tutu with no sewing required! These adorable sparkly tutus for girls can easily be sized to make a simple adult tutu for your next running costume or Halloween party.
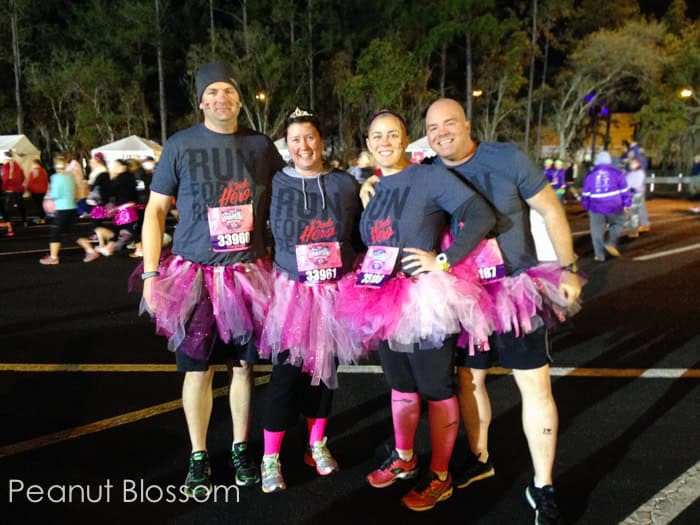
It's tutu time!! We are just over one week out from our Enchanted 10K at Walt Disney World and the time has come to make our running tutus!
In case you missed it, my sweet husband agreed to don a hot pink tutu in order to gather support for St. Jude Children's Hospital. Our team of 4 people has raised nearly $7,000 for St. Jude because of our tutus for adults.
We set out on our fundraising adventure with the offer that for every donation we received, we would add the donor's name on a sparkly ribbon in Tim's tutu. You can read about my love of St. Jude here. We are "this" close to meeting our final goal, so the time came to get the tutu into production!
If you'd like to make a tutu for a run or for a costume for a party or Halloween, I wanted to share this easy no sew tutu tutorial.
How to Make a Tutu
This tutu is perfect for both kids and adults, you simply have to adjust the waist band and quantity of tulle!
Step 1: Gather your materials for the tutu
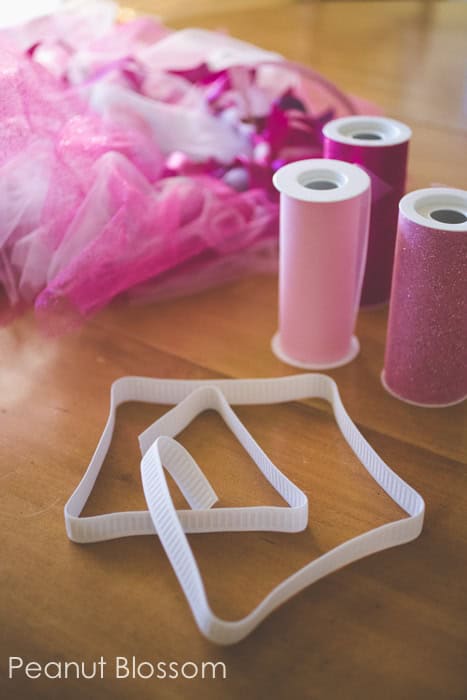
Tutu Waistband Elastic:
I bought this roll of white 3/4 inch non-roll waistband elastic and got two adult-sized tutus out of one package. It would go a lot farther if you were making kid-sized tutus.
30-40 yards of Tulle for Your Tutu
I bought our tulle at Michael's but you can find it cheaper for much larger rolls over on Amazon. They have a great mix of colors, too.
I mixed in a glitter tulle and realized later that there was only 10 yards on the spool vs 20 yards on the spool of the regular kind. I used 2 rolls of glitter tulle and most of a roll of non-glitter tulle for Tim's tutu. If you don't plan to mix in ribbons, you'd need a bit more.
A Note on Glitter: I love how the glitter tulle looks in the end, but be warned that the glitter does not stay on the tulle. Perfect for running at an outdoor race, maybe not so perfect for a child's dress up costume in the house unless you want glitter EVERYWHERE.
2-3 Spools of Ribbon
Do NOT pick the wired kind. Satin is the easiest to work with, but I went for the sparkle and found some glitter ribbon with solid backing for writing names on.
Scissors
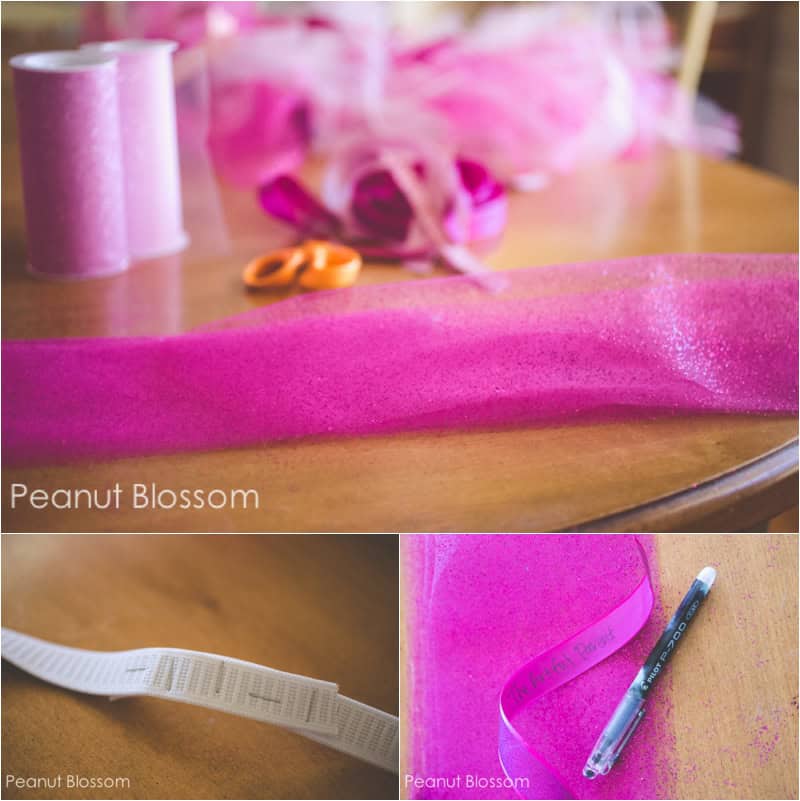
Stapler OR sewing machine OR needle and thread for finishing your tutu waistband
Fine Tip Gel Pen
Do NOT use Sharpies. I tried using our fine tip sharpie and the ink bled/spread on the ribbon. You can see a photo of the pen I used below and find them here on Amazon in several different color options, it worked like a charm!
Step 2: Prep the materials for making your tutu
1. Measure the Tutu Waist Band
The base of the tutu is the white elastic waist band.
I had Tim lift his shirt and wrapped the elastic around his waist where he wanted the tutu to sit. I overlapped the end by an inch or so and then cut it.
You want the elastic to be snug but not too tight since it will stretch. You can always tighten it up later, you can't add length as easily.
Now here is where we get fancy dancy. You can honestly just staple the ends together as shown in the picture. Add them in both directions to keep it extra tight.
The tulle and ribbon will be covering any pointy ends of the staples so you don't need to worry about it being scratchy.
HOWEVER, if you are making this tutu for a child and not an adult, you might want to choose to do a few simple stitches with a needle and thread or a simple X with a sewing machine just to be extra careful though.
This is the only step where any needle and thread could possibly be required.
2. Cut the Tulle into Strips for the Tutu
We're going to be slip knotting the tulle strips over the elastic band to make the tutu.
To measure your tulle, decide how long you want the tutu to be and then multiply the length by 2. This doesn't need to be an exact science.
I had Tim wear his elastic band, I held up the tulle and asked him how long he wanted his skirt, and then just doubled the length. No rulers required.
I cut one strip to the length we wanted and then just sat and cut the rest of the spool into strips of the same length using the first as a guide. You can see them piled up on the table in the photo above.
3. Cut the Tutu Ribbons into Strips
We decided not to slip knot the ribbons and gave each donor their own individual strip. I cut them to be half the length of the tulle strips.
If you prefer keep things very easy, slip knot the ribbons and cut them the same length as the tulle.
4. Write your Names on the Tutu Ribbons
If you're making a fundraising tutu, now is the time to write out all your donors names.
We had 2 different colors for our donors -- a light pink for $20, a brighter hot pink for $50.
I wanted to be sure I had the right quantity of ribbons, so I prepped it all before tying anything.
Step 3: Start Tying your Tutu!
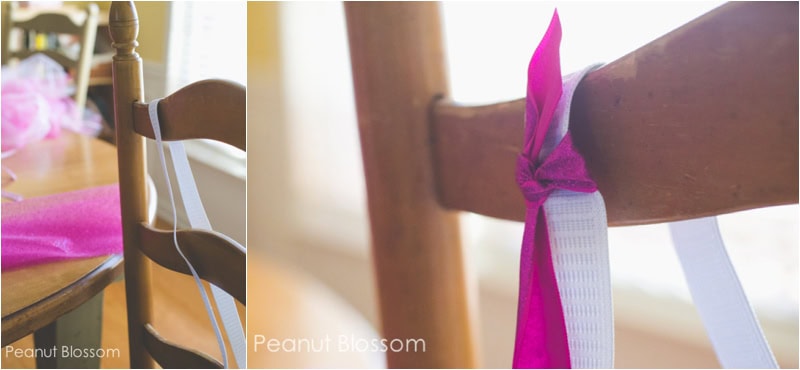
I used the back of a chair to hold the elastic in place while I worked. I definitely recommend this or the whole thing just slips around everywhere.
I started with each donor ribbon and just did a simple knot on one end as you see above. If you don't like the look of that short tail end peeking up out of the tutu, you'll want to cut the ribbons the same length as the tulle and slip knot them.
After each ribbon, I slip knotted the coordinating piece of tulle right next to it:
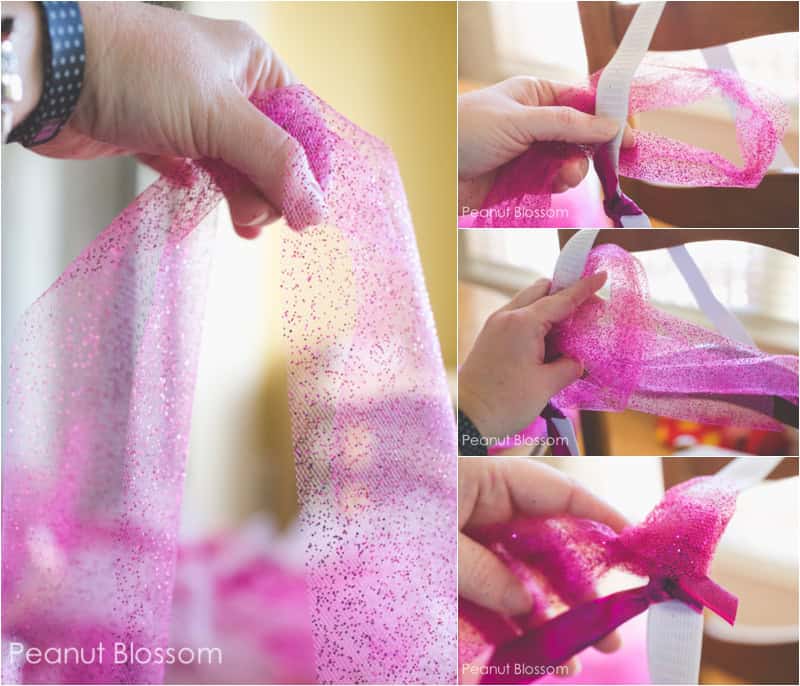
Hold the tulle in the middle, letting the ends hang down.
Use the "U" part of that ribbon to form a loop on the back of the waistband.
Pull the 2 loose ends over the front of the elastic and slip them through the loop in the back.
Pull the ends forward and back down to tighten the knot.
Done! See?? Easy peasy.
And if you're working with glitter ribbon or tulle, this is why you want to do this project OUTSIDE. What you don't see is my hands and clothing completely coated with glitter, too!:

I spread our hot pink ribbon donors around the waistband evenly. Then I went back through and did the light pink. Because the knots aren't too tight, you can slip things around and make room as you need:
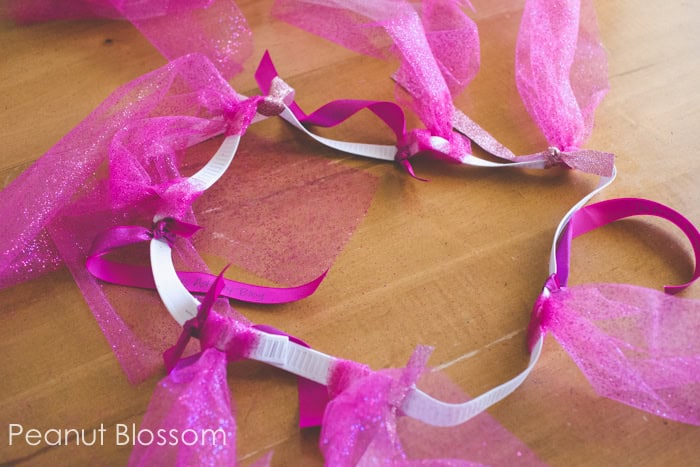
For a more traditional tutu look, you can skip the ribbons altogether and just do the tulle. For us, this project turned out perfectly.
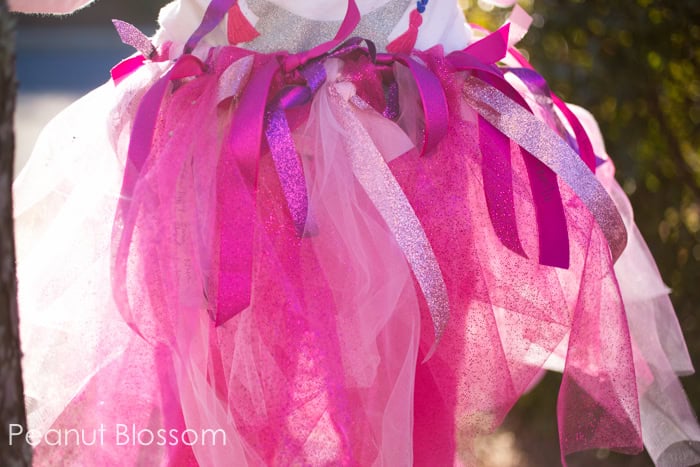
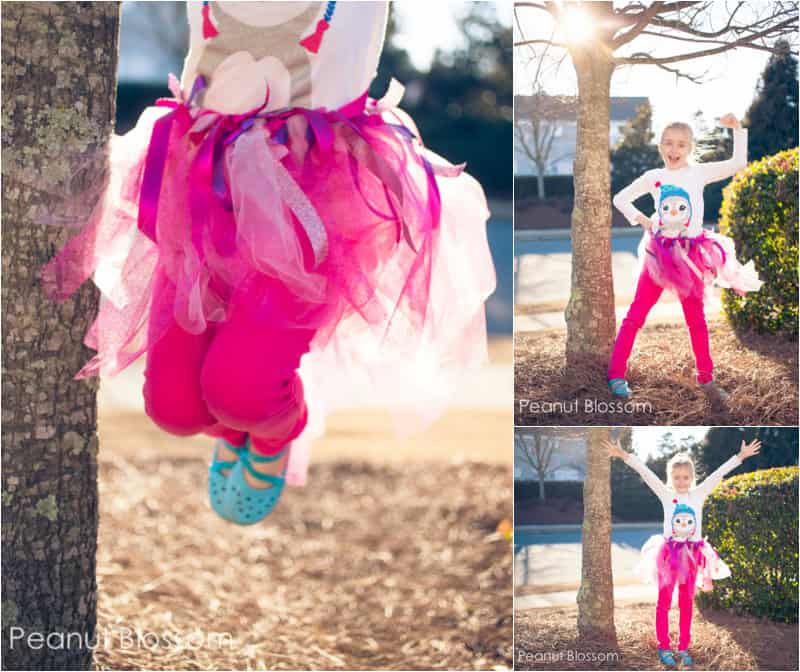
We didn't want to reveal Tim in his tutu until race day, so the Peanut was more than happy to model daddy's costume for this post. (It's clamped in the back to fit her, no Tim doesn't have the waistline of a 7 year old girl. LOL!)
Both girls are so excited to see photos of the big day and they've requested their own tutus to wear in solidarity.
Did I miss anything you have questions about? Let me know in the comments below and I'll try to help!
Edited to Add:
Running for St. Jude at the Disney Princess 10K with my husband and friends was one of the best experiences of my life. Our team raised tens of thousands of dollars for St. Jude in the 4 races we ran over several years.
Planning a trip to a runDisney race? You can read my travel tips for the experience over on Don't Just Fly.